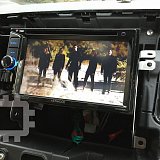
Kenwood DDX155: инструкция
Характеристики, спецификации
Инструкция к Автомагнитоле Kenwood DDX155

DDX155
DDX1035
DDX1035M
MONITOR WITH DVD RECEIVER
INSTRUCTION MANUAL
МОНИТОР С DVD-РЕСИВЕРОМ
ИHCTPУKCИЯ ПO ЭKCПЛУATAЦИИ
МОНІТОР ІЗ DVD-ПРИЙМАЧЕМ
ІНСТРУКЦІЯ З ЕКСПЛУАТАЦІЇ
Сделано в Китае
© 2013 JVC KENWOOD Corporation
B5A-0026-00/01 (Q)

Contents
Before use ...........................................3
How to reset your unit ...............................................3
INTRODUCTIONS
Overview Of The Main Unit ................ 5
Overview Of The Remote Control .....6
Setting the clock .................................8
AV SOURCE OPERATIONS
Selecting the playback source ..........9
Disc operations ................................. 10
Inserting a disc ............................................................. 10
Ejecting a disc ...............................................................10
Video menu operations ..........................................14
USB operations ................................. 16
Connecting a USB device ......................................16
Listening to the iPod/
iPhone device ............................. 19
Preparation ..................................................................... 19
Listening to the radio .......................22
Using other external components ..23
Sound adjustment ............................24
Selecting a preset sound mode ........................ 24
Storing your own adjustment ............................24
Adjust Audio Setting ........................ 25
Setting for video playback ..............26
Using a rear view camera .................27
Displaying the picture from the rear view
camera...............................................................................27
System Setup .................................... 28
REFERENCE
Maintenance .....................................30
More about this unit ........................31
Troubleshooting ...............................32
Accessories/Installation Procedure 34
Connecting Wires to Terminals ........36
Connecting a USB device/
iPod/iPhone ................................ 37
Installing/Removing the Unit .......... 38
Specifications ...................................40
2 English

Before use
WARNINGS:
Temperature inside the car...
(To prevent accidents and damage)
Ifyouhaveparkedthecarforalongtime
• DONOTinstallanyunitorwireanycablein
in hot or cold weather, wait until the
a location where;
temperatureinthecarbecomesnormal
– itmayobstructthesteeringwheeland
beforeoperatingtheunit.
gearshift lever operations.
How to reset your unit
– itmayobstructtheoperationofsafety
devicessuchasairbags.
– itmayobstructvisibility.
Reset button
• DONOToperatetheunitwhiledriving.
If you need to operate the unit while
If the unit fails to operate properly, press
driving,besuretolookaroundcarefully.
theResetbutton.Theunitreturnstofactory
• Thedrivermustnotwatchthemonitor
settingswhentheResetbuttonispressed
while driving.
(excepttheregisteredBluetoothdevices).
How to read this manual:
Cautions on the monitor:
• Thismanualmainlyexplainsoperations
• Themonitorbuiltinthisunithasbeen
usingthebuttonsonthemonitorpanel
producedwithhighprecision,butit
and touch panel. For operations using the
mayhavesomeineffectivedots.Thisis
remote controller, + page 6.
inevitableandisnotconsidered defective.
• <>indicatesthevariablescreens/menus/
• Donotexposethemonitortodirect
operations/settingsthatappearonthe
sunlight.
touch panel.
• Donotoperatethetouchpanelusinga
• []indicatesthebuttonsonthetouch
ball-pointpenorsimilartoolwiththesharp
panel.
tip.
Pressthebuttonsonthetouchpanelwith
your finger directly (if you are wearing a
glove,takeitoff).
• Whenthetemperatureisverycoldorvery
hot...
– Chemical changes occur inside, causing
malfunction.
– Pictures may not appear clearly or
may move slowly. Pictures may not
besynchronizedwiththesoundor
picture quality may decline in such
environments.
For safety...
• Donotraisethevolumeleveltoomuch,
asthiswillmakedrivingdangerousby
blockingoutsidesounds,andmaycause
hearing loss.
• Stopthecarbeforeperformingany
Thedisplaysandpanelsshowninthis
complicated operations.
manualareexamplesusedtoprovide
clearexplanationsoftheoperations.For
thisreason,theymaybedifferentfromthe
actual displays or panels.
English 3

The marking of products using lasers
The label is attached to the chassis/case and
says that the component uses laser beams
that have been classified as Class 1. It means
that the unit is utilizing laser beams that
are of a weaker class. There is no danger of
hazardous radiation outside the unit.
Declaration of Conformity with regard to
the EMC Directive 2004/108/EC
Declaration of Conformity with regard to
the RoHS Directive 2011/65/EU
Manufacturer:
JVC KENWOOD Corporation
3-12 Moriya-cho, Kanagawa-ku, Yokohamashi,
Kanagawa, 221-0022, Japan
EU Representative:
JVCKENWOOD NEDERLAND B.V.
Amsterdamseweg 37, 1422 AC UITHOORN,
The Netherlands
4 English
B5A-0026-0002EN.indd4B5A-0026-0002EN.indd4 14/07/0115:2814/07/0115:28

INTRODUCTIONS
Overview Of The Main Unit
English 5
Screen (Touch panel)
Monitor panel
7 USB input terminal
1 Loading slot
8 iPod/AVIN2inputterminal
2 0(Eject)button
9 Remote sensor
• Ejectsthedisc.
3 Resetbutton/Powerindicatorindicator
• Resetstheunit.(+page3)
• Lightsupwhiletheunitisturnedon.
4
MENUbutton
• Turnsoffthepower.(Hold)
• Turnsonthepower.(Press)
• Displaysthe<Top Menu>screen.
(Press)
5 AUDbutton
• Displaysthe<Equalizer>screen.
(Press)(+page24)
6 VOL/Muteknob
• Turnson/offthemute.(Press)
• Adjuststheaudiovolume.(Turn)

Overview Of The Remote Control
CAUTION
•
Keepbatteryoutofreachofchildrenandin
originalpackageuntilreadytouse.Disposeof
usedbatteriespromptly.Ifswallowedcontact
physician immediately
.
• Donotleavethebatterynearfireor
underdirectsunlight.Afire,explosionor
excessiveheatgenerationmayresult.
• Donotsettheremoteontrolinhotplaces
suchasonthedashboard.
• TheLithiumbatteryisindangerof
explosionifreplacedincorrectly.Replace
only with the same or equivalent type.
How to install the battery
• Aimtheremotecontroldirectlyatthe
remote sensor on the faceplate.
• DONOTexposetheremotesensorto
brightlight(directsunlightorartificial
lighting).
• Iftheeffectivenessoftheremotecontrol
decreases,replacethebatteries.
6 English

Button Operations
Button Operations
Turnsthepoweron/off.
Exitsfromthemenu.
MENU Displays the top menu
Mutes/restoresthe
screen.
sound.
5/∞/2/3 Selects an item.
SOURCE Selects a source.
ENTER Confirms the selection.
LIST Displays the item list for
the selected source.
VOLUME +/− Adjusts the volume level.
7
Stopsplayback.
4/¢ Searches for radio
stations automatically.
38
Starts/pausesplayback.
(Press)
Displaystheclock.
Searches for radio
stationsmanually.(Hold)
DISP Displayson-screen
information.
Selectsatrack.(Press)
DVD MENU Displays the DVD disc
Reversesearch/forward
menu.
search.(Hold)
TOP MENU Returns to the DVD top
Returns to previous layer
menu.
during menu operation.
DVD/AUDIO Selects the audio
AUDIO Selects the preset
language.
equalizer.
SUBTITLE Selectsthesubtitle
BASS Activates/deactivateBass
language.
Sound.
ANGLE Selects the view angle.
FNC Displays the function
menu for the source.
ZOOM Magnifies the picture.
(Notavailableforstill
0 − 9 Entersthenumber.
pictureplayback.)
BAND Selectstheband.
DIRECT Enters direct search
mode.
English 7

Setting the clock
1 Displaythe<TopMenu>screen.
5 Select the hour or minute.
Onthesourcecontrolscreen:
6 Settheclocktime.
2 Displaythe<SETUP>screen.
7 Finish the procedure.
3 Displaythe<General>screen.
4 Displaythe<Clock>screen.
8 English


