Asus WL-100W: Status - IP Cong Status - Ping
Status - IP Cong Status - Ping: Asus WL-100W
Table of contents
- 1. English ............................................................................1
- Quick Start Guide Installation Procedures Installing the WLAN utilities and driver Reading the WLAN status indicators
- One Touch Wizard
- Conguring with the WLAN utility (Infrastructure)
- Conguring with the WLAN utility (Ad Hoc)
- ASUS WLAN Control Center Starting the Control Center Using the Control Center Wireless Status Icons (on the taskbar)
- Taskbar icon - Right-click menu Taskbar icon - Left-click menu Taskbar Icon - Launch Wireless Settings
- ASUS Wireless Settings Utility Status - Status Association State
- Quick Start Guide
- Status - Connection
- Status - IP Cong Status - Ping
- Cong - Basic Channel
- Cong - Advanced
- Cong - Encryption
- Quick Start Guide Data encryption Wireless Network Key Wireless Network Key (WEP) Key Format Key Length
- Quick Start Guide Select one as your Default Key
- Cong - Authentication Authentication Type Survey - Site Survey
- Quick Start Guide Buttons About - Version Info
- Link State Exit Wireless Settings
- Windows XP Wireless Options
- Quick Start Guide
Quick Start Guide
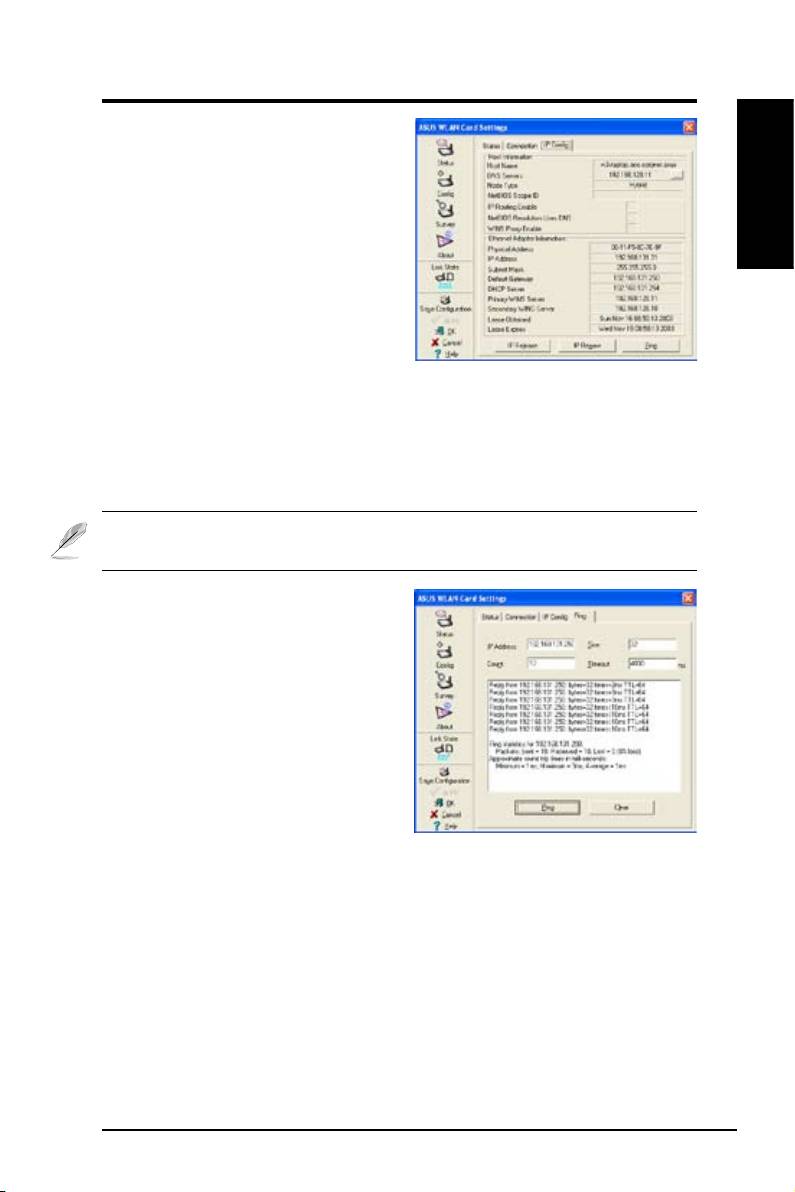
Status - IP Cong
IP Cong tab shows all the current host
and WLAN Card information including
host name, DNS servers, IP address,
English
subnet mask and default gateway.
Button
IP Release
- If you want to remove the
current IP address, click this button
to release the IP address from DHCP
server.
IP Renew
- If you want to obtain a new IP address from DHCP server, click this
button to renew the IP address.
Ping
- Click this button to open “Ping” tab which is used to ping the devices in
your network.
NOTE: The IP Release and IP Renew buttons can only be used on the
WLAN Card which gets IP address from DHCP server.
Status - Ping
Click the "Ping" button in Status-IP
Cong tab to open this page. The Ping
tab allows you to verify the accessibility
of other computers or network devices.
To ping a connection:
1. Type the IP address of the device you
want to verify in the IP Address eld.
2. Conf igu re th e ping sessi on by
assigning the ping packet size and
number of packet to send, and the timeout value (in milliseconds).
3. Click the “Ping” button.
During the ping session, the Ping button toggles into a Stop button. To cancel
the ping session, click the “Stop” button.
The session eld displays information on the veried connection including the
roundtrip time (minimum, maximum, and average) and packets sent, received,
and lost after a ping session.
Click the “Clear” button to clear the session eld.
ASUS WLAN Card 11
