Asus Vintage-PH1: Installing system memory Installing the fan and heatsink assembly
Installing system memory Installing the fan and heatsink assembly: Asus Vintage-PH1
Table of contents
- Front panel features Rear panel features
- Voltage selector Internal components
- Removing the side plate and front cover
- Installing a CPU
- Installing system memory Installing the fan and heatsink assembly
- Installing an optical drive Installing a hard disk drive
- Replacing the side plate and front cover
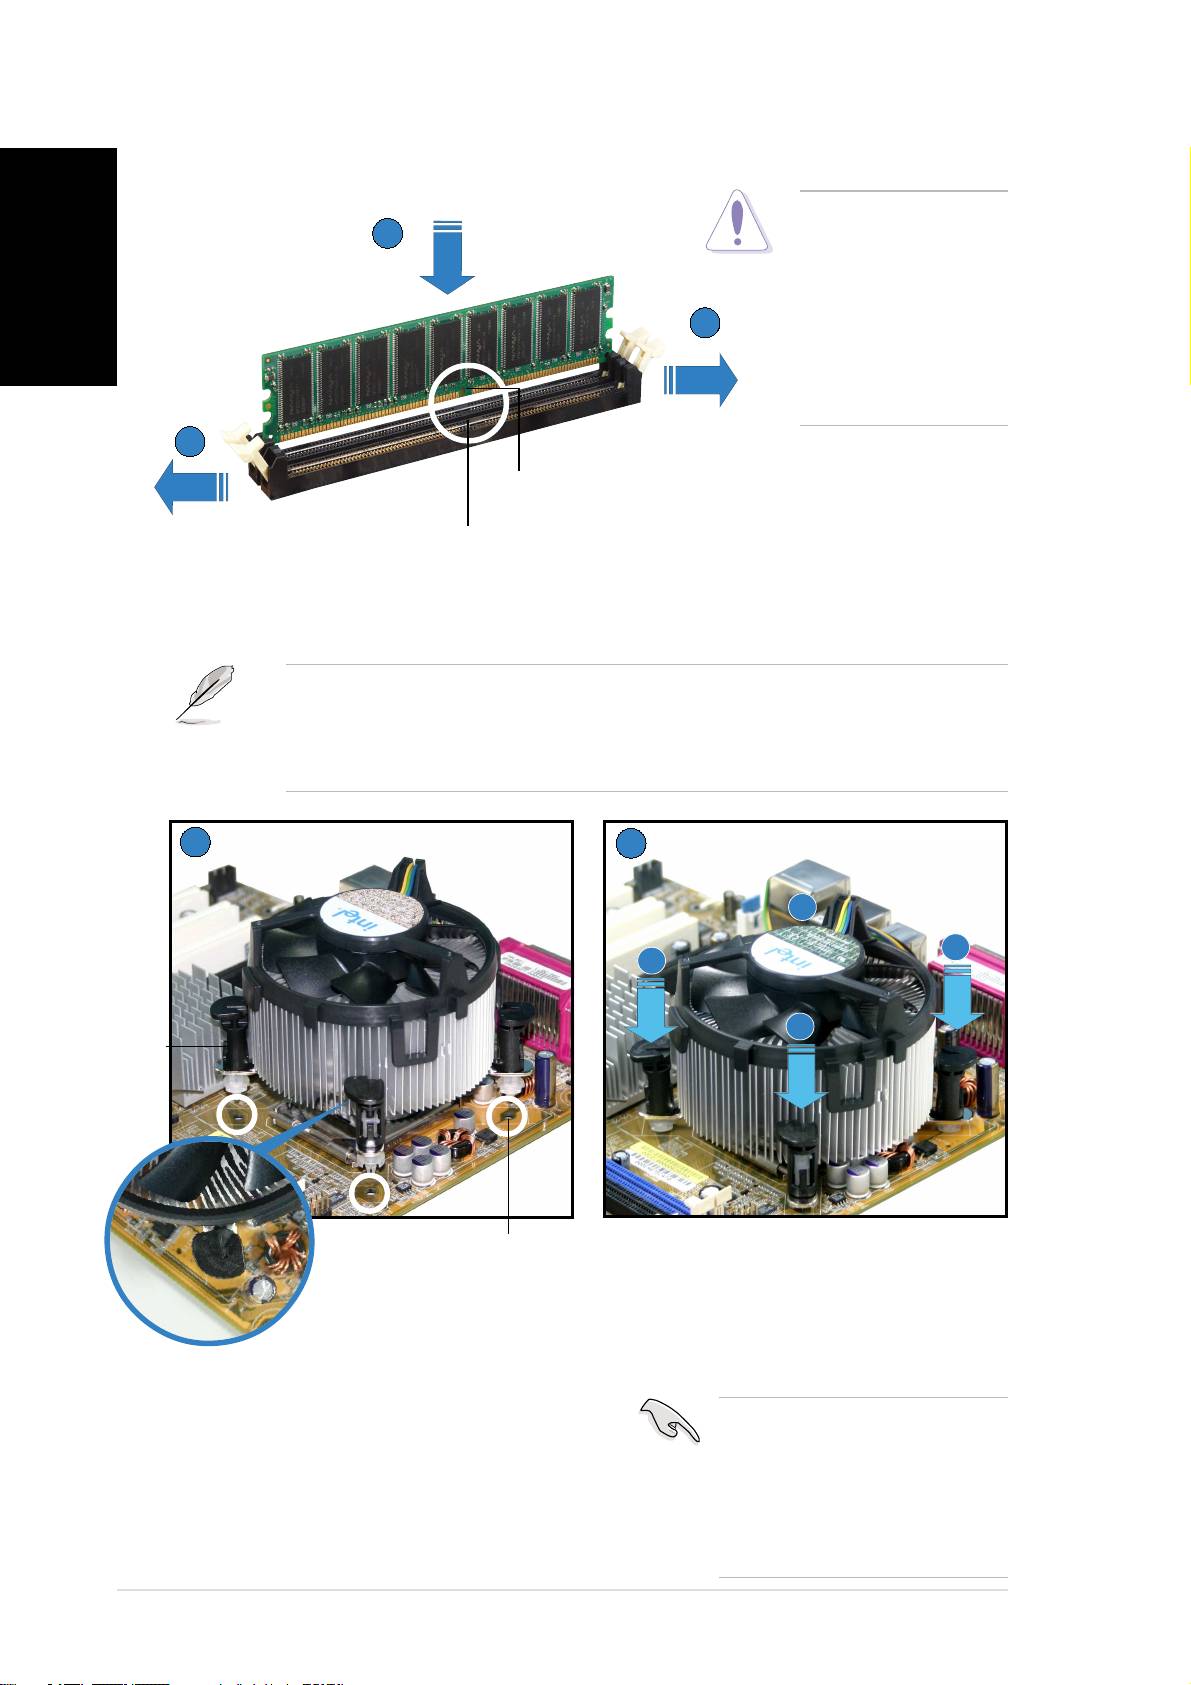
Installing system memory
English
CAUTION.CAUTION.
CAUTION.CAUTION.
CAUTION. A DDR
22
22
2
DIMM is keyed with
a notch so that it
fits in only one
11
11
1
direction. DO NOT
force a DIMM into a
socket to avoid
damaging the DIMM.
11
11
1
DIMM notchDIMM notch
DIMM notchDIMM notch
DIMM notch
Socket breakSocket break
Socket breakSocket break
Socket break
Installing the fan and heatsink assembly
®
®
NOTE.NOTE.
NOTE.NOTE.
NOTE. Your boxed Intel
Pentium
4 processor package should come
with installation instructions for the CPU, heatsink, and the retention
mechanism. If the instructions in this section do not match the CPU
documentation, follow the latter.
11
11
1
22
22
2
B
A
A
B
FastenerFastener
FastenerFastener
Fastener
Motherboard holeMotherboard hole
Motherboard holeMotherboard hole
Motherboard hole
Push down two fasteners at a time
in a diagonal sequence to secure
the heatsink and fan assembly in
place.
Place the heatsink on top of the
IMPORTANT. IMPORTANT.
IMPORTANT. IMPORTANT.
IMPORTANT. Do not
installed CPU, making sure that the
forget to connect the CPU
four fasteners match the holes on
fan connector! Hardware
the motherboard.
monitoring errors can occur
if you fail to plug this
connector.
vivi
vivi
vi
