Asus Vintage-PH1: Installing a CPU
Installing a CPU: Asus Vintage-PH1
Table of contents
Installing a CPU
CAUTION.CAUTION.
CAUTION.CAUTION.
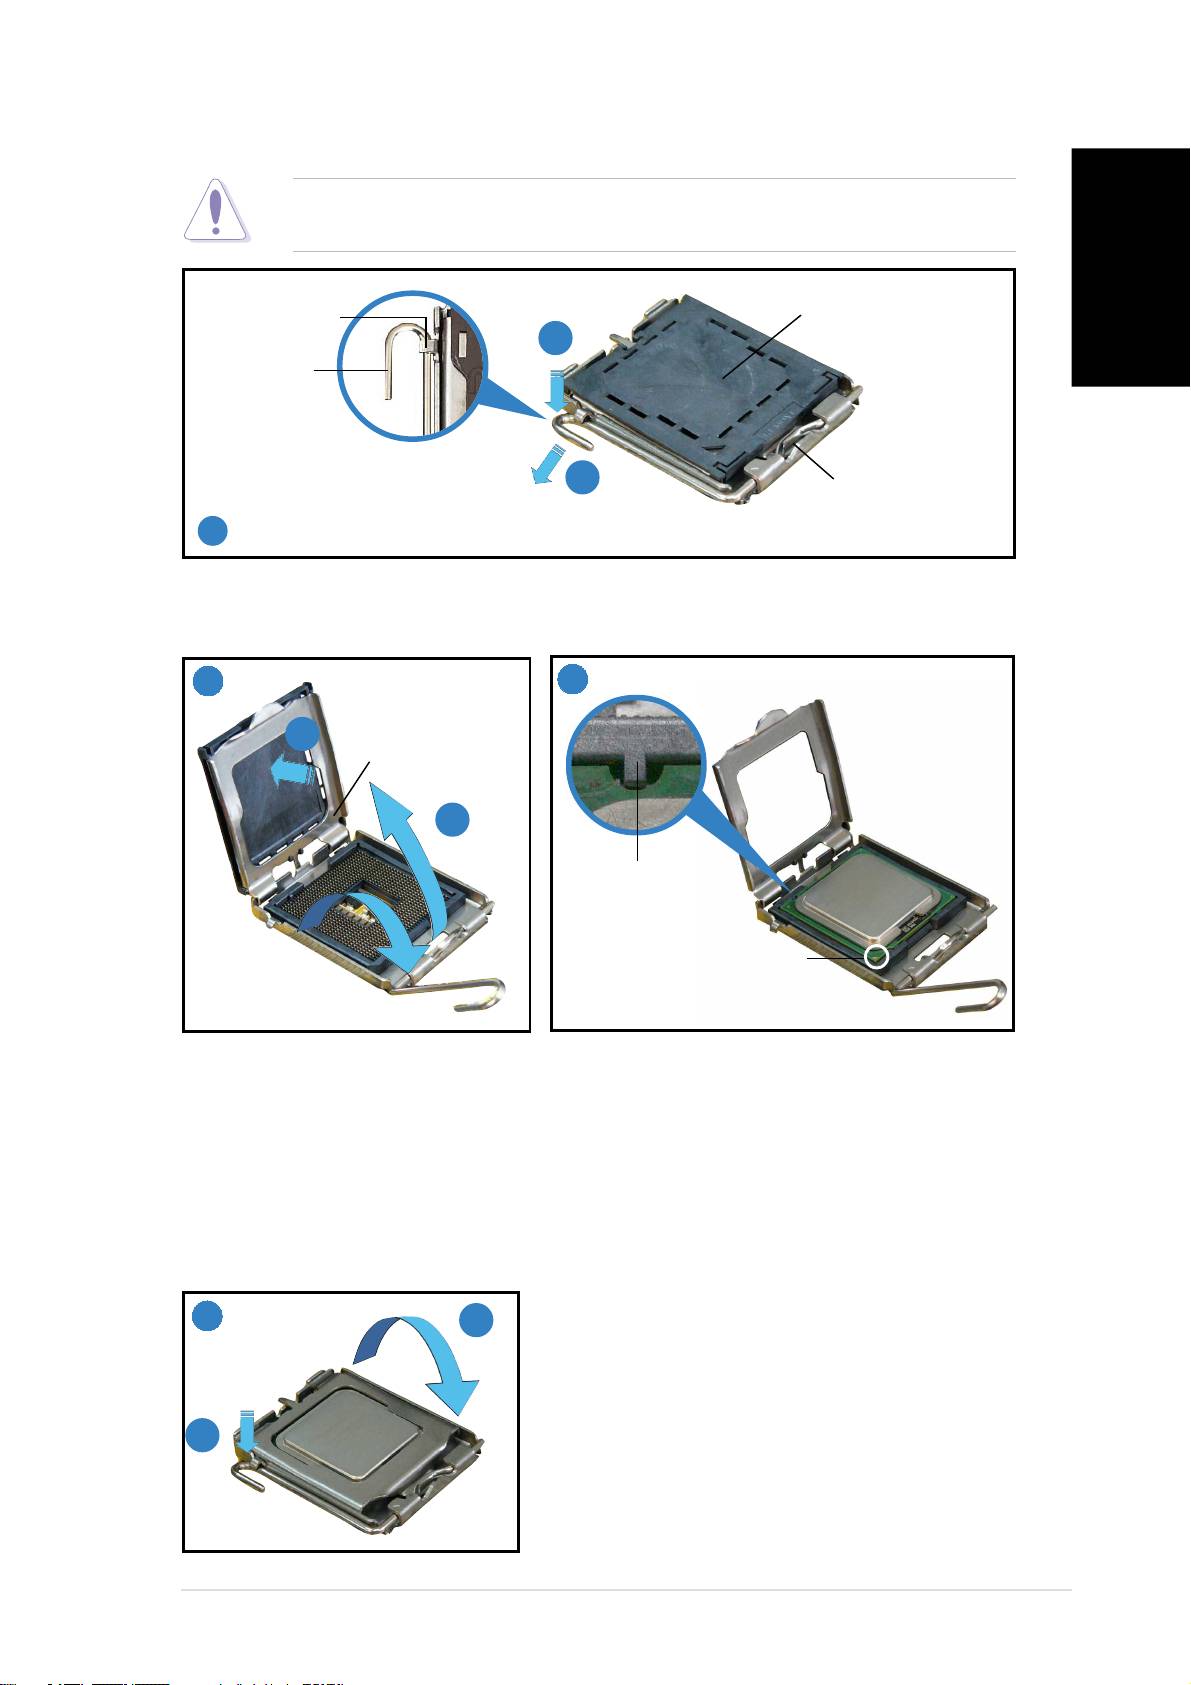
CAUTION. Incorrect installation of the CPU into the socket may bend
the pins and severely damage the CPU!
Retention tabRetention tab
Retention tabRetention tab
Retention tab
PnP CapPnP Cap
PnP CapPnP Cap
PnP Cap
English
A
Load leverLoad lever
Load leverLoad lever
Load lever
B
This side of the camThis side of the cam
This side of the camThis side of the cam
This side of the cam
box should face you.box should face you.
box should face you.box should face you.
box should face you.
11
11
1
Press the load lever with your thumb (A) and move it to the left (B) until it
is released from the retention tab.
22
22
2
33
33
3
B
Load plateLoad plate
Load plateLoad plate
Load plate
A
Alignment keyAlignment key
Alignment keyAlignment key
Alignment key
Gold triangle markGold triangle mark
Gold triangle markGold triangle mark
Gold triangle mark
Lift the load lever in the direction
Position the CPU over the socket,
of the arrow to a 135º angle.Lift
making sure that the gold triangle is
the load plate with your thumb
on the bottom-left corner of the
and forefinger to a 100º angle (A),
socket. The socket alignment key
then push the PnP cap from the
should fit into the CPU notch.
load plate window to remove (B).
44
44
4
A
B
Close the load plate (A), then push the
load lever (B) until it snaps into the
retention tab.
vv
vv
v
