Pioneer CDJ-2000: Changing the settings Using the [MENU/UTILITY] button Setting the auto standby mode Setting [HISTORY NAME] Changing the settings Changing the language List of settings
Changing the settings Using the [MENU/UTILITY] button Setting the auto standby mode Setting [HISTORY NAME] Changing the settings Changing the language List of settings: Pioneer CDJ-2000
Table of contents
- Contents
- Before start
- Before you start What’s in the box Discs/ files playable on the CDJ-2000 About CD playback About SD memory cards
- About USB devices About AAC files About WAV files About MP3 files About AIFF files About rekordbox
- Part Names and Functions Control Panel
- Rear Panel Front Panel
- Main unit display Jog dial display section
- Connections Basic style Using in combination with rekordbox
- Using other brands of DJ software Connections for relay play
- Loading USB devices Playback Loading discs Using the PRO DJ LINK function Loading SD memory cards
- Playback
- Setting Cue Setting Loop
- Setting Hot Cue Storing cue and loop points
- Operating the jog dial Operating the [NEEDLE SEARCH] pad
- Using the [BROWSE] button Operating the CDJ-2000 in combination with other devices
- Checking the playing history (HISTORY) Using the [TAG LIST] button Adding tracks to the tag list Loading tracks from the tag list Removing tracks from the tag list
- Using the [INFO] button Checking the details of loaded tracks Displaying details of tracks loaded in other DJ players Using the information jump function
- Changing the settings Using the [MENU/UTILITY] button Setting the auto standby mode Setting [HISTORY NAME] Changing the settings Changing the language List of settings
- About the rekordbox software Software end user license agreement Cautions on copyrights Cautions on Installation
- Installing rekordbox Using the support site
- Connecting the CDJ-2000 and computer About the driver software Cautions on Installation Adjusting the buffer size (Windows) Installing the driver software
- Checking the version of the driver software Checking the latest information on the driver software Using other brands of DJ software Operating DJ software by MIDI interface
- Additional information Troubleshooting Problem Check Remedy
- About the liquid crystal display Error messages List of icons displayed on the main unit display section
- Cautions on use
- Disclaimer Specifications
En
21
DRB1475-B
English
Changing the
settings
Using the [MENU/UTILITY] button
Various settings on the CDJ-2000 can be changed by pressing [MENU/UTILITY].
21
1 2
Options
Setting ranges Descriptions
settings
When set to [ON], the screensaver starts
up in the following cases:
! When no track is loaded in the CDJ-
2000 for over 5 minutes
SCREEN SAVER
ON/
OFF
! When no operation is performed
for over 100 minutes while in the
pause or cue standby mode or when
[END] is displayed on the main unit
display.
Displays the CDJ-2000’s software ver-
VERSION No. -
sion.
Setting the auto standby mode
1 Select [AUTO STANDBY] and enter the setting item.
2 Select [ON] or [OFF] and enter.
When [AUTO STANDBY] is set to [ON], the power management function is acti-
vated in the following cases and the standby mode is set.
! When no operation at all is performed for over 4 hours with no disc, SD
memory card or USB device loaded, no PRO DJ LINK connection and no
computer connected to the USB port (on the main unit’s rear panel).
! When the CDJ-2000 is operated, the standby mode is canceled.
! The CDJ-2000 is shipped with the power management function turned
on. If you do not want to use the power management function, set [AUTO
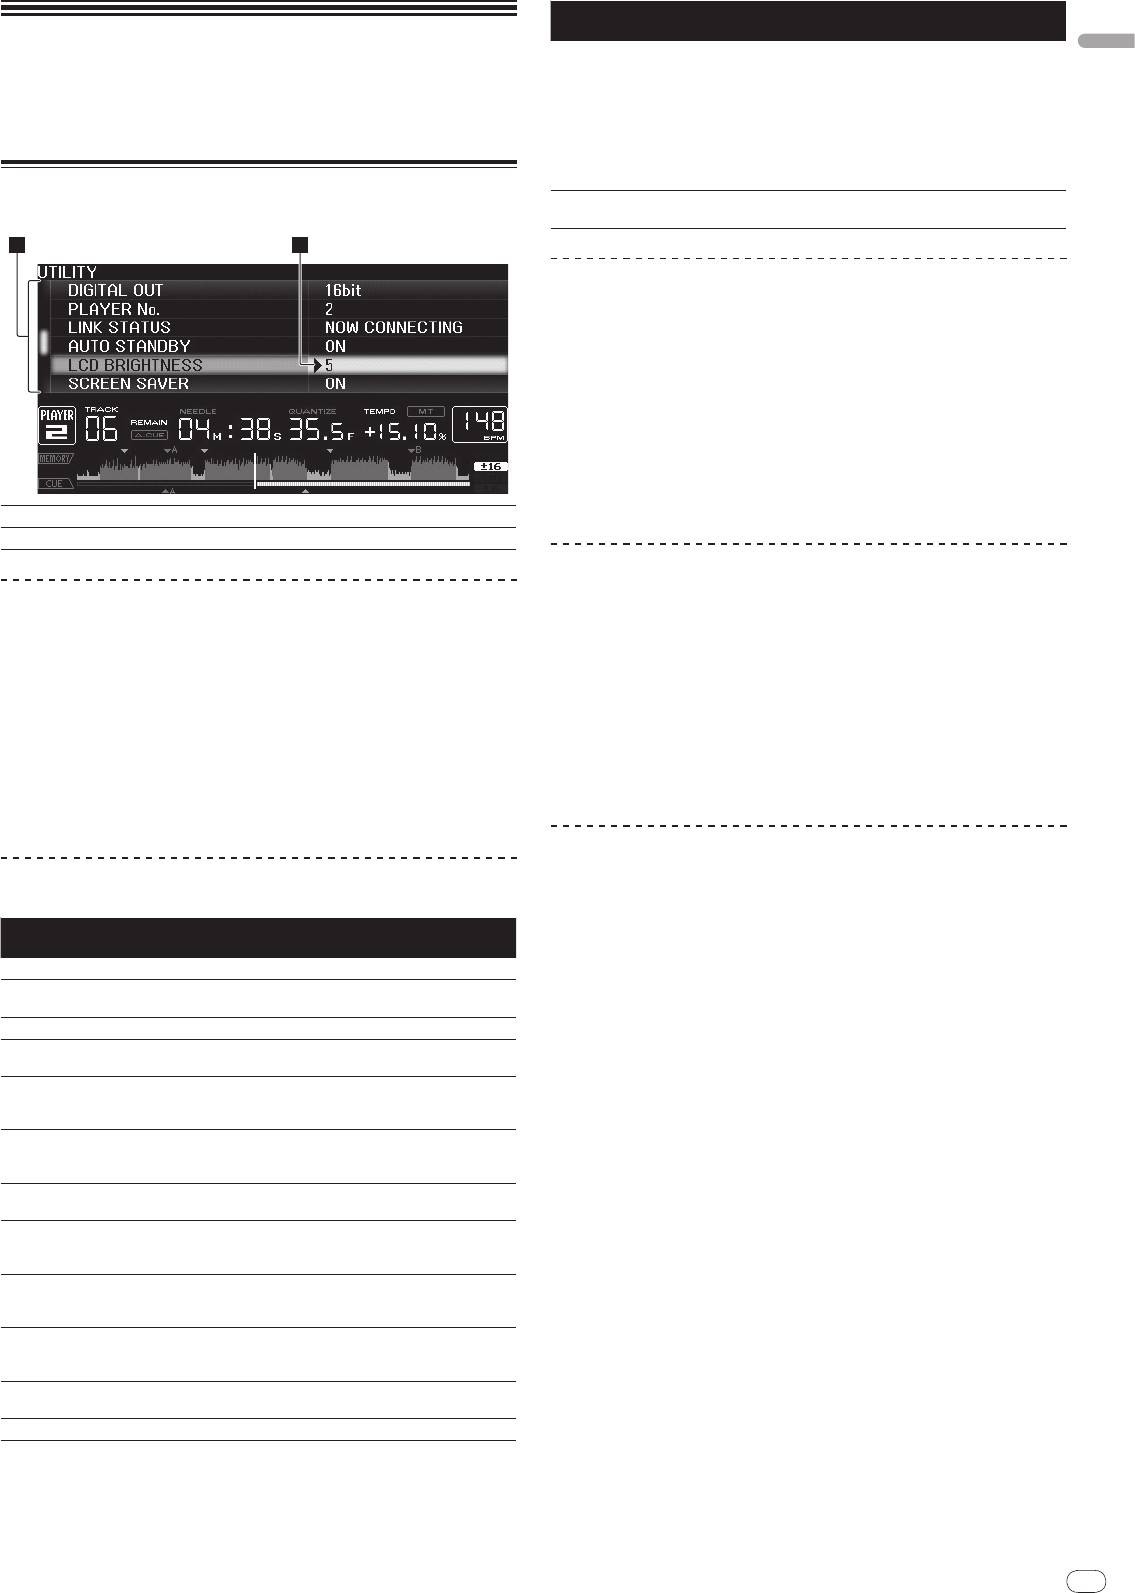
1Setting item
The CDJ-2000’s settings items are displayed here.
STANDBY] to [OFF].
2Setting
The settings for the various items are displayed here.
Setting [HISTORY NAME]
The name of the [HISTORY] recorded on the SD memory card/
USB device can be
Changing the settings
preset.
1 Press [MENU/UTILITY] for over 1 second.
1 Select [HISTORY NAME] and enter the setting item.
The [UTILITY] screen is displayed.
2 Use the [NEEDLE SEARCH] pad to input a character.
2 Select and enter the setting item.
The cursor moves to the setting.
3 Press the rotary selector to enter.
The [HISTORY NAME] setting is changed.
3 Change the setting and enter.
! If [HISTORY NAME] is not set, numbers are added sequentially after
The cursor returns to the setting.
[HISTORY].
! Press [BACK] before changing the setting to return to step 2.
! The maximum number of characters that can be set for the [HISTORY] name
is 32, including both letters, numbers and symbols.
4 Press [MENU/UTILITY].
Press [MENU/UTILITY] to return to the menu screen.
Changing the language
List of settings
1 Select [LANGUAGE] and enter the setting item.
The factory default settings are indicated in bold.
2 Select the language and enter.
Options
Setting ranges Descriptions
The language of the on-screen display is changed.
settings
! To display characters written in a local code other than Unicode, change the
QUANTIZE
ON/
OFF For details, see QUANTIZE on page 10.
[LANGUAGE] setting.
-36dB/
-42dB/
-48dB/
-54dB/
For details, see Changing the auto cue
AUTO CUE LEVEL
-60dB/
-66dB/
-72dB/
-78dB
level on page 15.
MIDI CHANNEL
1 – 16
-
The language used for the CDJ-2000’s
LANGUAGE -
display can be selected here.
When set to [ON], jacket photos are dis-
ART WORK
ON/
OFF
played on the tag list. When set to [OFF],
jacket photos are not displayed.
This can only be selected when a
LIBRARY CRE-
LIBRARY/
FOLDER
medium on which a Pioneer MEP-7000
ATOR
library is recorded is loaded.
For details, refer to Setting [HISTORY
HISTORY NAME -
NAME] on the right.
This switches the number of bits of the
DIGITAL OUT
16 bit/
24 bit
audio signals output from the [DIGITAL
OUT] terminal.
Sets this unit’s player number. The
PLAYER No.
AUTO, 1 – 4
player number cannot be changed when
a medium is loaded in this unit.
When PRO DJ LINK connections are
LINK STATUS -
made, the connection status is dis-
played here.
For details, refer to Setting the auto
AUTO STANDBY
ON/
OFF
standby mode on the right.
LCD BRIGHTNESS
1 – 3 – 5 Sets the main unit display’s brightness.


