Asus P1-AH1: Internal components Removing the cover
Internal components Removing the cover: Asus P1-AH1
Table of contents
- Front panel features Rear panel features
- Internal components Removing the cover
- Removing the front panel cover Removing the storage drive assembly Removing the CPU fan and heatsink
- Installing the CPU Installing a DIMM
- Installing an expansion card Installing optical and storage drives
- Reinstalling the storage drive assembly Installing the foot stand
- Reinstalling the front panel cover Reinstalling the cover
Internal components
33
33
3
English
11
11
1
22
22
2
55
55
5
44
44
4
88
88
8
77
77
7
66
66
6
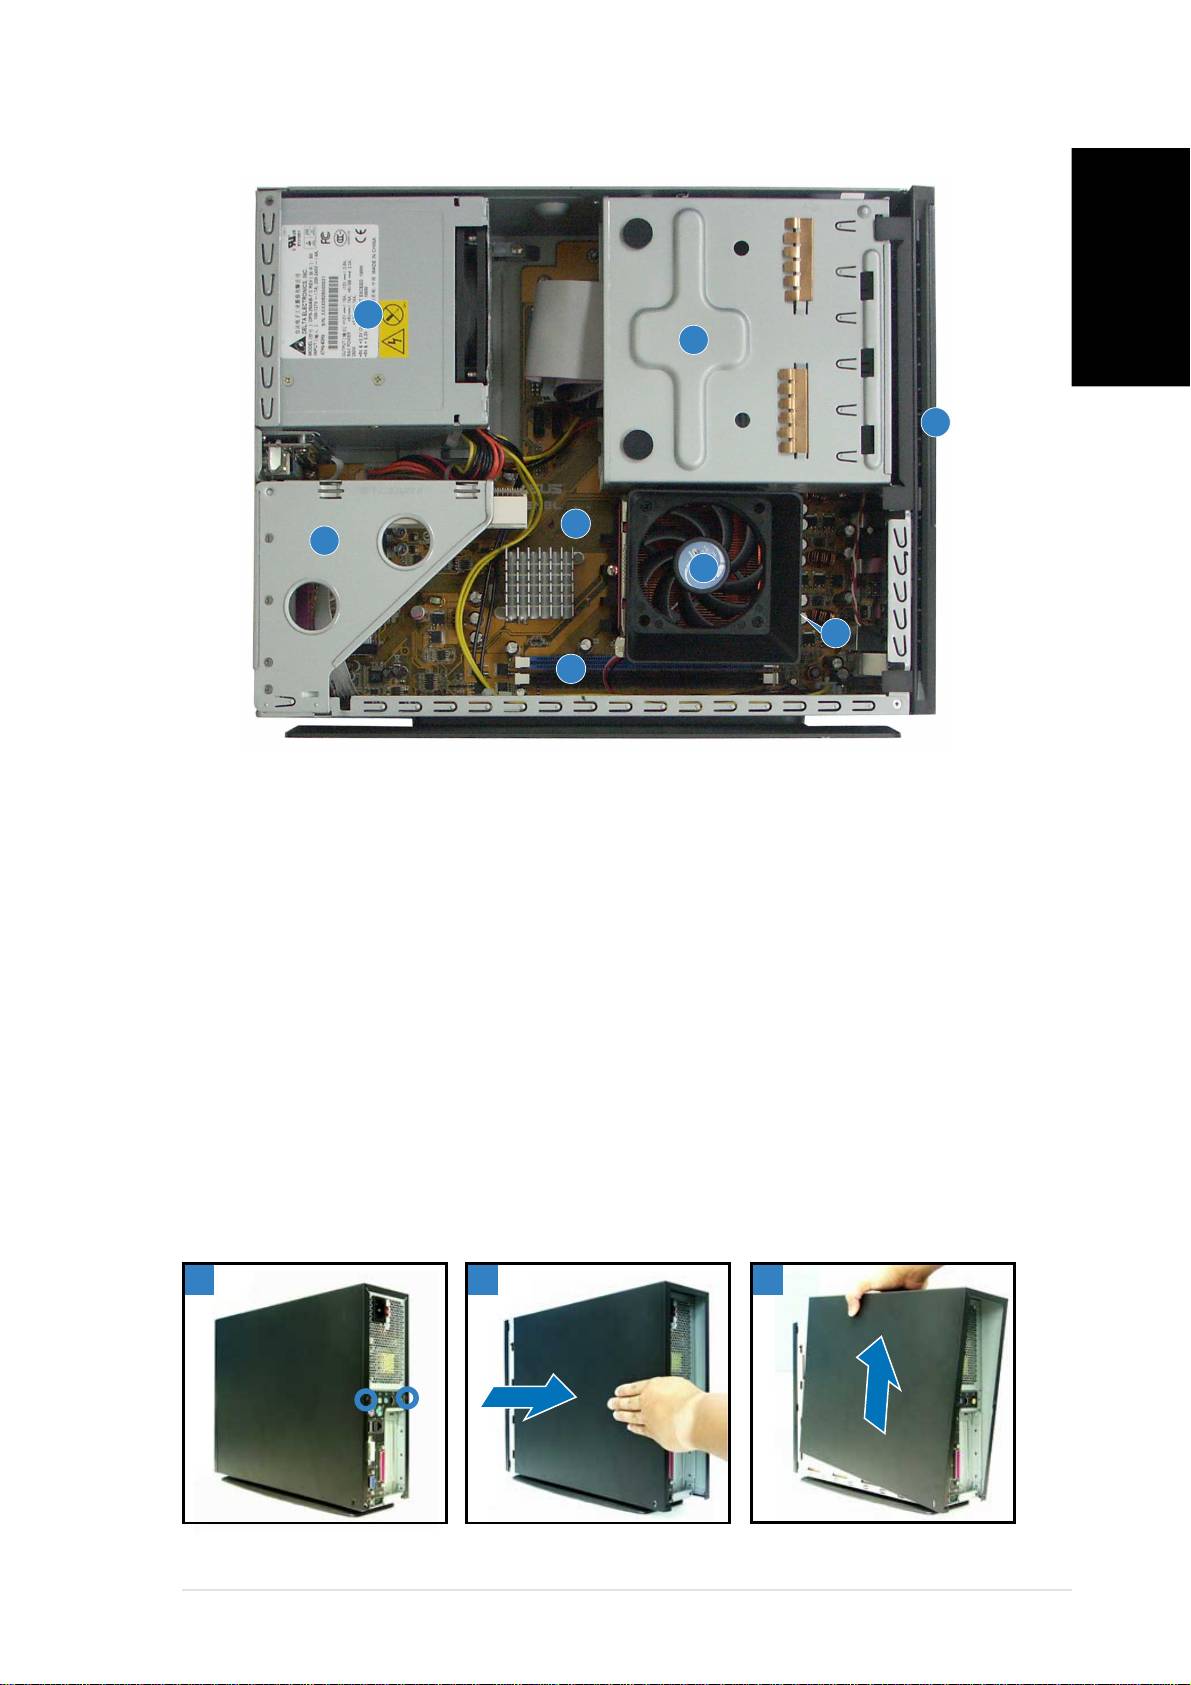
1. 5.25-inch optical drive and
5. ASUS motherboard
3.5 inch hard disk drive cage
6. DIMM sockets
2. Front panel cover
7. Socket for 939-pin processor
3. Power supply unit
(under the CPU fan and
4. PCI card riser bracket
heatsink assembly)
(connected to the
8. CPU fan and heatsink assembly
motherboard PCI slot)
Removing the cover
1. Remove the cover screws. Keep the screws for later use.
2. Pull the cover slightly toward the rear panel.
3. Lift the cover, then set aside.
11
11
1
22
22
2
33
33
3
Quick installation guideQuick installation guide
Quick installation guideQuick installation guide
Quick installation guide
33
33
3
Top 10 manuals
100.00
NZXT HALE90 1000W99.99
Samsung SM-R38099.97
AEG BSB 18C99.97
Dell 2700W99.97
Smeg KSEC70X99.96
Beurer HDE 4099.96
Pyramida KH 50 v.299.96
MSI CSM-H81M-P3299.96
AEG HR 562799.95
Melissa 640-048