Asus P1-AH1: Installing the CPU Installing a DIMM
Installing the CPU Installing a DIMM: Asus P1-AH1
Table of contents
- Front panel features Rear panel features
- Internal components Removing the cover
- Removing the front panel cover Removing the storage drive assembly Removing the CPU fan and heatsink
- Installing the CPU Installing a DIMM
- Installing an expansion card Installing optical and storage drives
- Reinstalling the storage drive assembly Installing the foot stand
- Reinstalling the front panel cover Reinstalling the cover
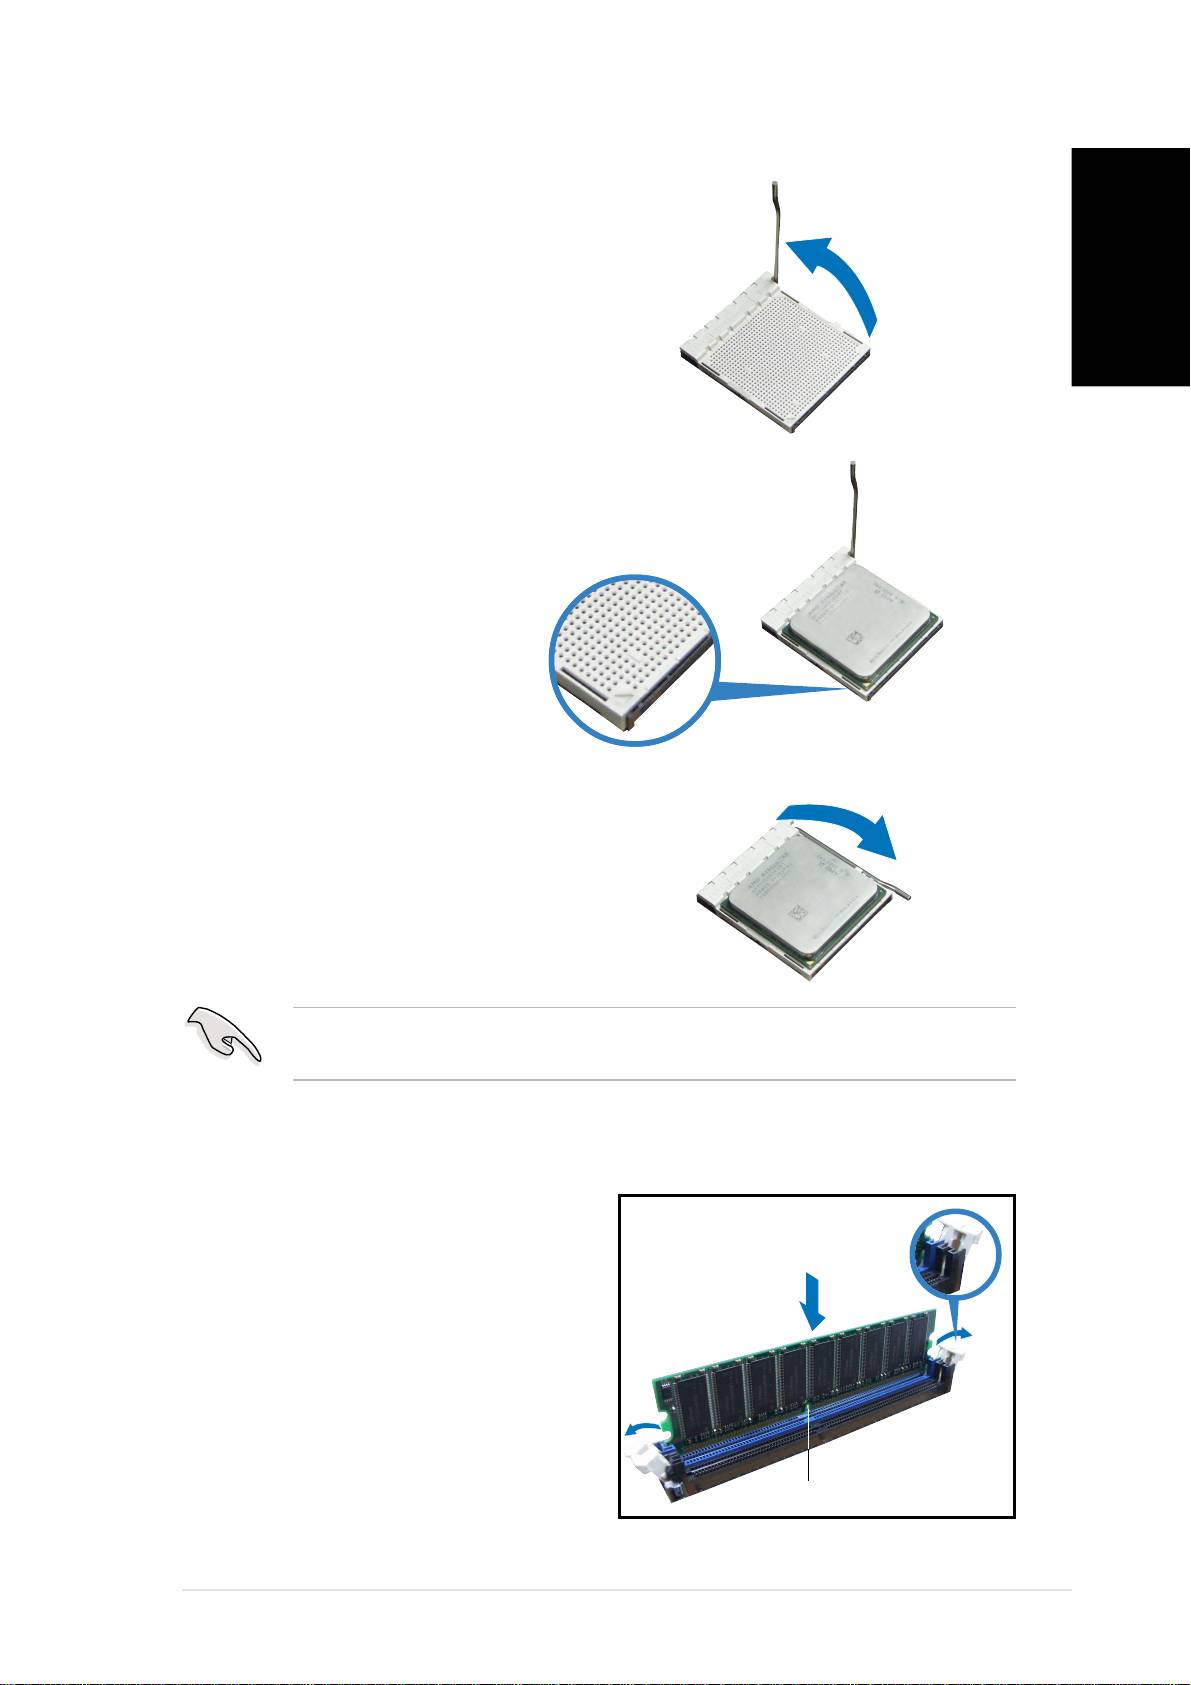
Installing the CPU
1. Press the CPU socket lever
sideways, then lift it up to a
90º-100º angle.
English
2. Match the gold triangle on the
CPU with the small triangle on
the socket. Insert the CPU into
the socket until it fits in place.
3. Push down the socket lever to
secure the CPU.
IMPORTANT!IMPORTANT!
IMPORTANT!IMPORTANT!
IMPORTANT! Make sure to install the CPU fan, blower, and heatsink
assembly on top of the installed CPU.
Installing a DIMM
1. Locate the DIMM sockets in the
Unlocked retaining clipUnlocked retaining clip
Unlocked retaining clipUnlocked retaining clip
Unlocked retaining clip
motherboard.
2. Unlock a DIMM socket by
pressing the retaining clips
outward.
3. Align a DIMM on the socket such
that the notch on the DIMM
matches the break on the
socket.
DDR DIMM notch
DDR DIMM notchDDR DIMM notch
DDR DIMM notchDDR DIMM notch
Quick installation guideQuick installation guide
Quick installation guideQuick installation guide
Quick installation guide
55
55
5
