Eneo VMC-19LEDOPC4: instruction
Class: Computer equipment, hardware, accessories
Type: Monitor
Manual for Eneo VMC-19LEDOPC4
QUICK MANUAL
Installation and Operating Instructions
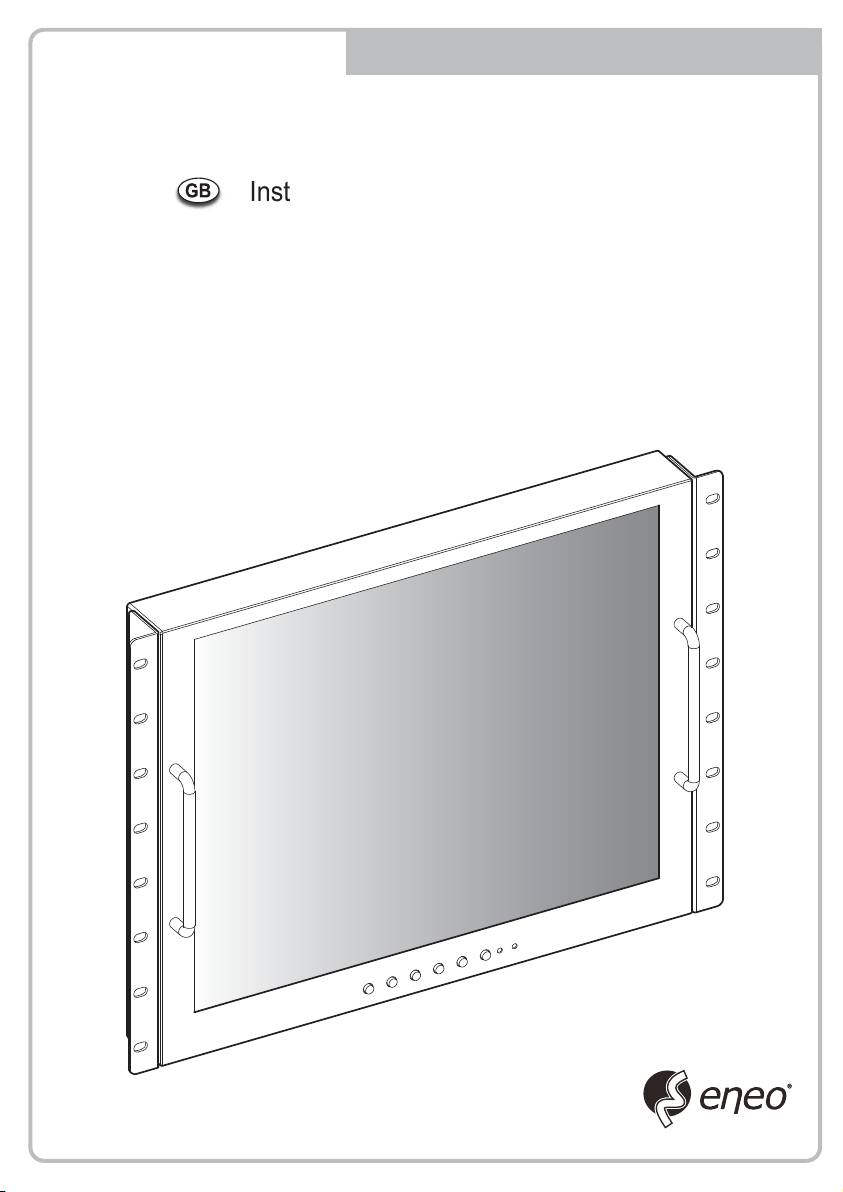
17.0"/19.0" TFT LCD MONITOR
VMC-17LCDM
VMC-19LEDM
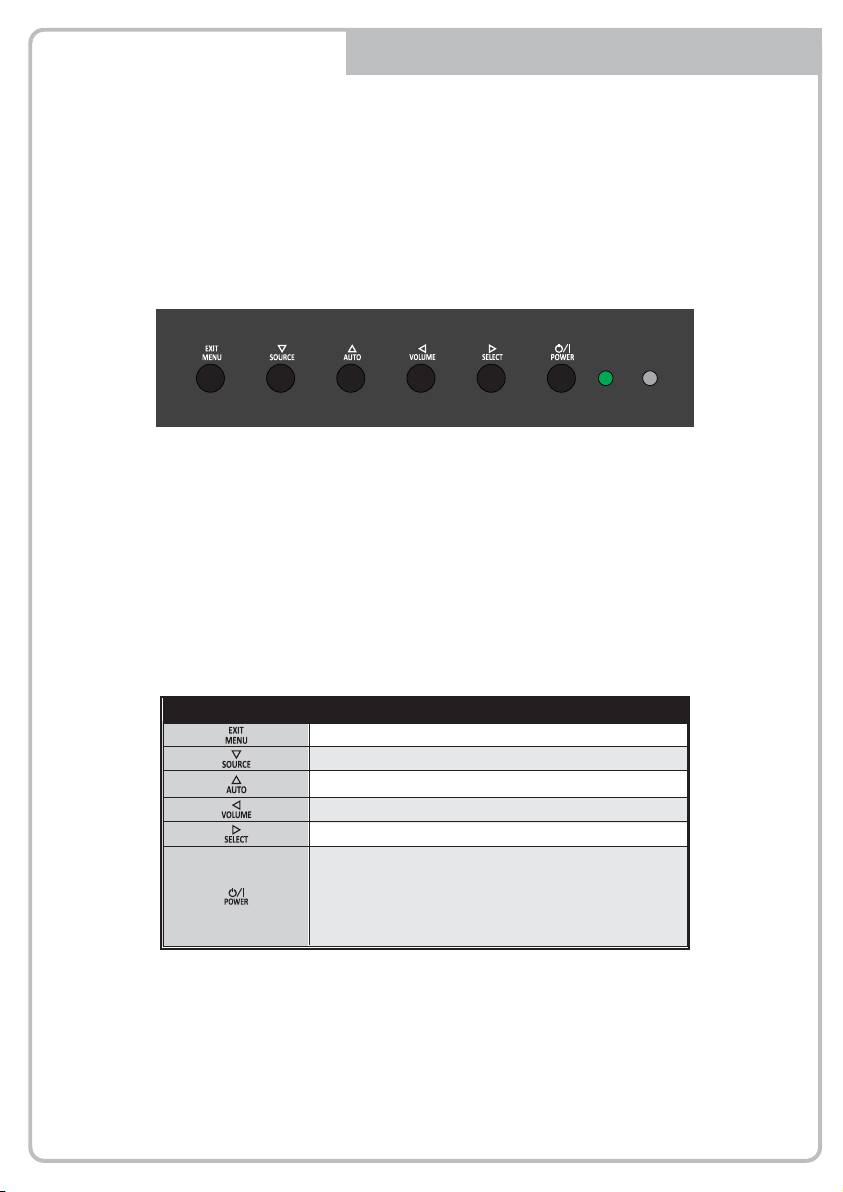
KEY BUTTON
SHORT KEY FUNCTION
OSD Key Function
Activates and exit the OSD
Select input source, and select the OSD menu
Move the OSD menu and auto adjustment of RGB source
Decrease the level of volume and move the previous menu
Increase the level of volume and select rhe OSD menu
Turns the power ON or OFF. There will be a few seconds
delay before the display appears. The power LED (next to the
power switch) lights with green when the power is turned ON.
The power is turned off by pressing the power switch again
and the power LED goes red.
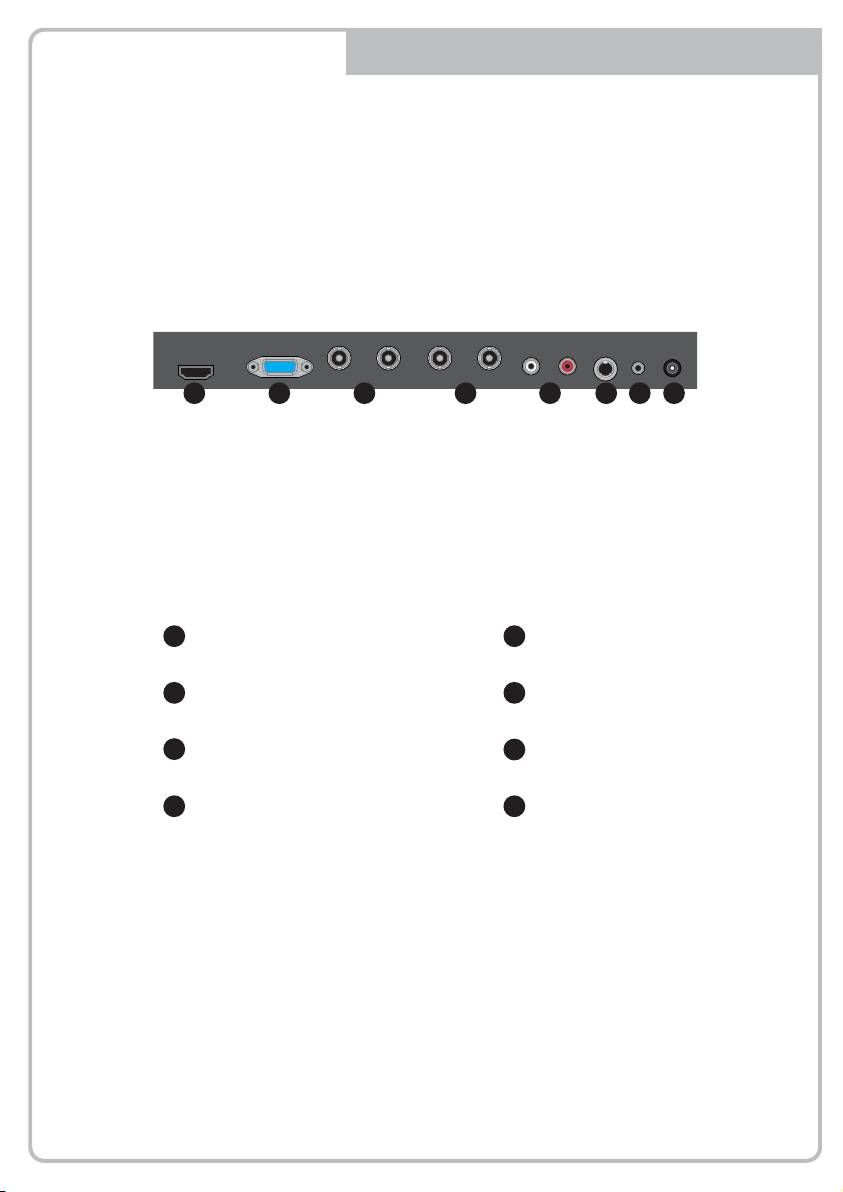
CONNECTION
1 2 3 4 5 6 7 8
1
HDMI
2
VGA
HDMI signal input
VGA (PC RGB) signal input
3
VIDEO-1 IN / OUT
4
VIDEO-2 IN / OUT
VIDEO-1 signal input / looping out
VIDEO-2 signal input / looping out
5
AUDIO (VIDEO)
6
S-VIDEO
Stereo audio input for VIDEO or S-VIDEO
S-VIDEO signal input
7
AUDIO (PC)
8
DC12V
Stereo audio input for VGA
DC adapter input
INPUT SELECT
1. Press the SOURCE button and then ▲/▼ Button
AV1
to move the source
AV2
2. Press the ►button to select the source
3. Press the MENU/EXIT Button to exit the INPUT menu.
SVIDEO
HDMI
PC
Inputs can be set to AV1, AV2, S-VIDEO, HDMI and PC mode.
VOLUME MENU
Volume
50
Press the ◄ / ►button for adjusting the volume up and down.
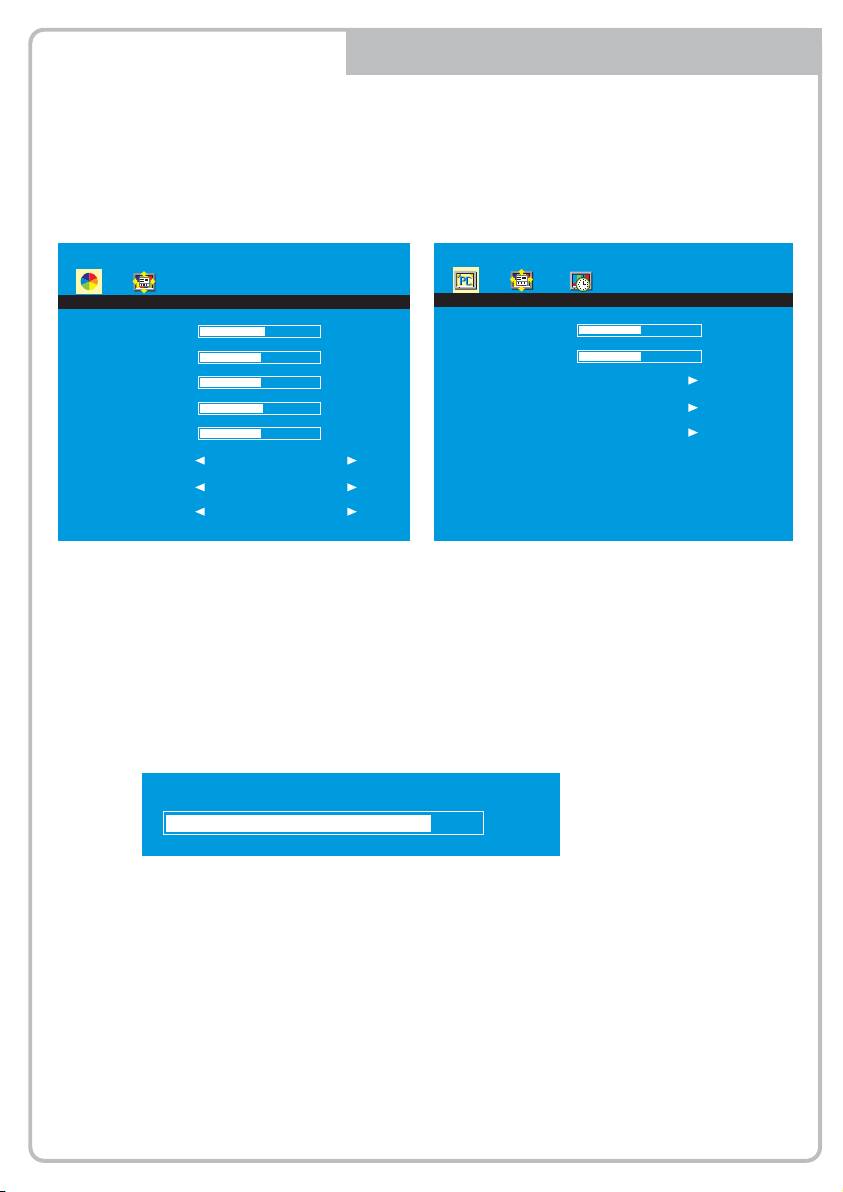
PICTURE MENU
AV1/2, S-VIDEO & HDMI Mode
PC Mode only
PICTURE
PICTURE
Contrast
57
Contrast
50
Brightness
50
Brightness
50
Tint
50
Color Tone
Color
55
Auto
Sharpness
51
Color Auto
Color Tone
Normal
Scale
Full
Picture Mode
Standard
1. Press the MENU/EXIT Button and then ◄ / ► Button to select the PICTURE menu.
2. Press the ▲or ▼ Button and then button to select the Button to select the adjustment
item you need.
3. Press the ◄ or ►Button to active the item.
Ex) if you select the BRIGHTNESS, then the below picture appears on the bottom screen.
Brightness
80
4. ‘Auto’ function is adjusting the location of screen by receiving the sync signal from PC.
Ex) Resolution change
5. ‘Color Auto’ is adjusting the optimum color coordination automatically.
6. Press the MENU/EXIT button to move to the previous menu.
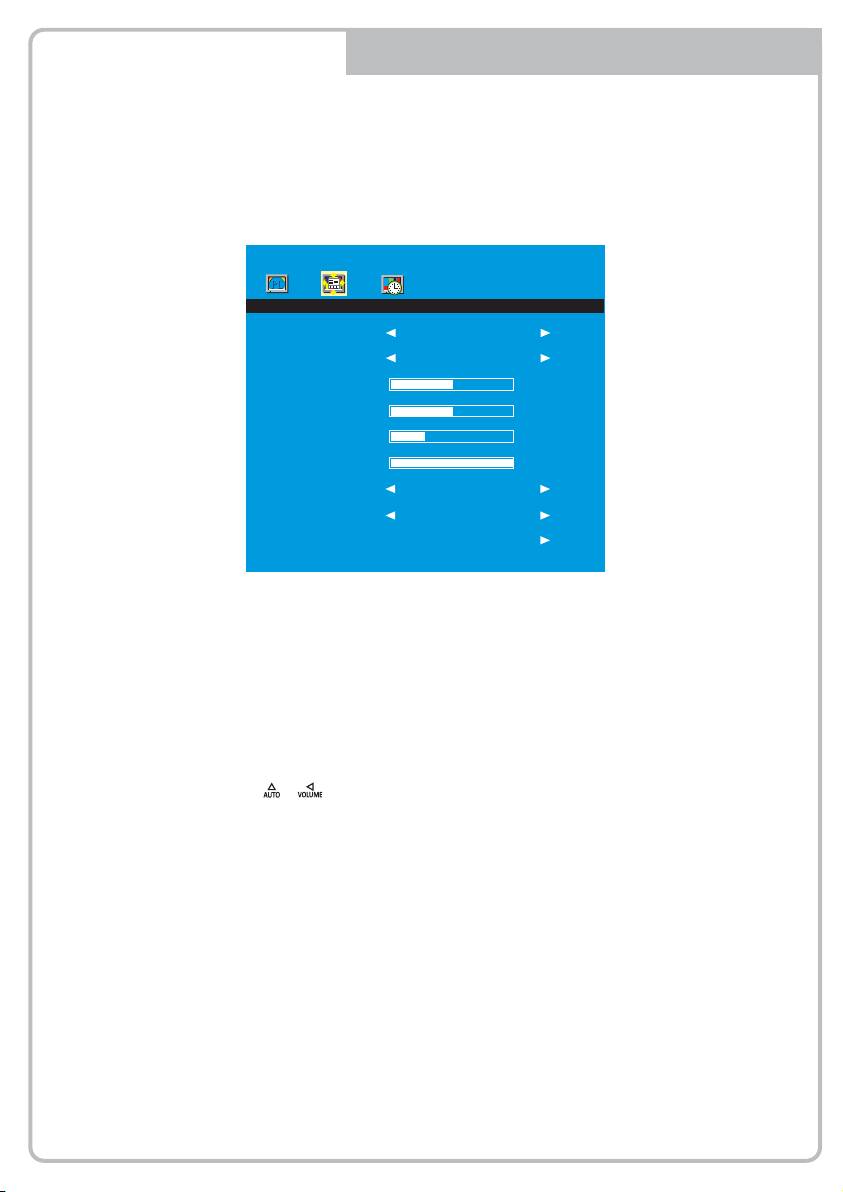
SYSTEM MENU
SYSTEM
Key Lock
OFF
Language
English
H-Position
50
V-Position
50
Duration
15
Halftone
100
DPMS
OFF
No Operation
OFF
Reset
1. Press the MENU/EXIT Button and then ◄ / ► Button to select the SYSTEM menu.
2. Press the ▲ or ▼ Button and then button to select the Button to select the
adjustment item you need.
3. Press the ◄ or ►Button to active the item.
4. ‘Key Lock’ function is adjust the button lock option.
Release the lock - Press KEY LOCK button on the remote controller.
- Press & button on the key pad.
5. ‘Duration’ function is adjust the time to display OSD menu.
6. ‘Halftone’ function is adjust the transparency of the OSD menu.
7. ‘DPMS’ function is adjust the time to turn power off during no input signal.
8. ‘No Operation’ function is adjust the time to turn power off during no input key button.
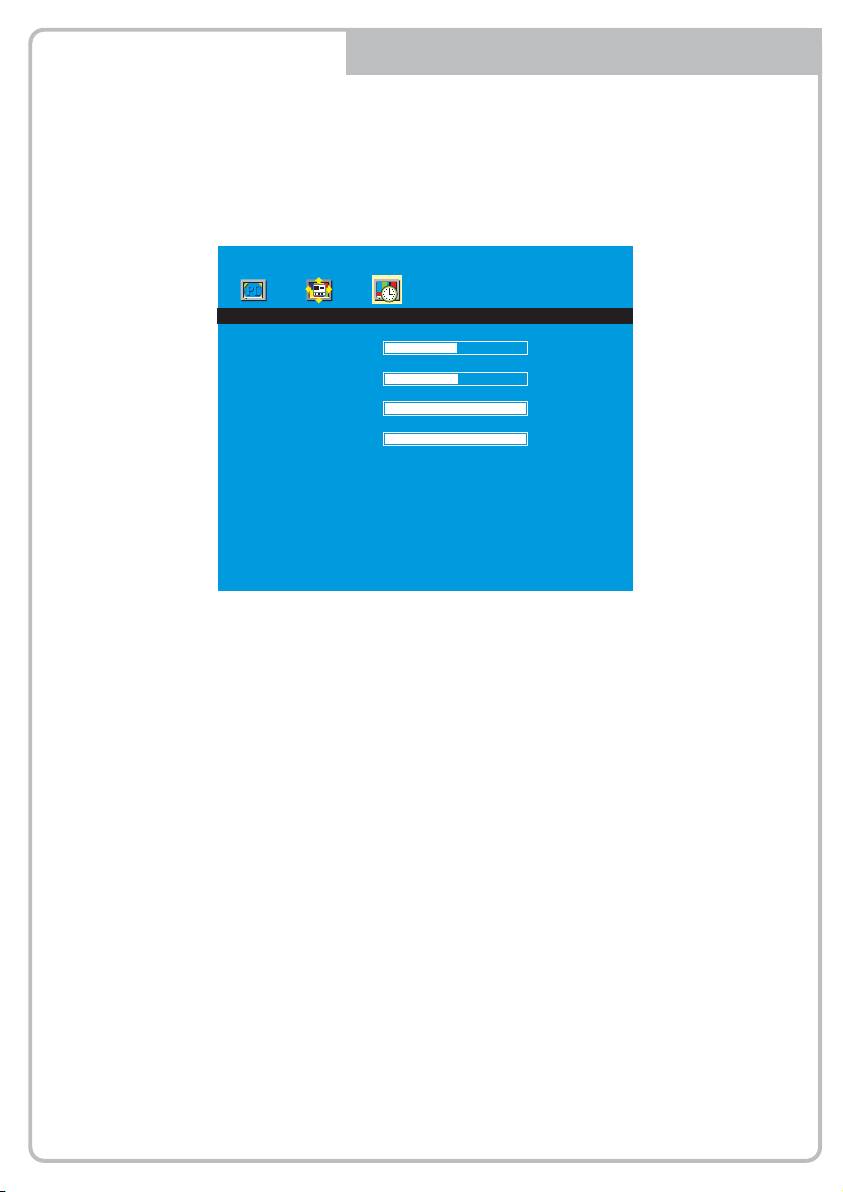
FUNCTION MENU
PC Mode only
FUNCTION
H-Position
50
V-Position
50
Clock
100
Phase
100
1. Press the MENU/EXIT Button and then ◄ / ► Button to select the FUNCTION menu.
2. Press the ▲or ▼ Button and then button to select the Button to select the adjustment
item you need.
3. Press the ◄ or ►Button to active the item.
4. Press the MENU/EXIT button to move to the previous menu.

®
eneo
is a registered trademark of Videor E. Hartig GmbH
Exclusive distribution through specialised trade channels only.
Videor E. Hartig GmbH
Carl-Zeiss-Straße 8 • 63322 Rödermark, Germany
Tel. +49 (0) 6074 / 888-0 • Fax +49 (0) 6074 / 888-100
www.videor.com
Technical changes reserved.
www.eneo-security.com
© Copyright by Videor E. Hartig GmbH 11/2013
- 1
- 2
