Asus V6-P5G31E: Installing an AMD CPU heatsink and fan Installing a DIMM
Installing an AMD CPU heatsink and fan Installing a DIMM: Asus V6-P5G31E
Table of contents
- Rear panel features Internal components
- Selecting the voltage Removing the side cover and front panel assembly Installing a CPU Installing an Intel CPU
- Installing an AMD CPU Installing the CPU fan and heatsink assembly Installing an Intel CPU heatsink and fan
- Installing an AMD CPU heatsink and fan Installing a DIMM
- Installing an expansion card Installing storage drives Optical drive Floppy disk drive
- Hard disk drive Reinstalling the front panel assembly and side cover
English
6
Installation manual
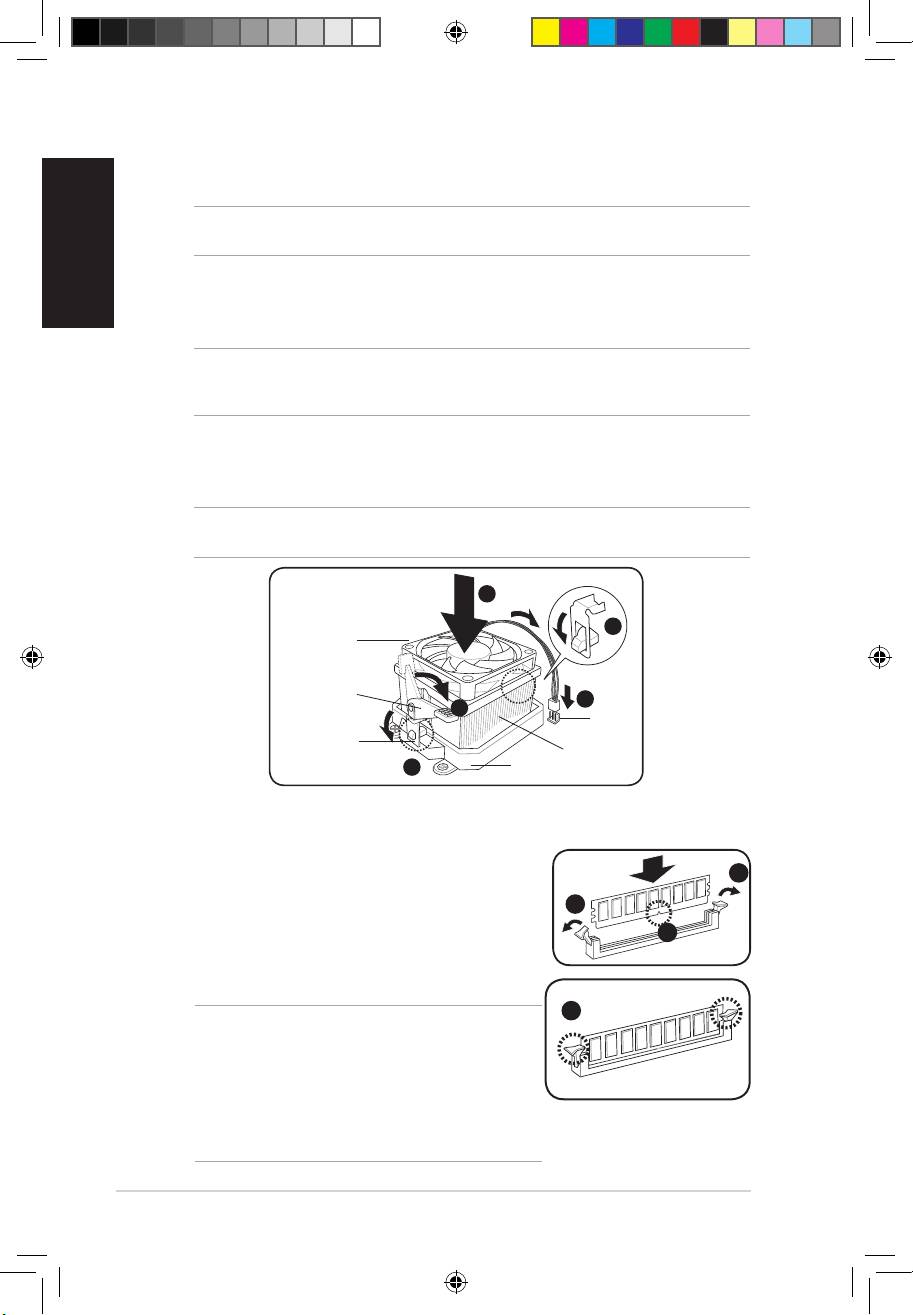
Installing an AMD CPU heatsink and fan
1. Place the heatsink on top of the installed CPU.
IMPORTANT.Makesurethatthefanandheatsinkassemblyperfectlytstheretentionmechanism
module base; otherwise you can not lock the retention bracket.
2. Attach one end of the retention bracket to the retention module base.
3. Attach the other end of the retention bracket (near the retention bracket lock) to the
retention module base until it clicks in place.
NOTE. Your boxed CPU should come with installation instructions for the CPU, fan/heatsink assembly,
and the retention mechanism. If the instructions in this section do not match the CPU documentation,
follow the latter.
4. Push down the retention bracket lock on the retention mechanism to secure the fan
and heatsink to the module retention module base.
5. Connect the CPU fan cable to the connector on the motherboard.
CAUTION. Do not forget to connect the CPU fan connector! Hardware monitoring error can occur if
you fail to plug this connector.
1
2
CPU fan
Retention
bracket lock
5
4
CPU fan
connector
Retention bracket
CPU heatsink
3
Retention module base
Installing a DIMM
1. Locate the DIMM sockets in the motherboard.
2
2. Unlock a DIMM socket by pressing the retaining clips
outward.
2
3. Align a DIMM on the socket such that the notch on the
3
DIMM matches the break on the socket.
4. Push the DIMM to the socket until the retaining clips
snap inward.
4
CAUTION:
• Unplug the power supply before adding or removing
DIMMs. Failure to do so may cause damage to the
motherboard and/or components.
• ADDR2/DDR3DIMMiskeyedwithanotchsothatitts
in only one direction. Do not force a DIMM into a socket
to avoid damaging the DIMM.
V7-P5G43 QSG.indb 6 9/1/09 4:59:51 PM
