Asus V6-P5G31E: Hard disk drive Reinstalling the front panel assembly and side cover
Hard disk drive Reinstalling the front panel assembly and side cover: Asus V6-P5G31E
Table of contents
- Rear panel features Internal components
- Selecting the voltage Removing the side cover and front panel assembly Installing a CPU Installing an Intel CPU
- Installing an AMD CPU Installing the CPU fan and heatsink assembly Installing an Intel CPU heatsink and fan
- Installing an AMD CPU heatsink and fan Installing a DIMM
- Installing an expansion card Installing storage drives Optical drive Floppy disk drive
- Hard disk drive Reinstalling the front panel assembly and side cover
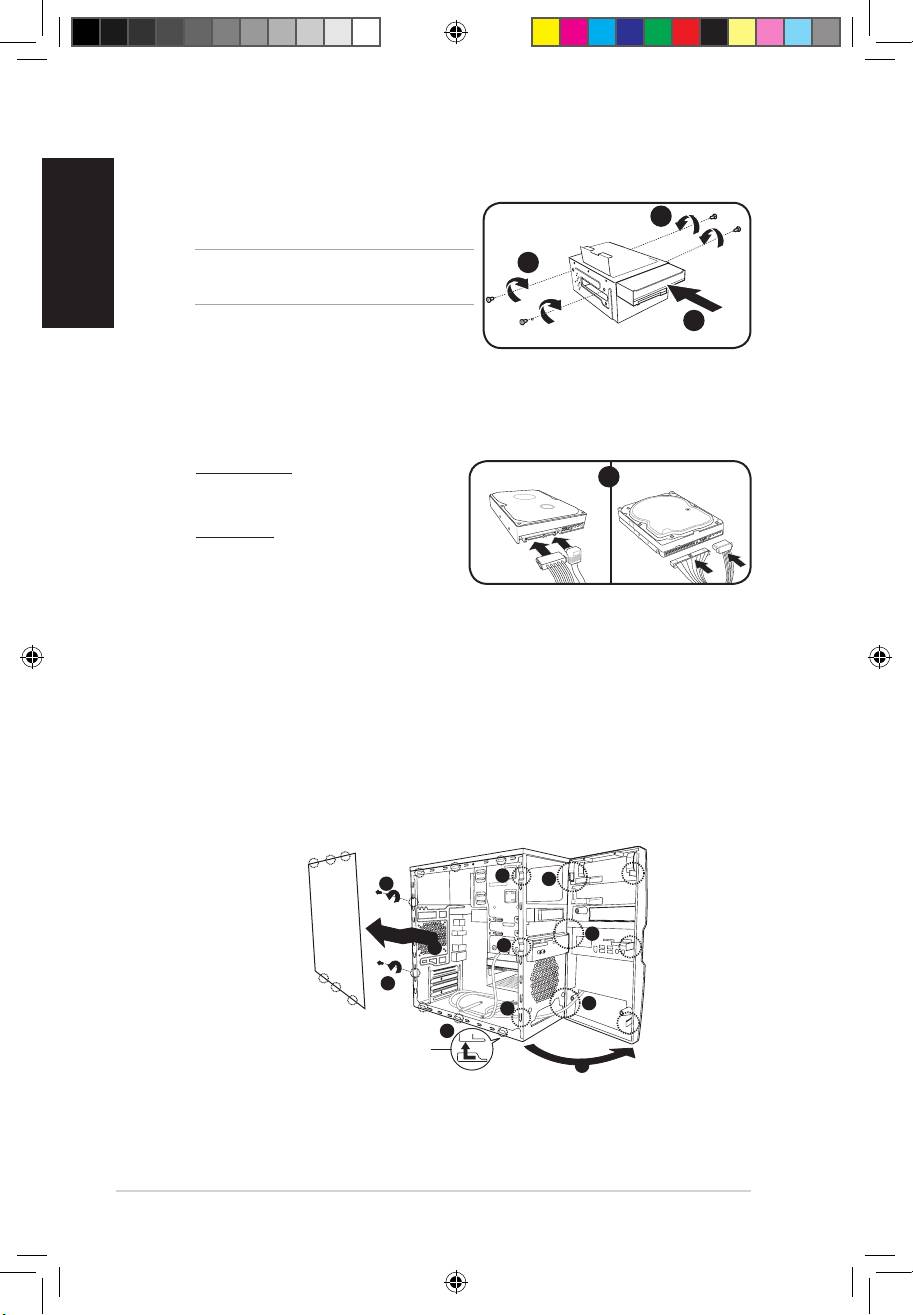
Hard disk drive
English
1. Remove the 3.5-inch hard drive holder out
3
of the chassis.
3
NOTE: The 3.5-inch hard drive holder is
optional.
2
2. Insert the hard disk drive to the 3.5-inch
hard drive holder, then carefully push the
drive until its screw holes align with the
holes on the holder.
3. Secure the hard disk drive with two screws on both sides of the bay.
4. Replace the hard drive holder to the chassis and secure the screws.
5. For SATA HDD: Connect the SATA
SATA IDE
5
signal and power plugs to the
connectors at the back of the drive.
For IDE HDD: Connect the IDE signal and
power plugs to the connectors at the back of
the drive.
Reinstalling the front panel assembly and side cover
To reinstall the front panel assembly and side cover:
1. Insert the front panel assembly hinge-like tabs to the holes on the right side of the
chassis.
2. Swing the front panel assembly to the left, then insert the hooks to the chassis until the
frontpanelassemblytsinplace.
3. Insert the six side cover hooks into the chassis tab holes .
4. Pushthesidecovertothedirectionofthefrontpaneluntilittsinplace.
5. Secure the cover with two screws you removed earlier.
2
1
5
1
4
2
5
1
2
3
Chassis tab holes
2
8
Installation manual
V7-P5G43 QSG.indb 8 9/1/09 4:59:57 PM
