Asus GX1108N: Placement options Desktop placement Wall mounting
Placement options Desktop placement Wall mounting: Asus GX1108N
Table of contents
- Introduction Features Package contents
- Technical specications
- Hardware Front panel Rear panel
- Placement options Desktop placement Wall mounting
- Connecting network devices
- Troubleshooting
- Glossary
Placement options
Desktop placement
PlacetheGX1105N/GX1108Nswitchonaatandstablesurface.Makesure
thatthelocationmeetstheoperatingenvironmentspecication.Seepage3for
details.
English
NOTE:
ThelengthoftheUTPCategory5cablelengthcannotexceed100
meters(328feet).
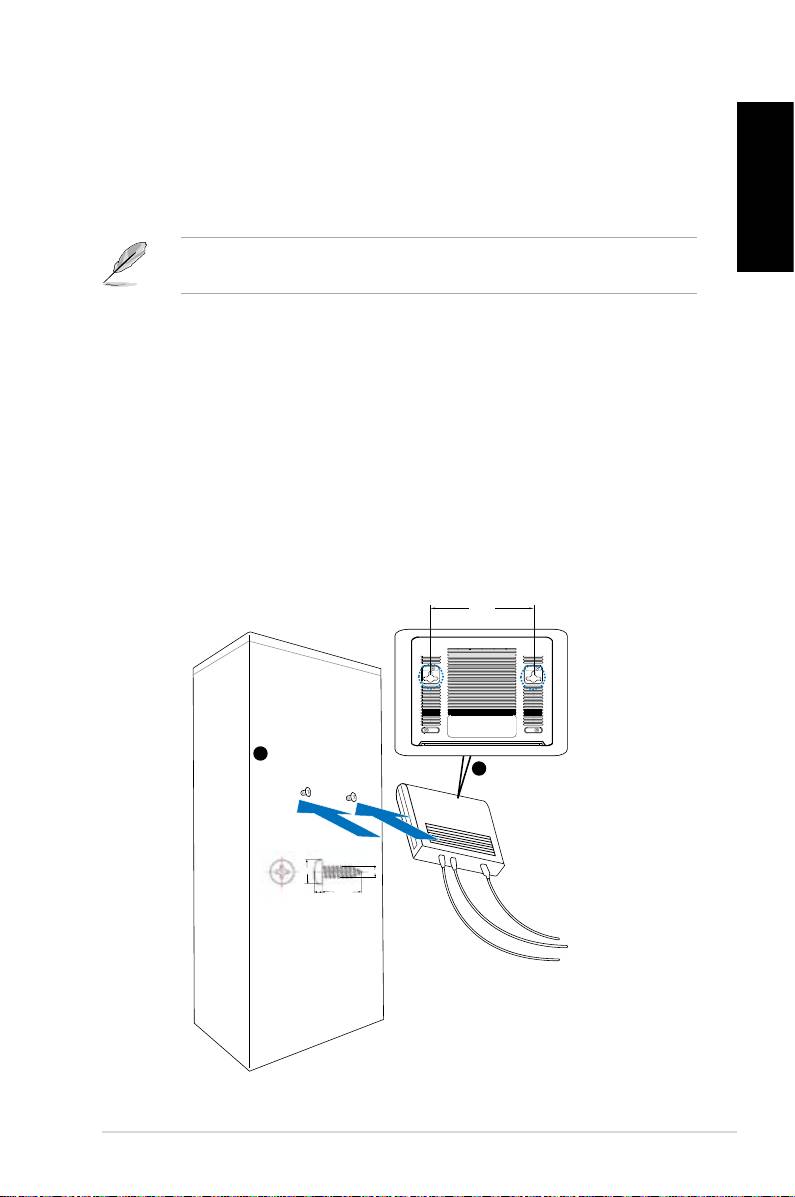
Wall mounting
YoucanmounttheGX1105N/GX1108Nswitchonawallwiththesupplied
mountingscrews.
Tomounttheswitchonawall:
1. Measurethedistancebetweenthetwohooksonthebottomoftheswitch.
2. Markthescrewpositiononthewallwiththesamedistanceinbetween.
3. Securethesuppliedscrewsonthewalluntilonly1/4isshowing.
4. LatchthehooksoftheGX1105N/GX1108Nontothescrews.
Figure 5. Wall-mount installation
Quick Start Guide 5
BottomSide
143.0mm
1
Securetwoscrewsonthewall
Latchtheswitch
2
ontothescrews.
5.3mm
2.95mm
2mm
18.75mm
