Asus G1-P5G43: Internal components Removing the side cover and front panel assembly
Internal components Removing the side cover and front panel assembly: Asus G1-P5G43
Table of contents
- Installation manual
- Internal components Removing the side cover and front panel assembly
- Installing a CPU Installing an Intel CPU Installing an AMD CPU
- Installing the CPU fan and heatsink assembly Installing an Intel CPU heatsink and fan Installing an AMD CPU heatsink and fan
- Installing a DIMM Installing an expansion card
- Installing storage drives Optical drive Hard disk drive
- Reinstalling the front panel assembly and side cover
English
Installation manual
3
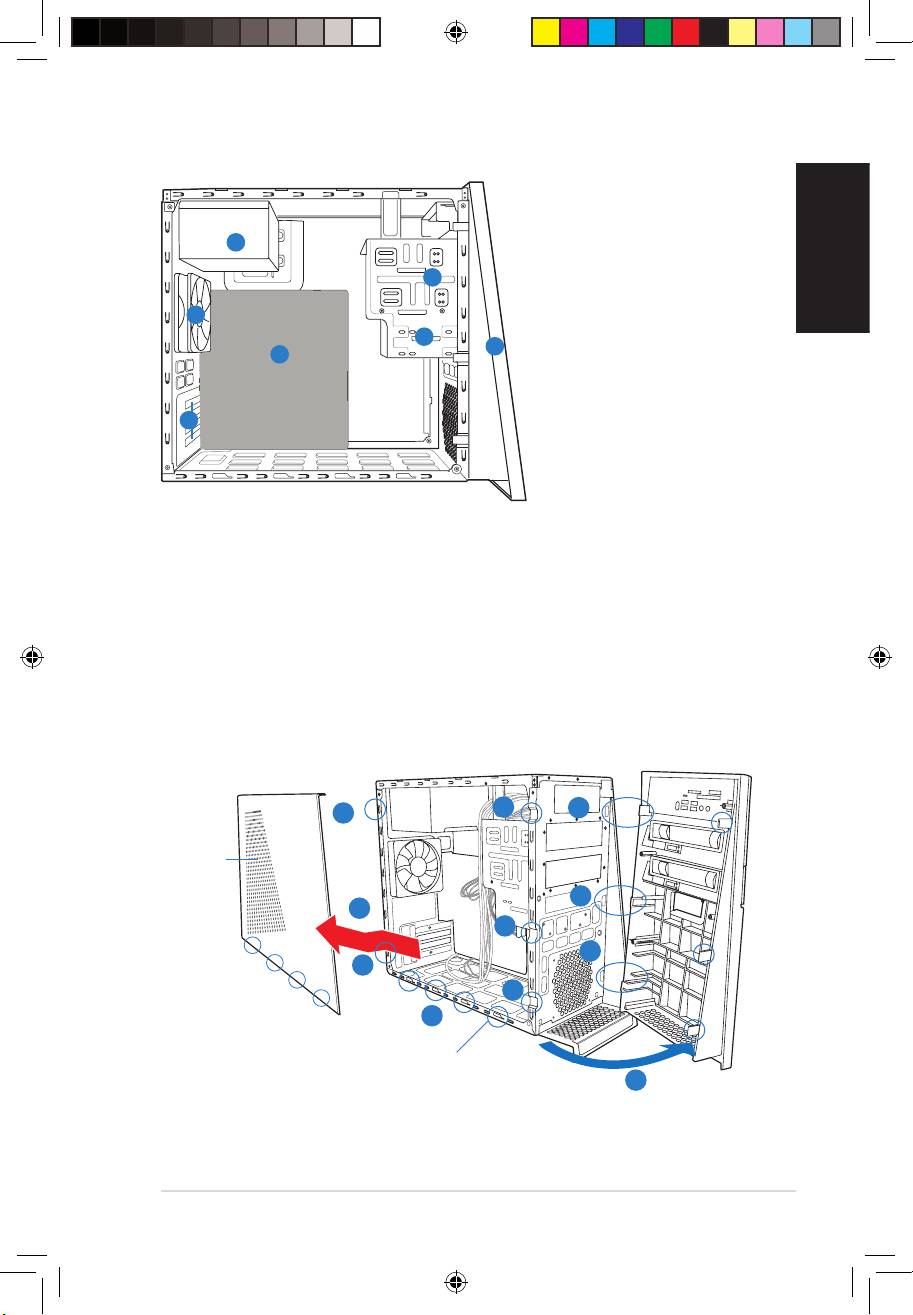
Internal components
1. Front panel cover
2. 5.25-inch optical drive bays
4
3. Hard disk drive bay
2
4. Power supply unit
5. ASUS motherboard
6
6. Chassis fan
3
7. Expansion slot metal brackets
1
5
7
Removing the side cover and front panel assembly
1. Remove the cover screws on the rear panel.
2. Pull the side cover toward the rear panel until its hooks disengage from the chassis tab
holes. Set the side cover aside.
3. Locate the front panel assembly hooks, then lift them until they disengage from the
chassis.
4. Swing the front panel assembly to the right, until the hinge-like tabs on the right side of
the assembly are exposed.
5. Remove the front panel assembly, then set aside.
3
4
1
Air duct
4
2
3
4
1
3
2
Chassis tab holes
4
Book G1.indb 3 9/1/09 6:10:34 PM
