Asus G1-P5G43: Installing storage drives Optical drive Hard disk drive
Installing storage drives Optical drive Hard disk drive: Asus G1-P5G43
Table of contents
- Installation manual
- Internal components Removing the side cover and front panel assembly
- Installing a CPU Installing an Intel CPU Installing an AMD CPU
- Installing the CPU fan and heatsink assembly Installing an Intel CPU heatsink and fan Installing an AMD CPU heatsink and fan
- Installing a DIMM Installing an expansion card
- Installing storage drives Optical drive Hard disk drive
- Reinstalling the front panel assembly and side cover
English
Installation manual
7
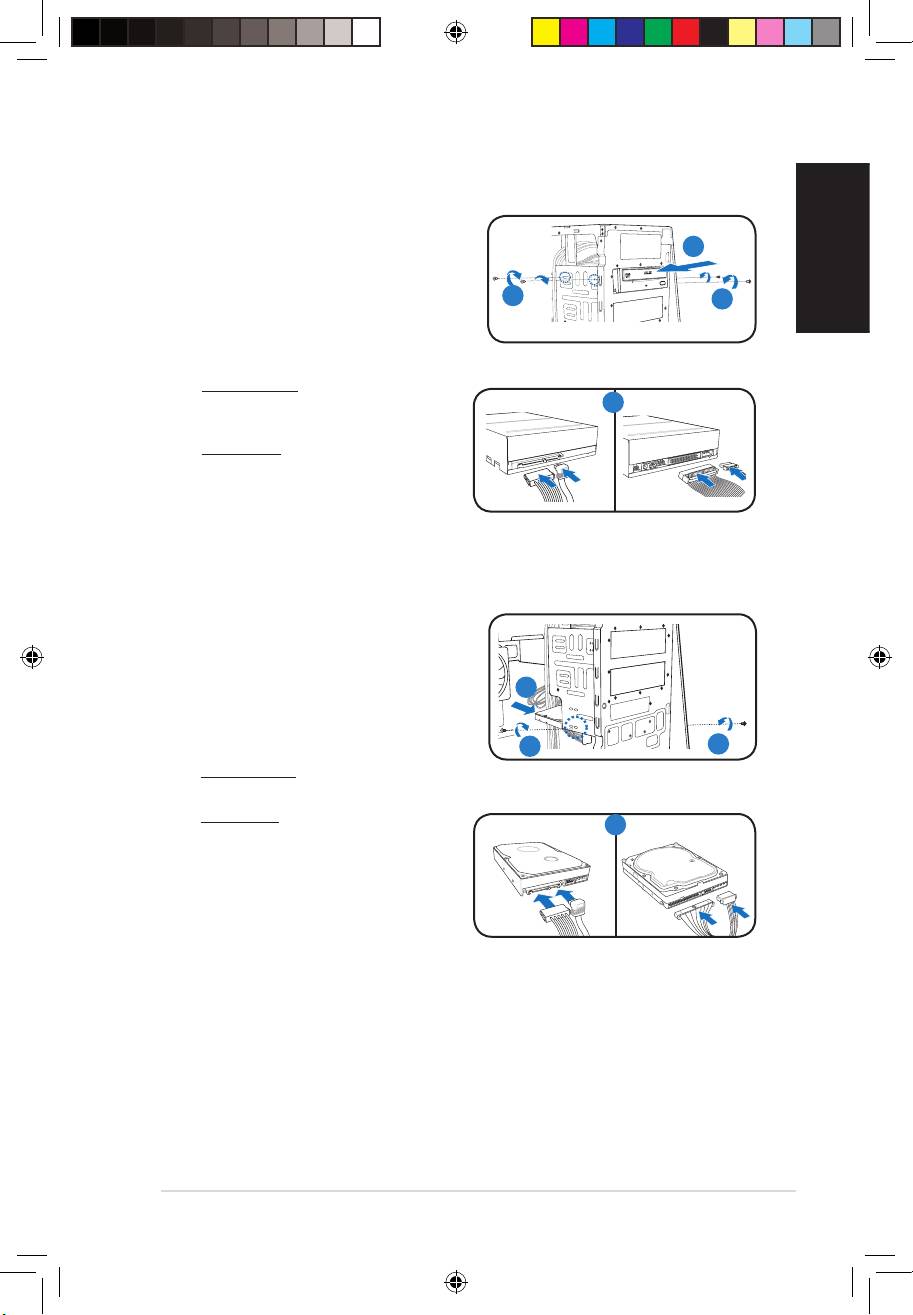
Installing storage drives
Optical drive
1. Place the chassis upright, then remove the
upper 5.25” drive bay metal plate cover.
2
2. Insert the optical drive to the bay, then
carefully push the drive until its screw holes
3
3
align with the holes on the bay.
3. Secure the optical drive with two screws on
both sides of the bay.
4. For SATA ODD: Connect the SATA
signal and power plugs to the
SATA IDE
4
connectors at the back of the drive.
For IDE ODD: Connect the IDE and power
plugs to the connectors at the back of the
drive.
Hard disk drive
1. Locate the 3.5-inch hard disk drive bay.
2. Insert the hard disk drive to the
3.5-inch hard disk drive bay, then carefully
push the drive until its screw holes align
2
with the holes on the bracket.
3. Secure the hard disk drive with two screws
on both sides of the bay.
3
3
4. For SATA HDD: Connect the SATA signal
and power plugs to the connectors at the back of the drive.
For IDE HDD: Connect the IDE and power
SATA IDE
4
plugs to the connectors at the back of the
drive.
Book G1.indb 7 9/1/09 6:10:44 PM
