Asus V2-AE1: Removing the side cover and front panel assembly Installing a CPU
Removing the side cover and front panel assembly Installing a CPU: Asus V2-AE1
Table of contents
- Front panel features Rear panel features
- Internal components Selecting the voltage
- Removing the side cover and front panel assembly Installing a CPU
- Installing the CPU fan and heatsink assembly
- Installing a DIMM Installing an expansion card
- Installing storage drives
- Removing the bay covers and reinstalling the front panel assembly and side cover
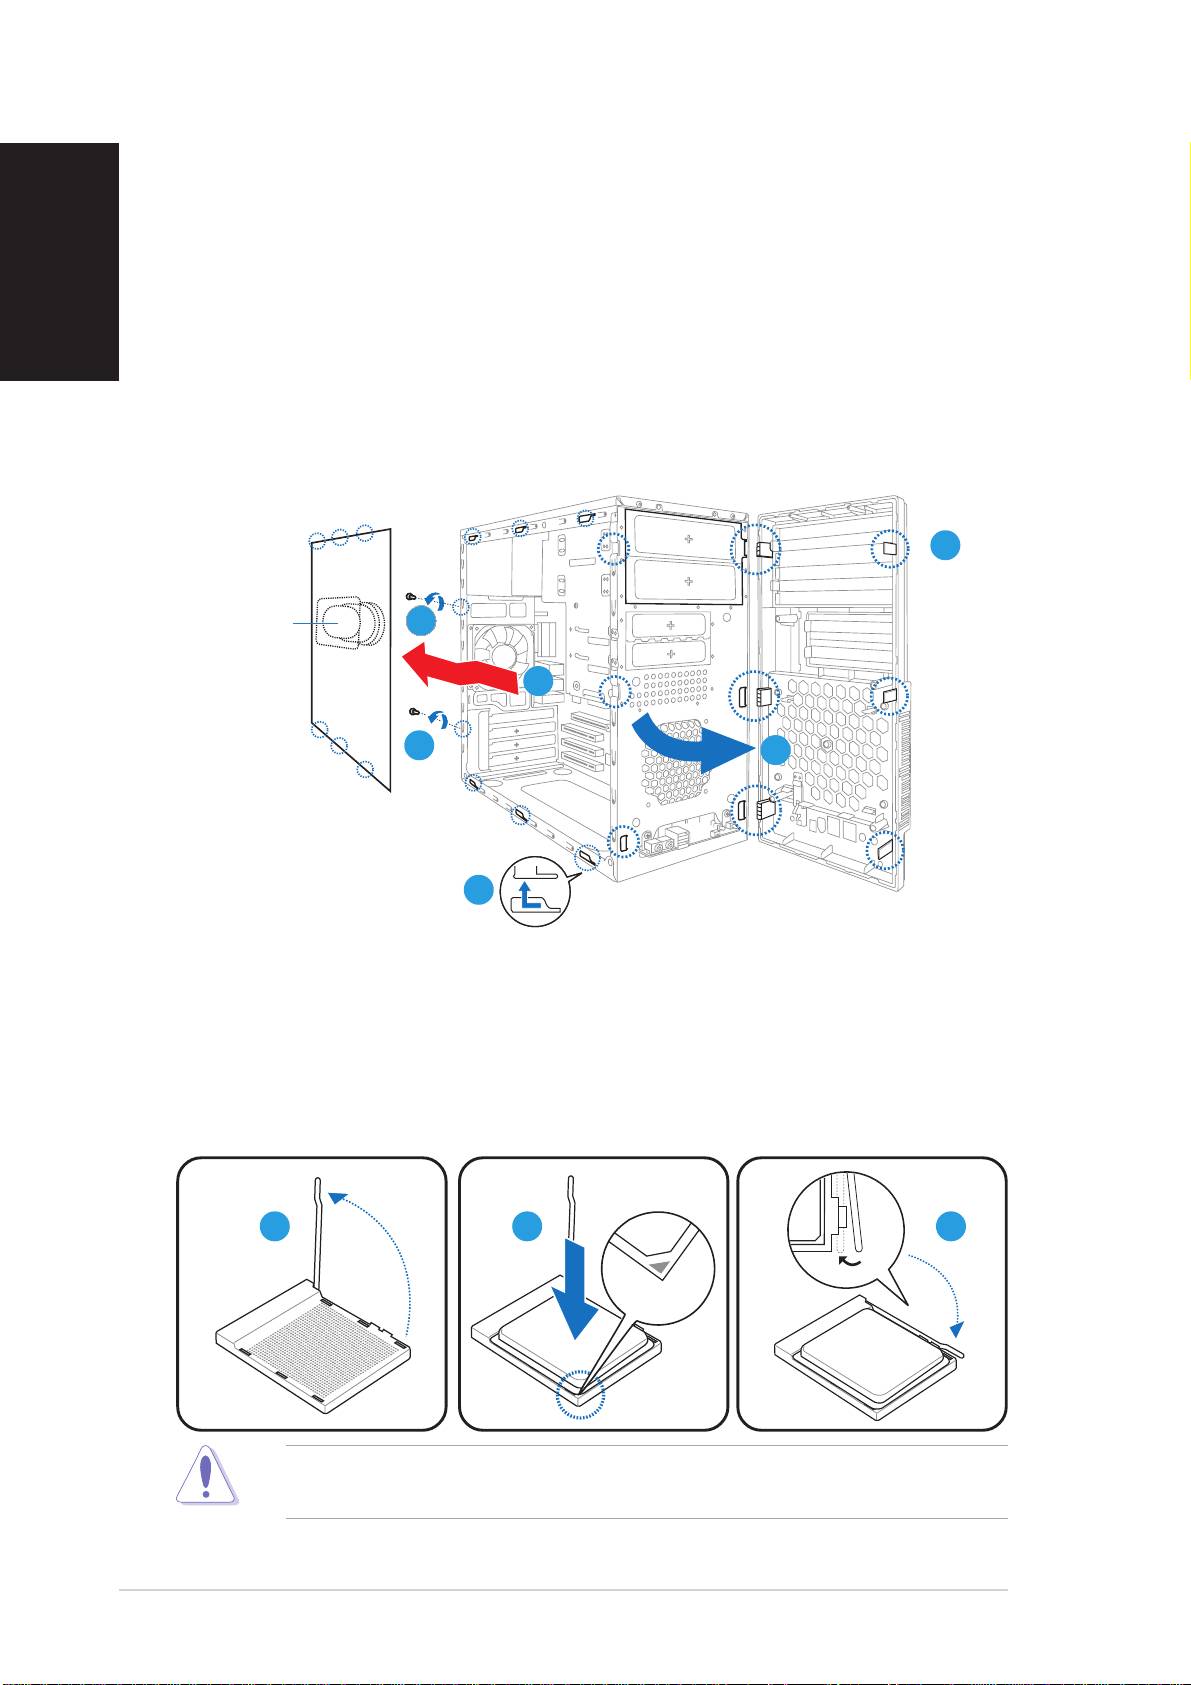
Removing the side cover and
front panel assembly
English
1. Remove the cover screws on the rear panel.
2. Pull the side cover toward the rear panel until its hooks disengage
from the chassis tabs. Set the side cover aside.
3. Locate the front panel assembly hooks, then lift them until they
disengage from the chassis.
4. Swing the front panel assembly to the right, until the hinge-like tabs
on the right side of the assembly are exposed.
5. Remove the front panel assembly, then set aside.
33
33
3
Air ductAir duct
Air ductAir duct
Air duct
11
11
1
22
22
2
1
11
11
44
44
4
2
22
22
Installing a CPU
1. Locate the CPU socket, then lift the socket lever to a 90º-100º angle.
2. Install the CPU to the socket, making sure that the CPU corner with
the gold triangle matches the socket corner with a small triangle.
3. Push down the socket lever to secure the CPU.
11
11
1
22
22
2
33
33
3
CAUTION: CAUTION:
CAUTION: CAUTION:
CAUTION: Incorrect installation of the CPU into the socket may bend
the pins and severely damage the CPU!
44
44
4
Quick installation guideQuick installation guide
Quick installation guideQuick installation guide
Quick installation guide
