Asus P1-P5945GC: Installing optical and storage drives Reinstalling the storage drive assembly
Installing optical and storage drives Reinstalling the storage drive assembly: Asus P1-P5945GC
Table of contents
- Front/Rear panel features
- Internal components Removing the cover Removing the front panel cover
- Removing the storage drive assembly Removing an AMD CPU fan and heatsink assembly
- Installing a CPU Installing an Intel Installing an AMD CPU
- Installing a DIMM Installing an expansion card
- Installing optical and storage drives Reinstalling the storage drive assembly
- Installing the foot stand Reinstalling the front panel cover Reinstalling the cover
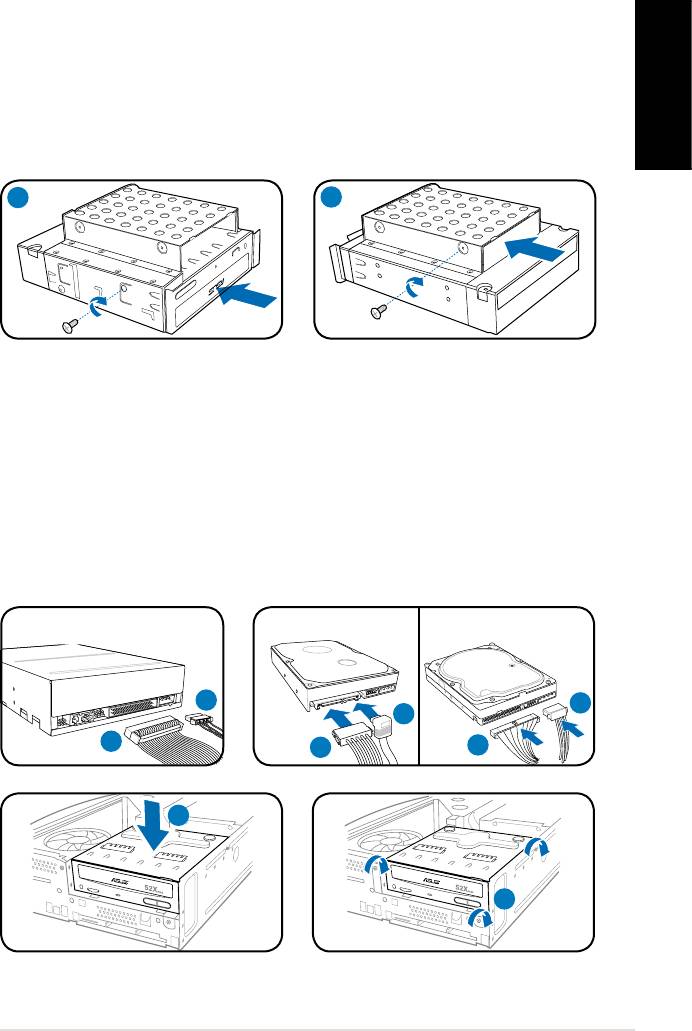
Installing optical and storage drives
1. Turn the storage drive assembly upside down with the 3.5-inch bay on top of
the 5.25-inch bay.
2. Insert the optical drive upside down to the 5.25-inch bay, then secure it with
two screws on both sides.
English
3. Turn the storage drive assembly, insert the hard disk drive upside down to the
3.5-inch bay, then secure it with two screws on both sides.
2
3
Reinstalling the storage drive assembly
1. Connect the IDE (1A) and power (1B) plugs to connectors at the back of the
optical drive.
2. Connect the SATA/IDE (2A) and power (2B) plugs to the connectors at the
back of the SATA/IDE hard disk drives.
3. Install the storage drive assembly to the chassis.
4. Secure the storage drive assembly with three screws.
SATA
IDE
1B
2B
2A
1A
2B
2A
7Installation manual
R
3
R
4


