Asus GigaX1016: instruction
Class: Networks, communications, telecommunications, internet, security
Type:
Manual for Asus GigaX1016
Table of contents

Content
English .............................................................................. 1
Français ............................................................................ 7
Deutsch .......................................................................... 13
Русский
............................................................................ 19
Español .......................................................................... 25
Italiano ............................................................................ 31
Türkçe ............................................................................ 37
简体中文
.........................................................................
43
한국어
............................................................................. 49
日本語
............................................................................. 55
繁體中文
......................................................................... 61

1
GigaX 1016
User Guide
Copyright © 2005 ASUSTeK COMPUTER INC. All Rights Reserved.

2
Introduction
Thank you for purchasing the ASUS GigaX1016 Switch.
The GigaX1016 Switch provides non-blocking, wire-speed switching
performance to meet your network needs. The Switch includes sixteen
Fast Ethernet ports with auto-sensing and auto MDI/MDIX capabilities, and
features easy connectivity, flow control, and QoS. With these advantages,
GigaX1016 is guaranteed to enhance your network performance and
productivity.
Features
• 16 RJ-45 10/100Base-TX ports
• Compatible with IEEE 802.3, 802.3u and 802.3x standards
• Supports auto MDI/MDIX on all ports
• Supports auto-Negotiation
• IEEE 802.3x flow control:
- Full duplex mode: Flow control
- Half duplex mode: Back pressure
• Store-and-forward switching architecture
• Non-blocking full wire speed transmission
• 3.2 Gbps Switch back-plane
• 1.25Mbits memory buffer
• 8K-entry MAC address table
• Class of Service by VLAN tag
Package Contents
Check the following items included in your ASUS GigaX1016 Switch
package.
• ASUS GigaX1016 Switch
• Power cord
• User guide
• Feet stands
NOTE
. Contact your retailer if any of this items is damaged or missing.
3
Hardware Description
This section introduces the physical features of GigaX1016 Switch.
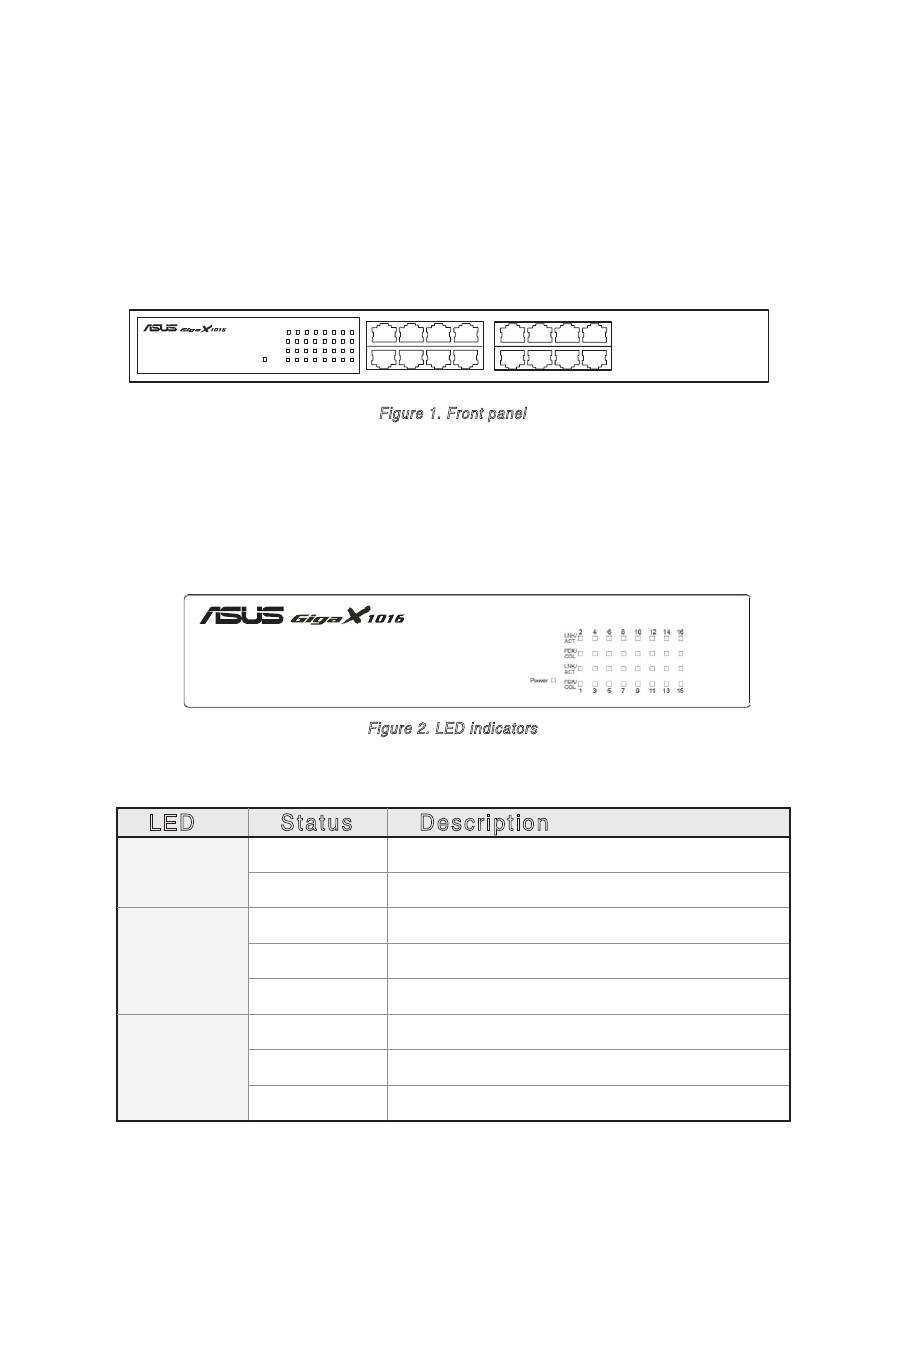
Front Panel
The front panel of GigaX1016 Switch consists of sixteen RJ-45 10/100Mbps
ports and LED indicators showing realtime status of the Switch.
1
2
3
4
5
6
7
8
9
10
11
12
13
14
15
16
Figure 1. Front panel
LED Indicators
The LED Indicators provides real-time information ragarding the Switch
status. The following table provides status of the different LEDs and their
descriptions.
LED
Status
Description
POWER
Green
Power is ON
OFF
Power is not connected
LNK/ACT
Green
Device connected
Blinking
The port is receiving or transmitting data
OFF
No device attached
FDX/COL
Orange
The port is operating in full-duplex mode
Blinking
Collision of packets occurs in the port
OFF
No device attached or in half duplex mode
Figure 2. LED indicators
Table 1 LED indicators
4
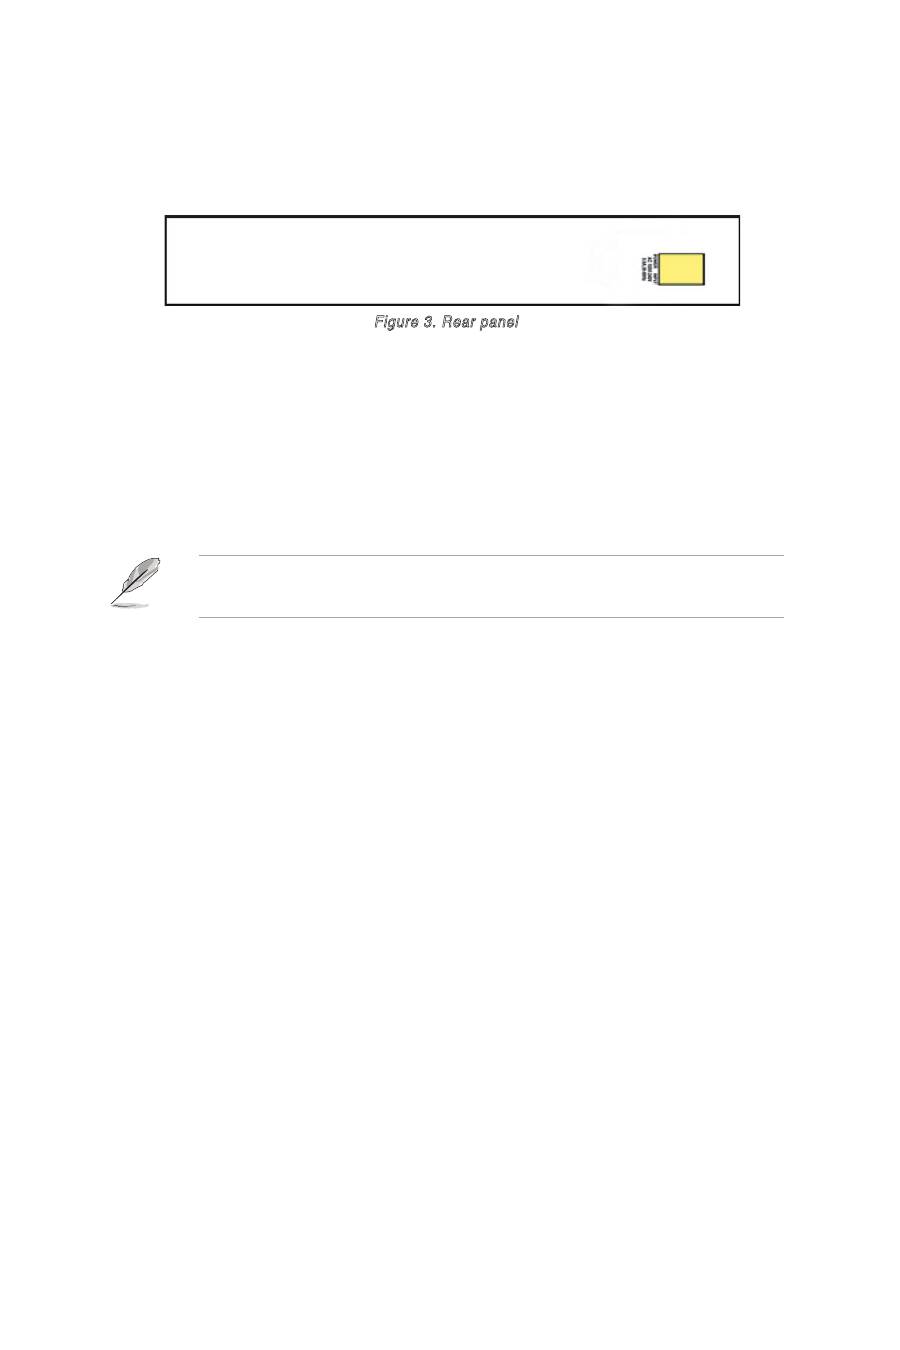
Rear Panel
The rear panel includes a three-prong universal power plug. The input
power is 100-240V AC /50-60Hz.
Figure 3. Rear panel
Placement options
Place the GigaX1016 Switch on a flat and stable surface. Make sure the
location meets the operating environment specifications. See page 6 for
details.
NOTE:
The maximum cable length of UTP Category 5 is 100 meters
(328 feet).
Connecting network devices
Follow these steps to connect network devices to the GigaX1016 Switch:
1. Connect one end of the Ethernet cable to an Ethernet port on the Switch
front panel. Connect the other end to the Ethernet port of the network
device. Repeat this step to connect additional network devices.
2. Plug one end of the power cable to the power connector on the Switch
rear panel, then plug the other end to an electrical outlet.
3. The Power LED and LED indicators for active Ethernet ports light up to
indicate that the device is on and in use. Refer to the LED table in page
3 for indications.
5
GigaX 1016 Switch
PC
Printer
Scanner
Figure 4. Small workgroup Application
Network Application
This section provides GigaX1016 network topology examples.
Small Workgroup
The GigaX1016 Switch can be used as a standalone switch to connect
PCs, servers, or printers and form a small workgroup.
PC
Core Switch
GigaX1016
Printer
Scanner
Server
Printer
PC
GigaX1016
Segment Bridge
GigaX1016 also provides ideal network solution for big enterprises. Using
the Uplink port, you can link workgroup networks to the core switch to get
a bigger switched network.
Figure 5. Segment workgroup application
6
Standard
IEEE802.3 10BASE-T Ethernet
IEEE802.3u 100BASE-TX Fast Ethernet
IEEE802.2x Flow Control and Back-pressure
IEEE802.1p Class of Service
Protocol
CSMA/CD
Forwarding Rate
14,880 pps per Ethernet port,
148,800 pps per Fast Ethernet port
MAC address
8k MAC address table
Memory Buffer
1.25Mbits
LED
Per port: Link/ Activity, Full duplex/ Collision
Per unit: Power
Network Cable
10Base-T: 2-pair UTP/STP Cat. 3,4,5 cable
EIA/TIA-568 100-ohm (100m)
100Base-TX: 2-pair UTP/STP Cat. 5 cable
EIA/TIA-568 100-ohm (100m)
Class of Service
2 Queues Per port for IEEE 802.1p QoS
Supports IEEE802.1Q VLAN tag-based priority
Recognizes 3 bits of precedence carried by the
VLAN tag and maps it to the specified priority
queue. Packets with precedence value of 0~3
flows to low queue while those with value of 4~7
flows to high queue
Supports weighted round robin for high and low
queue transmission, with a rotation rate of 4:1 (4
high queue packets then 1 low queue packet).
[Note]
The CoS function is included in the Switch
firmware, and is not user-configurable. It operates
automatically when the Switch is working
Back-plane
3.2 Gbps
Dimension
440mm x 120mm x 44mm (L x W x H)
Transparent packet
size
64 to 1536Bytes
Power
Consumption
8.1Watts max.
Operation
Environment
0˚C to 45˚C (32˚F to 113˚F);
10% to 90% Humidity (Non-condensing)
Strorage
Temperature
-10˚C to 70˚C
Power Supply
100-240V AC /50~60Hz
EMI & Safety
FCC Class A, CE, UL
Technical Specification

7
GigaX 1016
Guide
Copyright © 2005 ASUSTeK COMPUTER INC. Tous droits réservés.

8
Introduction
Félicitations pour votre achat d'un switch GigaX1016 ASUS.
Le switch GigaX1016 fournit une performance de commutation non
bloquante
et de haute vitesse pour satisfaire à tous vos besoins réseau.
Le switch inclut seize ports Fast Ethernet avec auto-sensing et possibilités
d'auto MDI/MDIX, des fonctions de connectivité simplifiées, contrôle
de flux, et QoS. Avec tous ces avantages, le GigaX1016 vous permet
d'améliorer vos performances réseau et votre productivité.
Fonctions
• 16 ports 10/100Base-TX RJ-45
• Compatible avec les standards IEEE 802.3, 802.3u et 802.3x
• Supporte l'Auto MDI/MDIX sur tout les ports
• Supporte l'auto-négociation
• Contrôle de flux IEEE 802.3x :
- Mode full-duplex : contrôle de flux
- Mode half-duplex: back pressure
• Architecture de répartition Store-and-forward
• Transmission non bloquante avec vitesse "full wire"
• Switch 3.2 Gbps back-plane
• 1.25Mo de mémoire tampon
• Tableau d'adressage MAC 2K
• Classe de Service par étiquettage VLAN
Contenu de la boîte
Vérifiez que tous les éléments suivants sont bien inclus dans la boîte du
switch ASUS GigaX1016.
• Switch ASUS GigaX1016
• Cordon d'alimentation
• Guide
• Patins adhésifs
NOTE
: Si lʼun des éléments ci-dessus était manquant ou endommagé,
contactez votre revendeur
.
9
Description du matériel
Cette section introduit les fonctions physiques du switch GigaX1016.
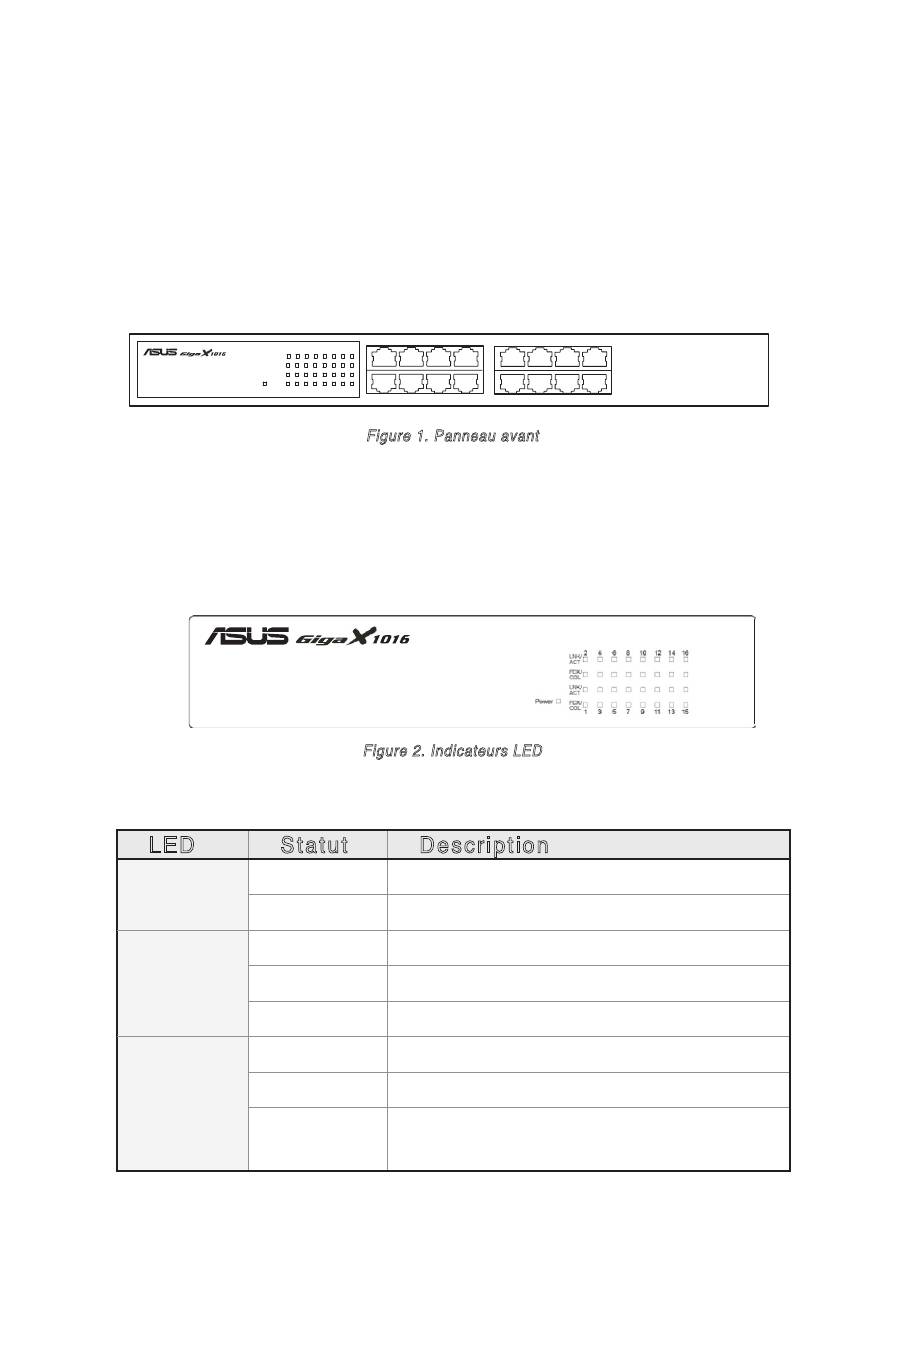
Panneau avant
Le panneau avant du switch GigaX1016 est équipé de seize ports 10/100Mbps
RJ-45 et d'indicateurs LED affichant en temps réel le statut du switch.
1
2
3
4
5
6
7
8
9
10
11
12
13
14
15
16
Figure 1. Panneau avant
Indicateurs LED
Les indicateurs LED affichent en temps réel les informations relatives au
statut du switch. Le tableau suivant fait état des statuts des différentes
LED et leurs descriptions.
LED
Statut
Description
POWER
Vert
Lʼunité est alimentée
Eteint
Lʼunité n'est pas alimentée
LNK/ACT
Vert
Lʼunité est connectée
Clignotant Réception ou transmission de données
Eteint
Aucun appareil connecté
FDX/COL
Orange
Le port fonctionne en mode full-duplex
Clignotant Collision de paquets dans le port
Eteint
Aucun appareil connecté ou en mode half-
duplex
Figure 2. Indicateurs LED
Tableau 1 Indicateurs LED

10
Panneau arrière
Le panneau arrière intègre un connecteur d'alimentation universel 3
broches. L'alimentation d'entrée est de 100-240V AC /50-60Hz.
Figure 3. Panneau arrière
Options de placement
Placez le switch GigaX1016 sur une surface plane et stable. Assurez-
vous que lʼemplacement corresponde aux spécifications relatives à
lʼenvironnement dʼopération. Voir page 6 pour plus de détails.
NOTE:
La longueur maximale dʼun câble UTP de catégorie 5 est de
100 mètres (328 pieds).
Connecter des périphériques réseau
Suivez ces étapes pour connecter des périphériques réseau au switch
GigaX1016:
1. Connectez une extrémité du câble Ethernet à un port Ethernet du
panneau avant du switch. Connectez lʼautre extrémité au port Ethernet
du périphérique réseau. Répetez cette étape pour connecter des
périphériques réseau additionnels.
2. Connectez une extrémité du cordon dʼalimentation au connecteur
dʼalimentation du panneau arrière du switch, puis branchez lʼautre
extrémité à une prise électrique murale.
3. La LED dʼalimentation et les indicateurs LED pour les ports Ethernet actifs
sʼallument pour indiquer que lʼappareil est en état de fonctionnement.
Référez-vous au tableau des indicateurs LED page 3 pour plus
dʼinformations.
11
GigaX 1016 Switch
PC
Printer
Scanner
Figure 4. Application pour petit groupe de travail
Applications réseau
Cette section fournit des exemples de configuration réseau avec le GigaX1016.
Petit groupe de travail
Le switch GigaX1016 peut être utilisé comme switch autonome pour se
connecter à des ordinateurs, serveurs, ou imprimantes et ainsi former un
petit groupe de travail.
Pont de segments
Le GigaX1016 fournit aussi une solution réseau idéale pour les grandes
entreprises. En utilisant le port Uplink (lien ascendant), vous pouvez lier
des réseaux de groupes de travail au commutateur d'infrastructure (core
switch) pour profiter d'une meilleure répartition de réseau.
Switch GigaX1016
Imprimante
PC
Scanner
PC
Core Switch
GigaX1016
Printer
Scanner
Server
Printer
PC
GigaX1016
Figure 5. Segmentation du groupe de travail
PC
Imprimante Scanner
Serveur
Imprimante
PC
Switch d'infrastructure
GigaX1016
GigaX1016
12
Standards
Ethernet 10BASE-T IEEE802.3
Fast Ethernet 100BASE-TX IEEE802.3u
Contrôle de flux et Back-pressure IEEE802.2x
Classe de Service IEEE802.1p
Protocole
CSMA/CD
Taux de transfert
14,880 pps par port Ethernet,
148,800 pps par port Fast Ethernet
Adressage MAC
Tableau d'adressage MAC 8k
Mémoire tampon
1.25Mo
LED
Par port: Link/ Activity, Full-duplex/ Collision
Par unité: Power
Câbles réseau
10Base-T : câble UTP/STP (cat. 3,4,5) 2 paires
EIA/TIA-568 100-ohm (100m)
100Base-TX: câble UTP/STP (cat. 5) 2 paires
EIA/TIA-568 100-ohm (100m)
Classe de Service
2 Queues par port pour IEEE 802.1p QoS
Supporte la priorité d'étiquettage VLAN IEEE802.1Q
Reconnaît 3 octets de précédence portés par
les étiquettes VLAN et mappe le paquet à la
queue spécifiée. Les packets avec une valeur de
précédence de 0~3 sont envoyés vers la queue
basse alors que les paquets avec une valeur de
4~7 sont envoyés vers la queue haute
Supporte le "Weighted Round Robin" pour les
transmissions en queues hautes et basses, avec
un taux de rotation de 4:1 (4 paquets en queue
haute et 1 paquet en queue basse)
[Note]
La fonction CoS est inclue dans le firmware
du switch, et n'est pas configurable. Il opère
automatiquement lorsque le switch fonctionne
Back-plane
3.2 Gbps
Dimensions
440mm x 120mm x 44mm (L x L x H)
Taille des paquets
transparents
64 à 1536Bytes
Consommation
électrique
8.1Watts max.
Température de
fonctionnement
0˚C à 45˚C (32˚F à 113˚F);
10% à 90% d'humidité (sans condensation)
Température de
stockage
-10˚C à 70˚C
Alimentation
100-240V AC /50~60Hz
EMI & Sécurité
FCC Classe A, CE, UL
Spécifications techniques

13
GigaX 1016
Benutzerhandbuch
Copyright © 2005 ASUSTeK COMPUTER INC. Alle Rechte vorbehalten.

14
Einführung
Vielen Dank, dass Sie sich für den ASUS GigaX1016 Switch entschieden
haben.
Der GigaX1016 Switch bietet nicht blockierte Switch-Leistung mit voller
Kabelgeschwindigkeit, die all Ihren Netzwerkansprüchen gerecht wird.
Der Switch verfügt über 16 Fast Ethernet-Anschlüsse mit automatischer
Erkennung und automatischen MDI/MDIX-Fähigkeiten, sowie einfachen
Anschluss, Datenflusskontrolle und QoS. Mit all diesen Vorzügen
verbessert der GigaX1016 die Leistung und Produktivität Ihres Netzwerks.
Funktionen
• 16 RJ-45 10/100Base-TX-Anschlüsse
• Kompatibel mit IEEE 802.3-, 802.3u- und 802.3x-Standards
• Unterstützt automatisches MDI/MDIX an allen Anschlüssen
• Unterstützt automatische Verhandlung
• IEEE 802.3x Datenflusskontrolle:
- Vollduplexmodus: Datenflusskontrolle
- Halbduplexmodus: Back-Pressure
• Store-and-forward Switching Architektur
• Nicht blockierte Übertragung mit voller Kabelgeschwindigkeit
• 3,2 Gbps Switch Backplane
• 1,25Mbits Pufferspeicher
• 8K-Eintrags-MAC-Adressentabelle
• Serviceklasse über VLAN-Markierung
Paketinhalt
Die folgenden Gegenstände sind in Ihrem ASUS GigaX1016 Switch-Paket
enthalten.
• ASUS GigaX1016 Switch
• Stromkabel
• Benutzerhandbuch
• Standfüße
HINWEIS
. Falls einer der oben aufgeführten Gegenstände beschädigt
oder nicht vorhanden ist, wenden Sie sich bitte an Ihrem Händler.
15
Hardwarebeschreibung
Dieser Abschnitt beschreibt das Aussehen des GigaX1016 Switch.
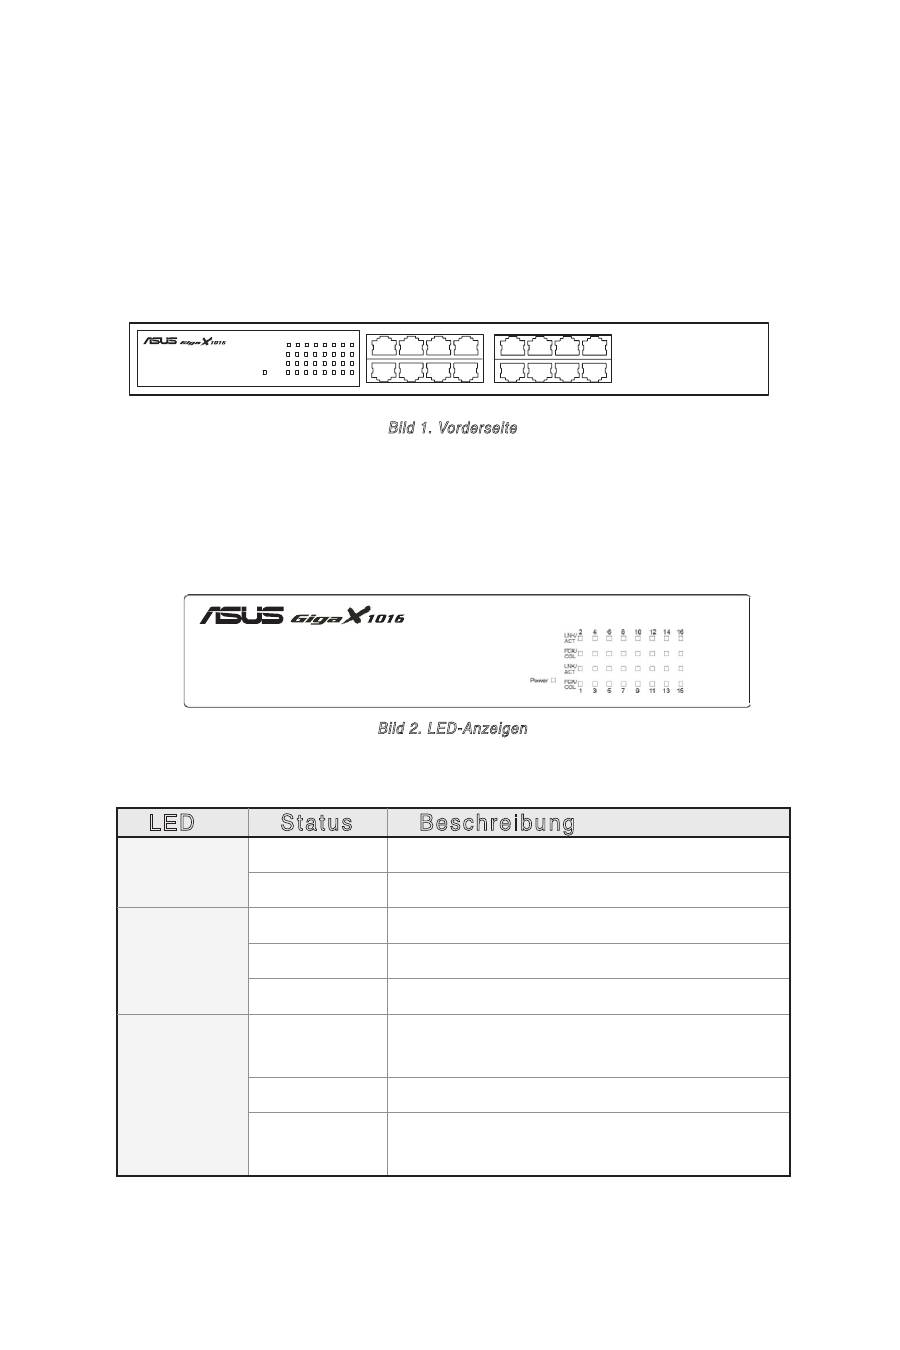
Vorderseite
An der Vorderseite des GigaX1016 Switch befinden sich 16 RJ-45
10/100Mbps-Anschlüsse und LED-Anzeigen, die den Status des Switch in
Echtzeit anzeigen.
1
2
3
4
5
6
7
8
9
10
11
12
13
14
15
16
Bild 1. Vorderseite
LED-Anzeigen
Die LED-Anzeigen liefern Echtzeitinformationen über den Switch-Status.
Die folgende Tabelle gibt den Status der verschiedenen LEDs und deren
Bedeutung an.
LED
Status
Beschreibung
POWER
Grün
Strom ist eingeschaltet
AUS
Stromversorgung ist nicht vorhanden
LNK/ACT
Grün
Gerät angeschlossen
Blinkt
Anschluss empfängt oder sendet Daten
AUS
Kein Gerät angeschlossen
FDX/COL
Orange
Der Anschluss arbeitet im
Vollduplexmodus
Blinkt
Paketkollision in diesem Anschluss
AUS
Kein Gerät angeschlossen oder Anschluss
arbeitet im Halbduplexmodus
Bild 2. LED-Anzeigen
Tabelle 1 LED-Anzeigen

16
Rückseite
Auf der Rückseite befindet sich eine Buchse mit drei Kontaktstiften, für
eine Eingangsspannung von 100-240V~/50-60Hz.
Bild 3. Rückseite
Platzierungsmöglichkeiten
Platzieren Sie den GigaX1016 Switch auf einer stabilen, ebenen Oberfläche.
Stellen Sie sicher, dass dieser Platz den auf Seite 6 beschriebenen
Arbeitsumständen entspricht.
HINWEIS:
Die maximale Kabellänge der UTP Kategorie 5 beträgt 100
Meter.
Anschluss von Netzwerkgeräten
Folgen Sie diesen Schritten, um Netzwerkgeräte an den GigaX1016 Switch
anzuschließen:
1. Ethernetkabel: Verbinden Sie ein Ende des Ethernetkabels mit einem
Ethernetanschluss an der Switch-Vorderseite. Verbinden Sie das andere
Ende mit dem Ethernetanschluss des Netzwerkgeräts. Wiederholen Sie
diesen Schritt, um weitere Netzwerkgeräte anzuschließen.
2. Stromkabel: Verbinden Sie ein Ende des Stromkabels mit dem
Stromanschluss an der Switch-Rückseite, und stecken Sie das andere
Ende in eine Steckdose.
3. Die Power LED und LED-Anzeigen für aktive Ethernetanschlüsse leuchten
auf, wenn das Gerät angeschaltet ist und benutzt wird. Genaueres hierzu
in der LED-Tabelle auf Seite 3.

17
GigaX 1016 Switch
PC
Drucker
Scanner
Bild 4. Anwendung in kleiner Arbeitsgruppe
Netzwerkanwendung
Dieser Abschnitt zeigt Beispiele für die Verwendung des GigaX1016.
Kleine Arbeitsgruppe
Der GigaX1016 Switch kann dazu verwendet werden, als einzelner Switch PCs,
Server, oder Drucker zu verbinden und eine kleine Arbeitsgruppe zu bilden.
PC
Hauptswitch
GigaX1016
Drucker
Scanner
Server
Drucker
PC
GigaX1016
Segmentbrücke
GigaX1016 biete außerdem die ideale Netzwerklösung für größere
Unternehmen. Mit dem Uplink-Anschluss können Sie Arbeitsgruppennetz-
werke mit dem Hauptswitch verbinden, um ein großes Netzwerk zu bilden.
Bild 5. Anwendung in Segmentarbeitsgruppe
18
Standard
IEEE802.3 10BASE-T Ethernet
IEEE802.3u 100BASE-TX Fast Ethernet
IEEE802.2x Datenflusskontrolle und Back-pressure
IEEE802.1p Serviceklasse
Protokoll
CSMA/CD
Weiterleitungsrate
14.880 pps pro Ethernet-Anschluss,
148.800 pps pro Fast Ethernet-Anschluss
MAC-Adresse
8k MAC-Addressentabelle
Pufferspeicher
1,25Mbits
LED
Pro Anschluss: Verbindung/ Aktivität, Vollduplex/
Kollision; pro Einheit: Stromversorgung
Netzwerkkabel
10Base-T: 2-Pair UTP/STP Cat. 3,4,5-Kabel
EIA/TIA-568 100-Ohm (100m)
100Base-TX: 2-Pair UTP/STP Cat. 5 Kabel
EIA/TIA-568 100-Ohm (100m)
Serviceklasse
2 Warteschlangen pro Anschluss für IEEE 802.1p QoS
Unterstützt auf IEEE802.1Q VLAN-Markierung
basierende Priorität
Erkennt die 3 Bit VLAN-Markierungspräzedenz
und ordnet sie der jeweiligen Prioritätswarte-
schlange zu. Pakete mit Präzedenzwert 0-3
werden zur Warteschlange mit niedriger Priorität
und die mit 4-7 zu der mit hoher Priorität geleitet.
Unterstützt Gewichtungsrotation für hohe und
niedrige Warteschlangenübertragung, mit einer
Rotationsrate von 4:1 (4 Pakete hoher Priorität
und dann 1 Paket niedriger Priorität).
[Hinweis]
Die CoS-Funktion ist in der Switch-
Firmware enthalten, und nicht vom Benutzer
konfigurierbar. Sie wird automatisch ausgeführt,
wenn der Switch arbeitet.
Backplane
3,2 Gbps
Maße
440mm x 120mm x 44mm (B x T x H)
Transparente
Paketgröße
64 bis 1536Bytes
Stromverbrauch
8,1Watt max.
Arbeitsumstände
0˚C bis 45˚C
10% bis 90% Luftfeuchtigkeit (keine Kondensation)
Lagertemperatur
-10˚C bis 70˚C
Stromversorgung
100-240V ~ /50-60Hz
EMI & Sicherheit
FCC Klasse A, CE, UL
Technische Spezifikationen

19
GigaX 1016
Руководство пользователя
Copyright © 2005 ASUSTeK COMPUTER INC. All Rights Reserved.
