Asus Xonar D1: 1.3 Card installation
1.3 Card installation: Asus Xonar D1
Table of contents
- 1.1 System requirements 1.2 Package contents
- 1.3 Card installation
- 1.4 Driver installation 1.4.1 Installing the audio card driver
- 1.5 Connecting audio device 1.5.1 Back ports 1.5.2 Connecting analog speakers 2 Speakers
- 2.1 Speakers 4 Speakers
- 4.1 Speakers 5.1 Speakers
- 6.1 Speakers 7.1 Speakers
- 1.5.3 Connecting digital speakers SPDIF Out 1.5.4 Connecting Line-In audio sources
- 1.5.5 Connecting headphone / microphone
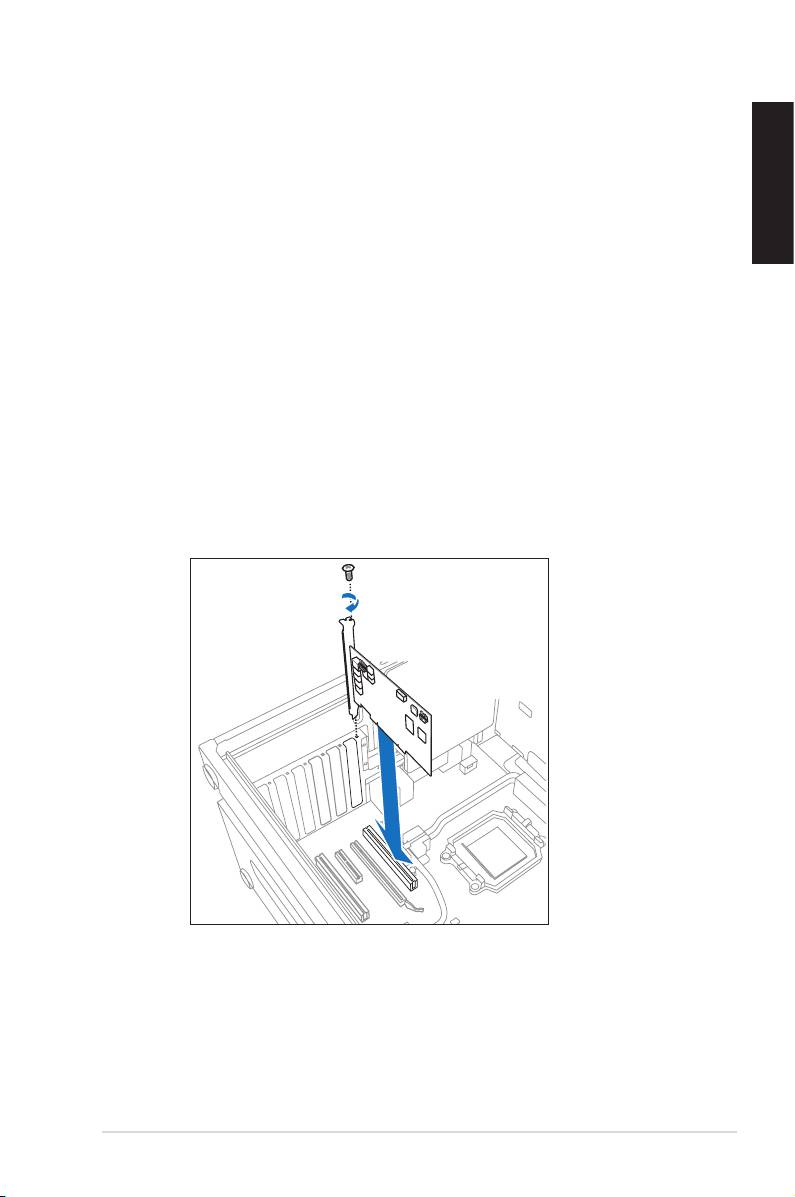
1.3 Card installation
To install the Xonar D1 audio card:
1. Power OFF the computer, the monitor, and all other peripheral devices
connected to your computer.
English
2. Unplug the computer power cord from your computer and power outlet.
3. Touch the metal back or side panel of the computer to avoid static electricity.
4. Remove the chassis cover.
5. Locate an empty PCI slot on the motherboard.
7. Align and insert the audio card into the PCI slot until it seats in place. Make
surethegoldngersareproperlyinsertedtotheslot.
8. Secure the bracket screw that holds the audio card in place. Refer to the
picture below for the bracket screw hole.
9. Put back the chassis cover.
10. Reconnect all cables.
11. Power ON the computer.
ASUS Xonar D1 Quick start guide
3
