Asus P3-PE5: Installing the CPU fan and heatsink assembly Installing a DIMM
Installing the CPU fan and heatsink assembly Installing a DIMM: Asus P3-PE5
Table of contents
- Front/Rear panel features
- Internal components
- Removing the cover Removing the front panel cover
- Installing a CPU
- Installing the CPU fan and heatsink assembly Installing a DIMM
- Installing an expansion card Installing an optical drive Installing a SATA hard disk drive
- Reinstalling the front panel cover Reinstalling the cover
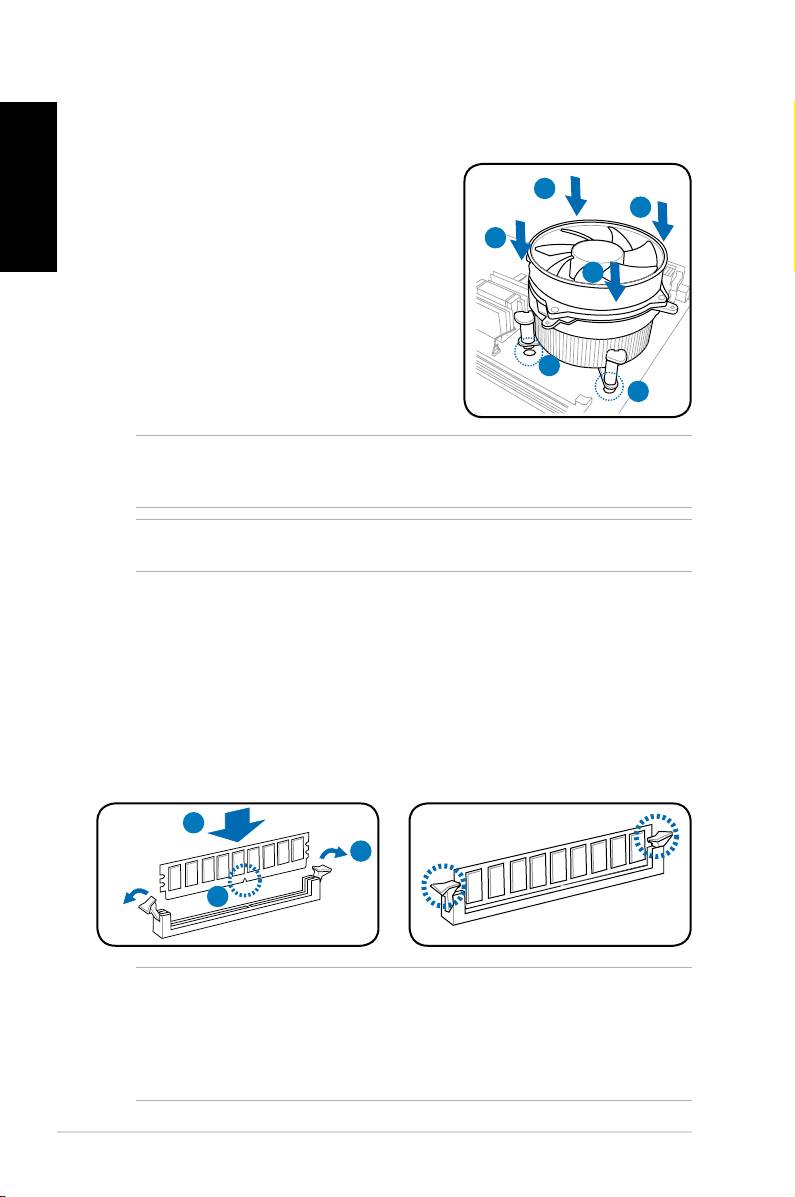
Installing the CPU fan and heatsink assembly
®
Installing an Intel
CPU heatsink and fan
English
1. Place the heatsink on top of the installed
CPU, making sure that the four fasteners
A
B
match the holes on the motherboard.
2. Push down two fasteners at a time in a
B
diagonal sequence to secure the heatsink
A
and fan assembly in place.
3. When the fan and heatsink assembly is in
place, connect the CPU fan cable to the
connector on the motherboard.
1
1
NOTE: Your boxed CPU should come with installation instructions for the CPU and fan/
heatsink assembly. If the instructions in this section do not match the CPU documentation,
follow the latter.
CAUTION: Do not forget to connect the CPU fan connector! Hardware monitoring error
can occur if you fail to plug this connector.
Installing a DIMM
1. Locate the DIMM sockets in the motherboard.
2. Unlock a DIMM socket by pressing the retaining clips outward.
3. Align a DIMM on the socket such that the notch on the DIMM matches the
break on the socket.
4. Push the DIMM to the socket until the retaining clips snap inward.
4
2
3
CAUTION:
• Unplug the power supply before adding or removing DIMMs. Failure to do so may
cause damage to the motherboard and/or components.
• A DIMM is keyed with a notch so that it ts in only one direction. Do not force
a DIMM into a socket to avoid damaging the DIMM.
6 Installation manual
