Asus P3-PE5: Installing an expansion card Installing an optical drive Installing a SATA hard disk drive
Installing an expansion card Installing an optical drive Installing a SATA hard disk drive: Asus P3-PE5
Table of contents
- Front/Rear panel features
- Internal components
- Removing the cover Removing the front panel cover
- Installing a CPU
- Installing the CPU fan and heatsink assembly Installing a DIMM
- Installing an expansion card Installing an optical drive Installing a SATA hard disk drive
- Reinstalling the front panel cover Reinstalling the cover
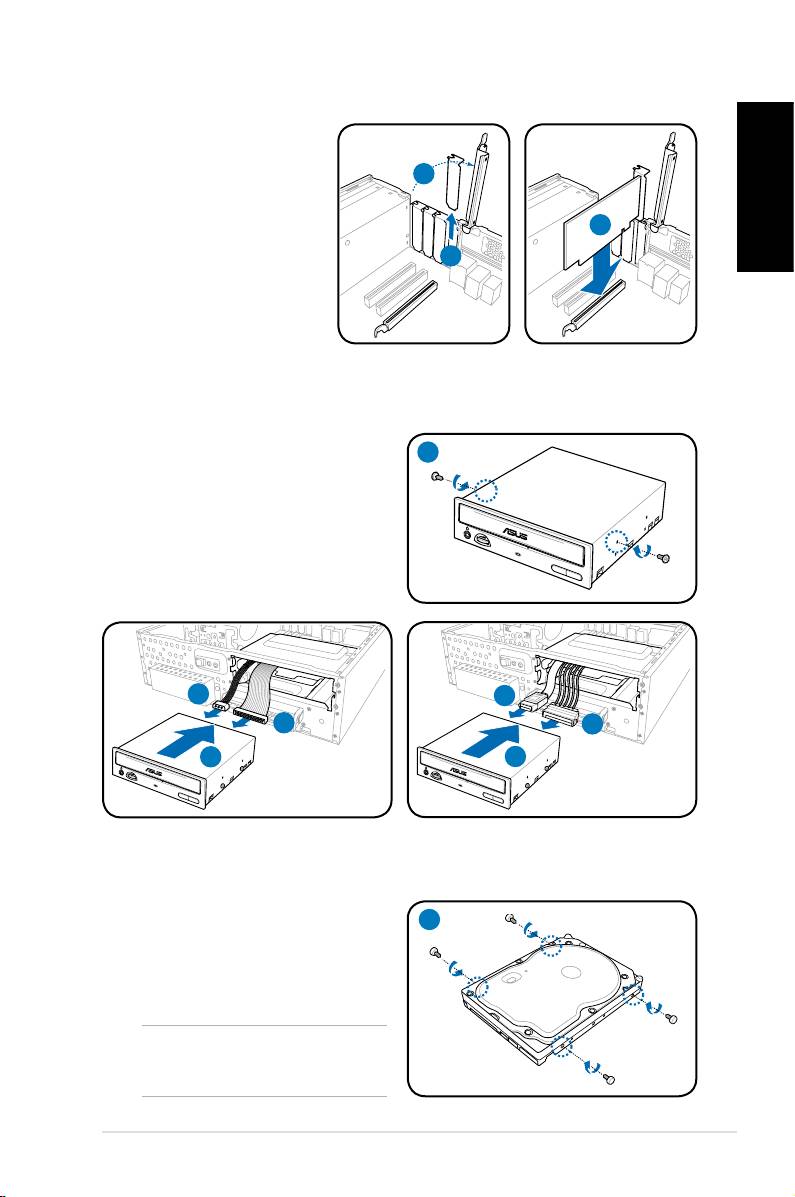
Installing an expansion card
1. Lift the expansion card
lock to a 90º-100º angle.
1
2. Remove the metal cover
opposite the slot that you
English
intend to use.
3
3. Insert the card connector
2
to the slot, and press the
card rmly until it ts in
place.
Installing an optical drive
1. Drive a screw to the screw hole on
1
both sides of the optical drive.
2. Connect the IDE/SATA signal plug
(2A) and IDE/SATA power plug (2B)
to the connectors at the back of the
IDE/SATA optical drive.
3. Push the drive all the way into the
bay until the drive lock clicks.
2B
2A
2A
2B
3
3
IDE
SATA
Installing a SATA hard disk drive
1. Drive two screws with rubber
1
washers on both sides of the hard
disk drive.
NOTE: Before using the hard disk
drive screws, put the supplied rubber
washers onto the screws.
7Installation manual
