Asus P2-PH1: Removing the storage drive assembly Removing the CPU fan and heatsink assembly
Removing the storage drive assembly Removing the CPU fan and heatsink assembly: Asus P2-PH1
Table of contents
- Front/Rear panel features
- Internal components Removing the cover Removing the front panel cover
- Removing the storage drive assembly Removing the CPU fan and heatsink assembly
- Installing a CPU
- Installing a DIMM Installing an expansion card
- Reinstalling the storage drive assembly
- Installing the foot stand Reinstalling the front panel cover Reinstalling the cover
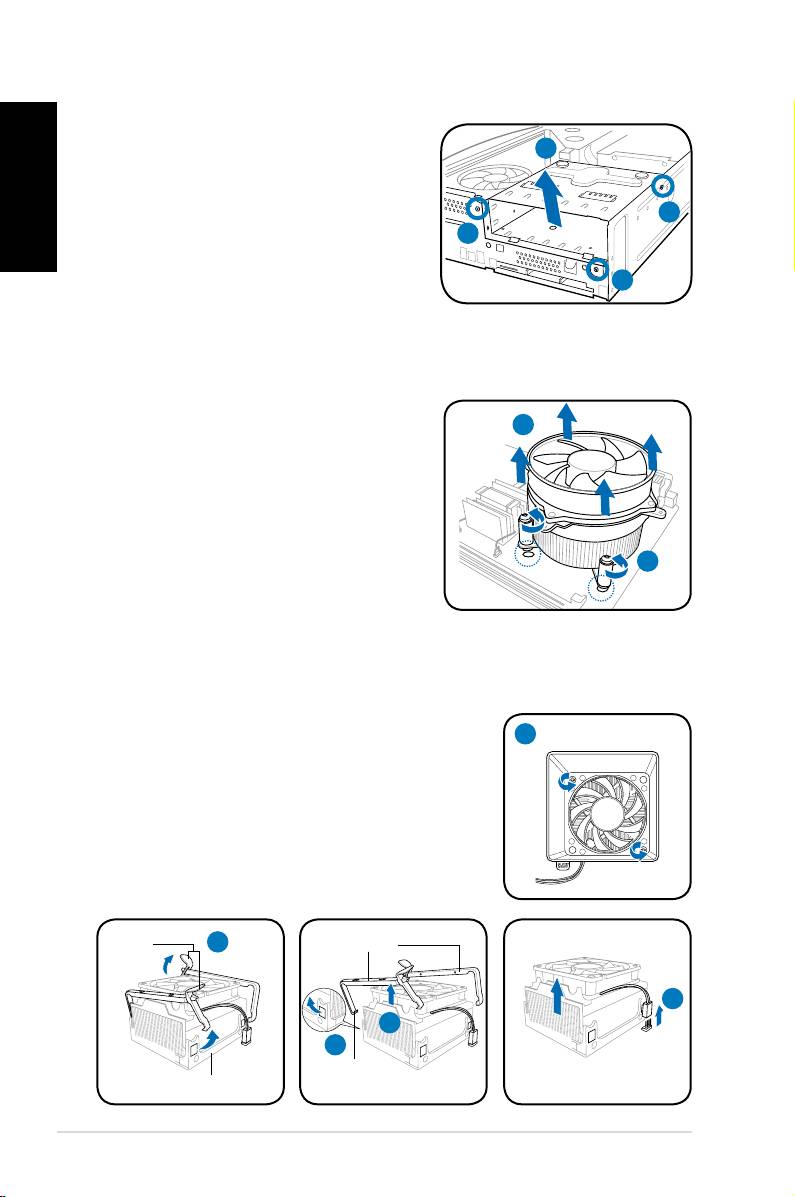
Removing the storage drive assembly
1. Lay the system on its side, then
English
locate and remove three storage
drive assembly screws.
2. Lift the storage drive assembly, then
set aside.
Removing the CPU fan and heatsink assembly
®
Removing an Intel
CPU fan and heatsink assembly
1. Disconnect the CPU fan cable from
the connector on the motherboard.
2. Loosen the four screws out of the
fan holes to disengage the fan
and heatsink assembly from the
motherboard.
3. Carefully remove the fan and
heatsink assembly, then set it aside.
Removing an AMD CPU fan and heatsink assembly
1. Remove two screws securing the blower to the CPU fan.
2. Carefully lift each locking lever and detach its end
from the hole of the retention module.
3. Release the hook of each metal clip from the hole
of the retention module.
4. Remove the metal clips from the side rail of the
fan and heatsink assembly.
5. Disconnect the CPU fan cable from the connector
on the motherboard, then remove the fan and
heatsink assembly.
4 Installation manual
2
1
1
1
3
2
1
Locking
2
Metal clip
levers
5
4
3
Hook
Retention module
