Asus P2-PH1: Installing a DIMM Installing an expansion card
Installing a DIMM Installing an expansion card: Asus P2-PH1
Table of contents
- Front/Rear panel features
- Internal components Removing the cover Removing the front panel cover
- Removing the storage drive assembly Removing the CPU fan and heatsink assembly
- Installing a CPU
- Installing a DIMM Installing an expansion card
- Reinstalling the storage drive assembly
- Installing the foot stand Reinstalling the front panel cover Reinstalling the cover
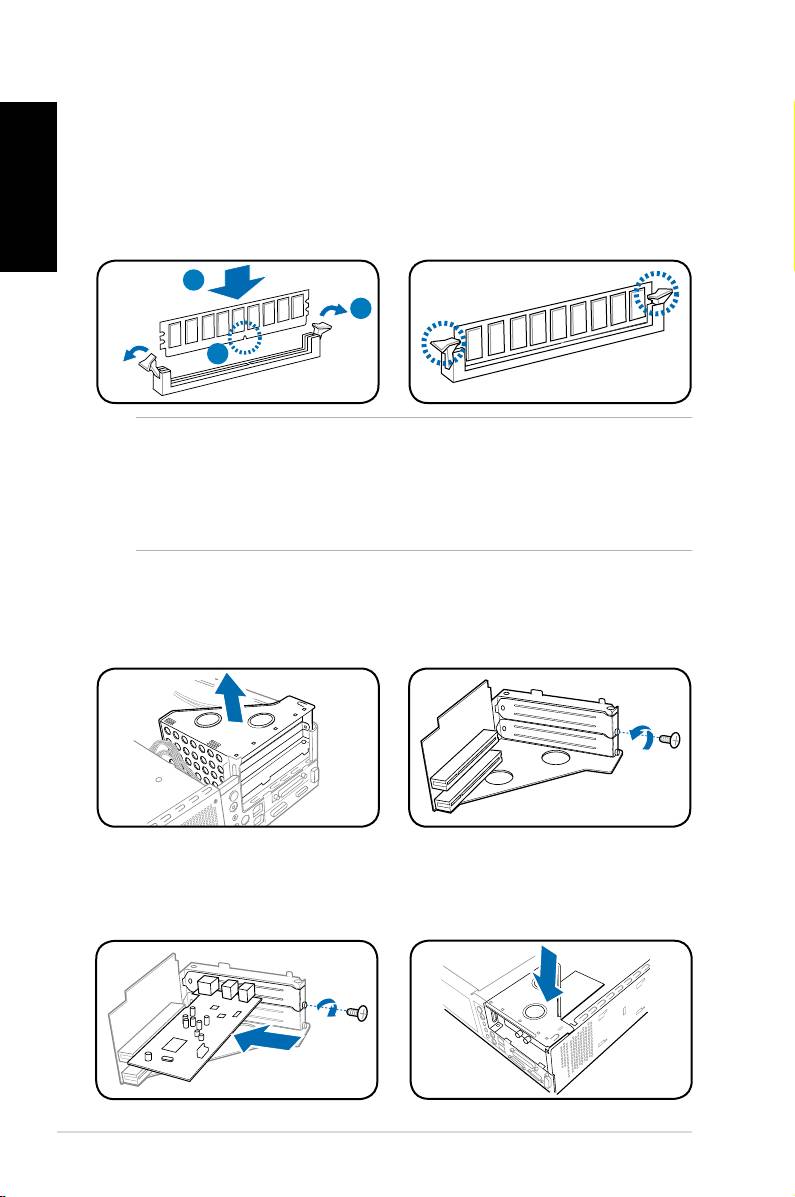
Installing a DIMM
1. Locate the DIMM sockets in the motherboard.
English
2. Unlock a DIMM socket by pressing the retaining clips outward.
3. Align a DIMM on the socket such that the notch on the DIMM matches the
break on the socket.
4. Push the DIMM to the socket until the retaining clips snap inward.
4
2
3
CAUTION:
• Unplug the power supply before adding or removing DIMMs. Failure to do so may
cause damage to the motherboard and/or components.
• ADDRDIMMiskeyedwithanotchsothatittsinonlyonedirection.Donotforce
a DIMM into a socket to avoid damaging the DIMM.
Installing an expansion card
1. Lift the PCI riser card assembly to
2. Remove the metal cover opposite
remove.
the slot that you intend to use.
3. Insert the card connector to the
4. Reinstall the PCI riser card
slot,thenpressthecardrmly
assembly. Make sure that the
untilittsinplace.Securethe
riser card connector sits properly
card with a screw.
on the motherboard PCI slot.
6 Installation manual
