Asus P1-PH1: Installing the CPU Installing a DIMM
Installing the CPU Installing a DIMM: Asus P1-PH1
Table of contents
- Front panel features Rear panel features
- Internal components Removing the cover
- Removing the front panel cover Removing the storage drive assembly Removing the CPU fan and heatsink
- Installing the CPU Installing a DIMM
- Installing an expansion card Installing optical and storage drives
- Reinstalling the storage drive assembly Installing the foot stand
- Reinstalling the front panel cover Reinstalling the cover
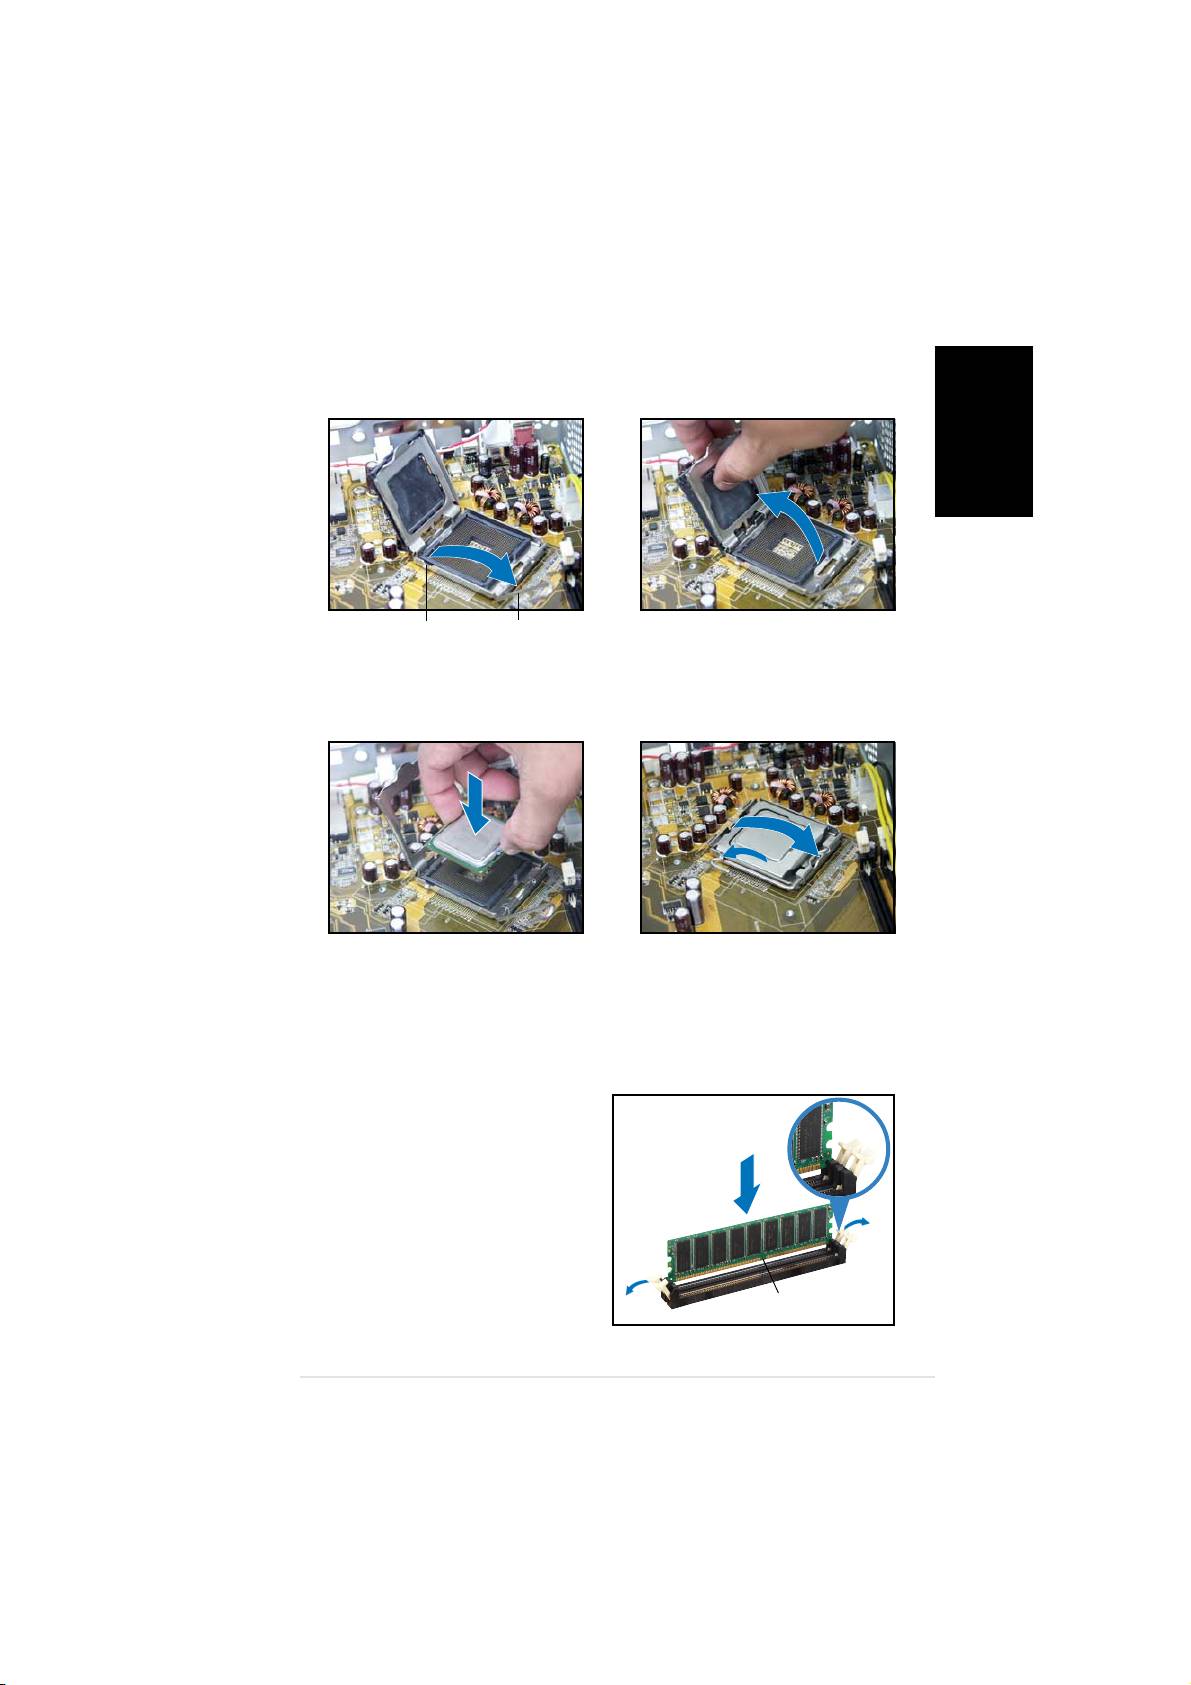
Installing the CPU
1. Unlock the load lever, then lift
2. Lift the load plate, then
to a 90º-100º angle.
remove the PnP cap.
English
Retention tabRetention tab
Retention tabRetention tab
Retention tab
Load leverLoad lever
Load leverLoad lever
Load lever
3. Install the CPU. The CPU fits in
4. Close the load plate, then lock
only one orientation.
the load lever.
5. Reinstall the CPU fan and heatsink assembly, then reconnect the CPU
fan cable to the CPU fan connector on the motherboard. Refer to the
instructions in the previous section for details.
Installing a DIMM
1. Locate the DIMM sockets in the
UnlockedUnlocked
UnlockedUnlocked
Unlocked
motherboard.
retaining clipretaining clip
retaining clipretaining clip
retaining clip
2. Unlock a DIMM socket by
pressing the retaining clips
outward.
3. Align a DIMM on the socket such
that the notch on the DIMM
matches the break on the
socket.
DDR DIMM notchDDR DIMM notch
DDR DIMM notchDDR DIMM notch
DDR DIMM notch
Quick installation guideQuick installation guide
Quick installation guideQuick installation guide
Quick installation guide
55
55
5
