Pioneer VSX-LX70: Setup
Setup: Pioneer VSX-LX70
04
Setup
Chapter 4:
Setup
Tip
Setting up the network
•Press / or the numeric buttons to enter
In case the router connected to the LAN terminal on this
alphanumeric characters. To delete alphanumeric
receiver is a broadband router (with the built-in DHCP
characters entered one at a time, press or
server function), simply turn on the DHCP server
CLEAR. ‘Cancel Key Editing Lose Changes?’
function, and you will not need to set up the network
appears when you press RETURN or while the
manually. You must set up the network as described
cursor is placed in the leftmost position on the
below only when you have connected this receiver to a
alphanumeric character entry screen. In this case,
server without the DHCP server function. Before you set
press ENTER to exit from the screen and RETURN to
up the network, consult with your ISP or the network
return to the screen.
manager for the required settings. It is advisory that you
also refer to the operation manual supplied with your
1
network component.
SLEEP
DIMMER
ANALOG
IP Address
ATT
The IP address to be entered must be defined within the
SR
+
following ranges. If the IP address defined is beyond the
following ranges, you cannot play back audio files stored
D.ACCESS
CLASS
on components on the network or listen to Internet radio
CLEAR
DISC
+
10
stations.
Class A: 10.0.0.1 to 10.255.255.254
Class B: 172.16.0.1 to 172.31.255.254
ENTER
Class C: 192.168.0.1 to 192.168.255.254
Subnet Mask
TV CONTROL
In case an xDSL modem or a terminal adapter is directly
connected to this receiver, enter the subnet mask
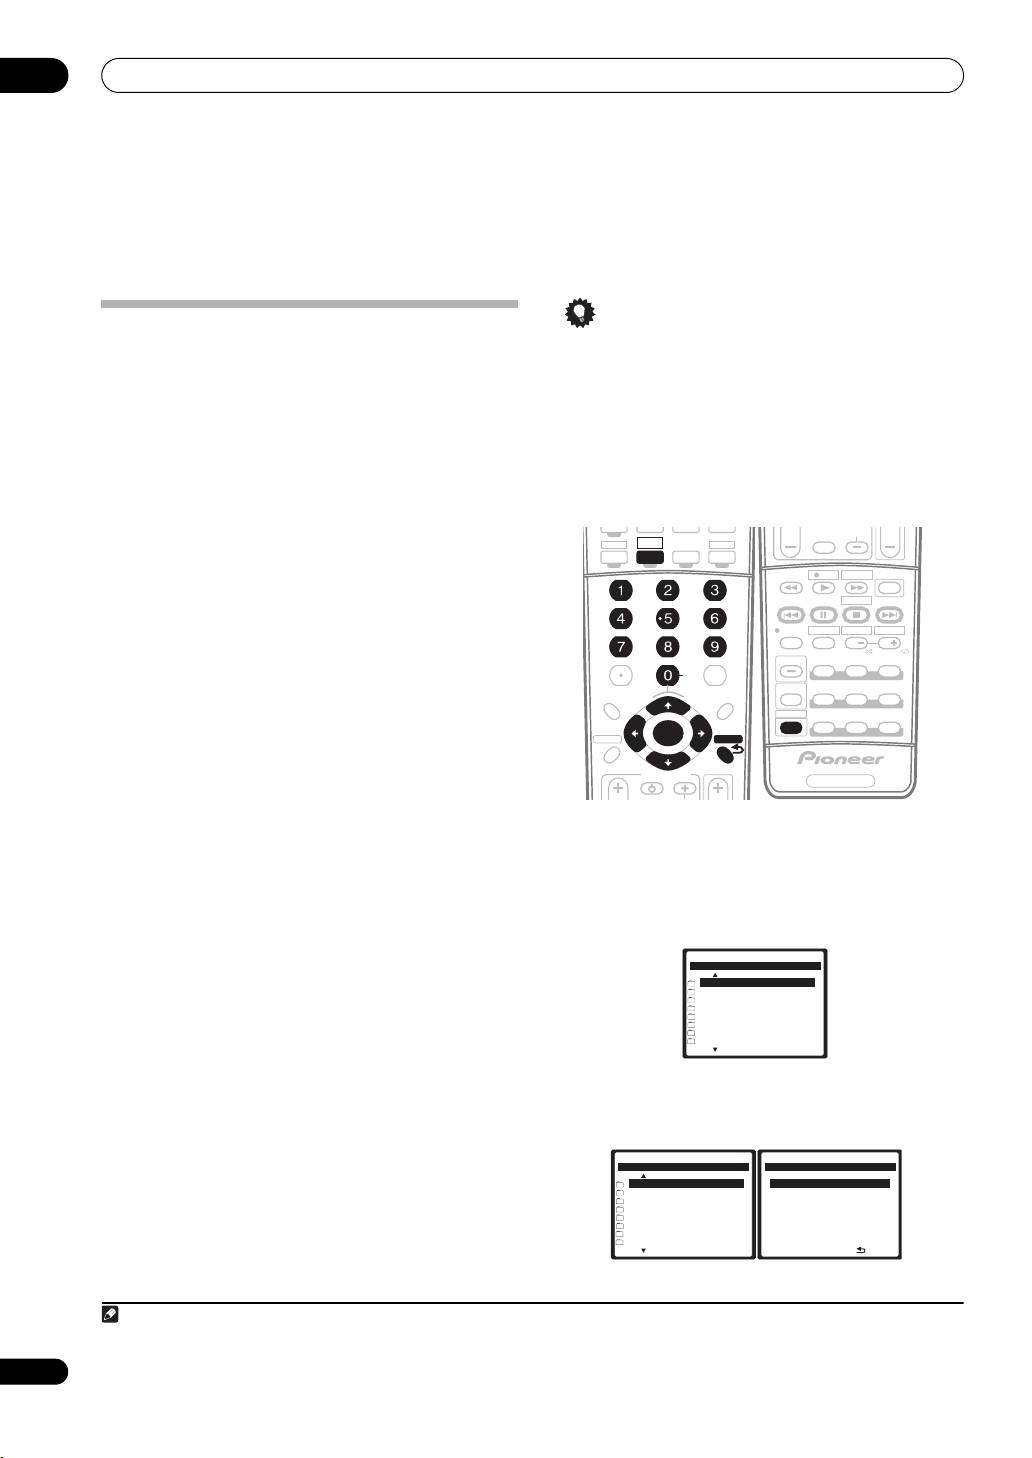
1 Press
HOME MEDIA GALLERY
(press
iPod
while
provided by your ISP on paper. In most of the cases, enter
you press and hold
SHIFT
) to select
HMG
as the input
255.255.255.0.
source.
Gateway IP
It may take several seconds for this receiver to access the
In case a gateway (router) is connected to this receiver,
network. The following screen appears when the Home
enter the corresponding IP address.
Media Gallery is selected as the input source.
DNS Server Preferred/DNS Server Alternate
In case there is only one DNS server address provided by
your ISP on paper, enter ‘DNS Server Preferred’. In case
there are more than two DNS server addresses, enter
‘DNS Server Alternate’ in the other DNS server address
field.
Proxy Hostname/Proxy Port
This setting is required when you connect this receiver to
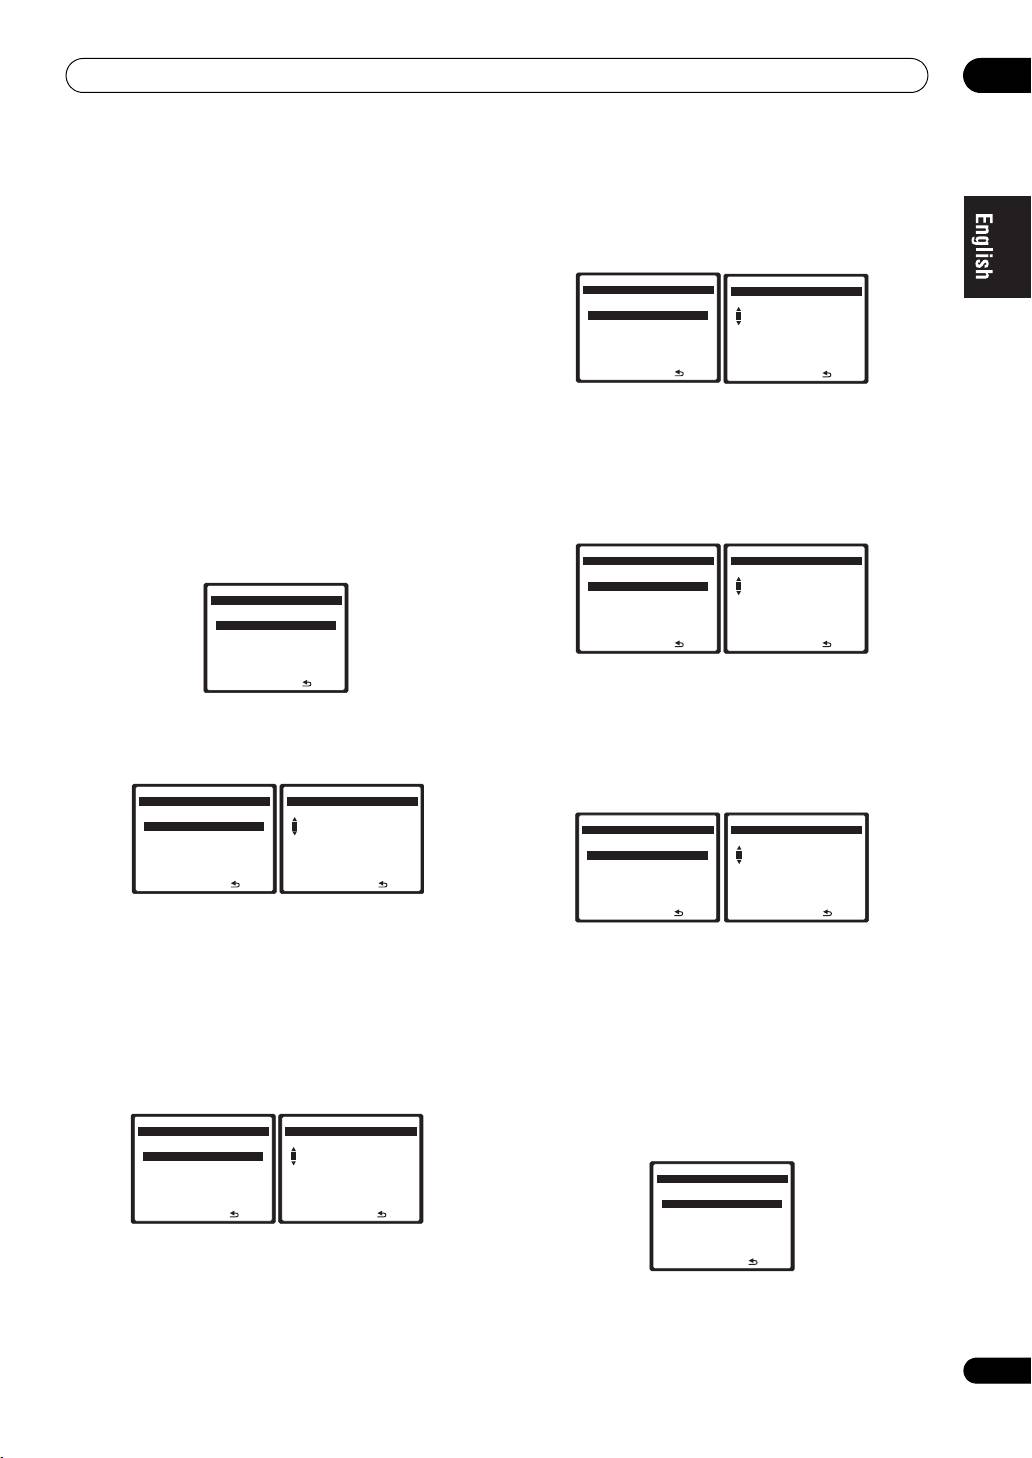
2 Select ‘
Setup
’ and press
ENTER
to confirm your
the Internet via a proxy server. Enter the IP address of
selection.
your proxy server in the ‘Proxy Hostname’ field. Also,
The
‘
Setup
’
screen appears.
enter the port number of your proxy server in the ‘Proxy
Port’ field.
Note
1 In case you make changes to the network configuration without the DHCP server function, make the corresponding changes to the network settings of
this receiver.
10
En
DVD TV
BD TV
CTRL
DVR1
ST ST
INPUT
TV CH
VOL
HOME MEDIA
DVR2
GALLERY
ZONE2/3
i Pod
TUNER
RECEIVER
JUKEBOX
GENRE
T.DISP
STEREO/
STATUSSTATUS
SIGNAL SEL
SBch
F.S.SURR
CH
ENTER
LEVEL
A PARAMETER
V PARAMETER
MULTI OPE
TOP MENU
MENU T.EDIT
TUNE
SHIFT
MCACC S.DIRECT
BAND
SETUPSETUP
RETURNRETURN
PROGRAM
TUNE
PTY SEARCH
GUIDE
INPUT
VSX_LX70_net.book Page 10 Tuesday, June 5, 2007 10:47 AM
TV VOL
SELECT
TV/DTV
REC
INFO
A
MUTE
MPX
EON
REC STOP
BCDE
AUDIO SUBTITLE
HDD
DVD
DISP
CH
CH
PHOTO
THX
STANDARD
ADV.SURR
PHASE
RECEIVER
Home Media G
-
55.0
dB
Top Menu
Pre 001/009
[ USB ]
[ Internet Radio ]
[ Neural Music Direct ]
[ Server1 ]
[ Server2 ]
[ Server3 ]
[ Server4 ]
[ Favorites ]
Next
Home Media G
-
55.0
dB
Home Media G
-
55.0
dB
Home Menu
Setup
Pre 009/009
[ Setup ]
[ Information ]
[ USB ]
[ Network Setup ]
[ Internet Radio ]
[ Neural Music Direct ]
[ Server1 ]
[ Server2 ]
[ Server3 ]
[ Server4 ]
Next
Return
VSX_LX70_net.book Page 11 Tuesday, June 5, 2007 10:47 AM
Setup
04
3 Select ‘
Network Setup
’ and press
ENTER
to confirm
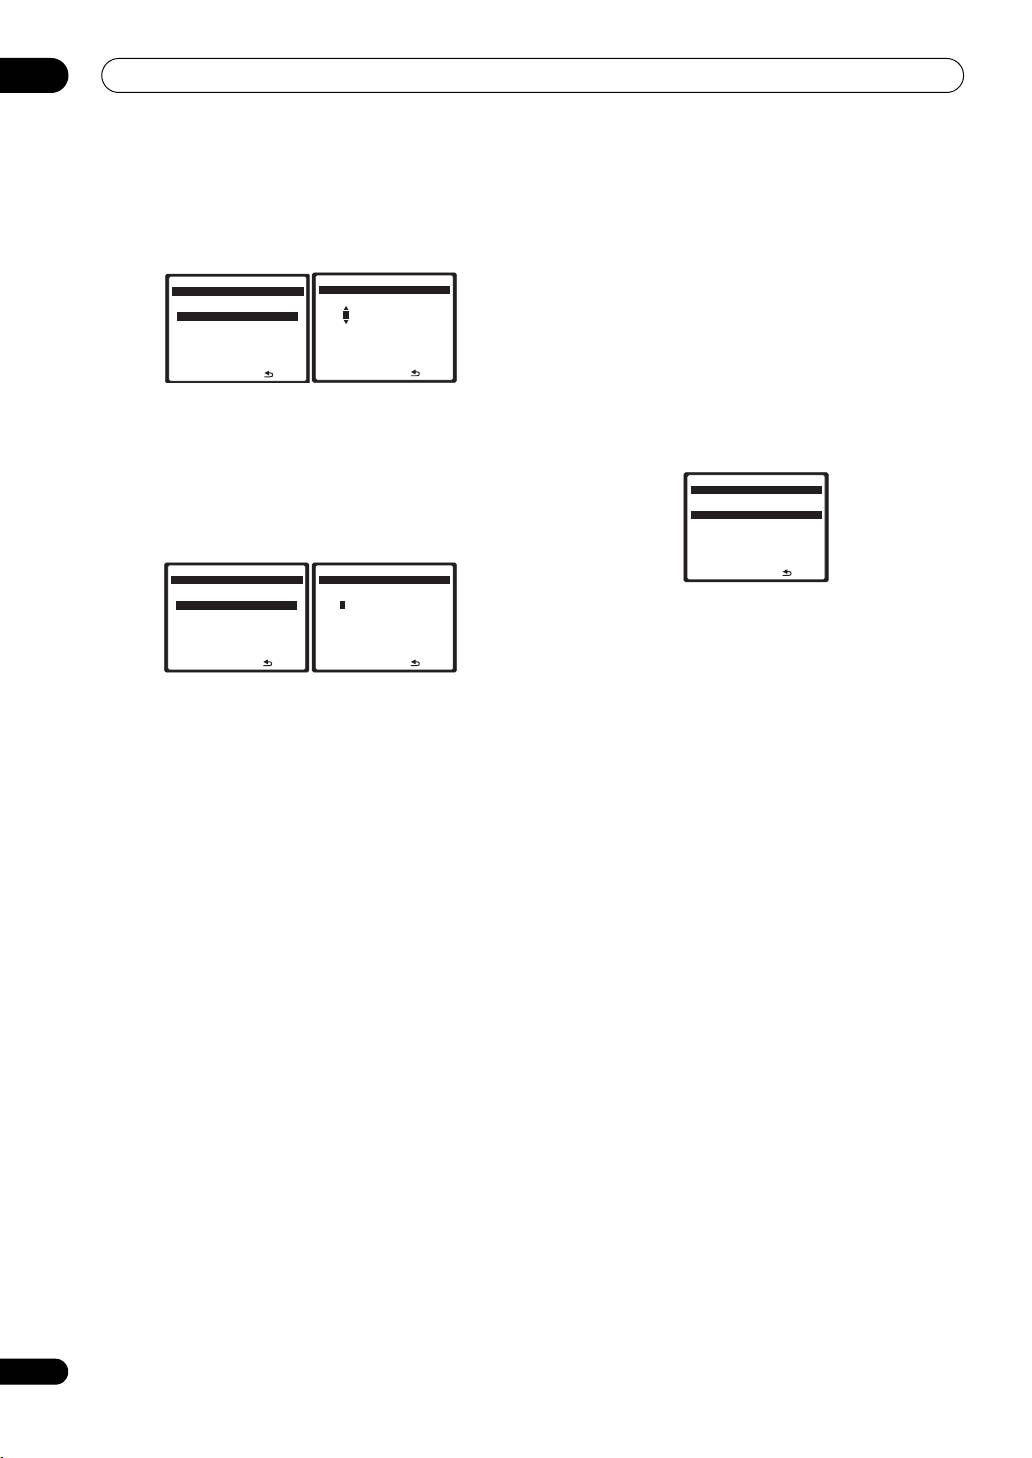
10 Select ‘
Change
’ and press
ENTER
to confirm your
your selection.
selection.
The ‘Network Connection’ screen appears.
The ‘Edit Gateway’ screen appears.
4Either ‘
Network Found
’ or ‘
No Network Found
’
Home Media G
-
55.0
dB
Home Media G
-
55.0
dB
Gateway IP
Edit Gateway IP
appears. Check the network connection status and
[ 0.0.0.0 ]
press
ENTER
.
1
[ Change ]
192:168:000:001
• Network Found – Connected to a component on the
network.
Return
Return
• No Network Found – Not connected to a
component on the network.
11 Enter the default gateway IP address.
The ‘Network IP Settings’ screen appears.
After entry, press the button or ENTER. The ‘DNS
Server Preferred’ screen appears.
5 Select ‘
Static IP Address
’ and press
ENTER
to
confirm your selection.
12 Select ‘
Change
’ and press
ENTER
to confirm your
The ‘IP Address’ screen appears. When you select
selection.
‘Automatic (DHCP)’, the network is automatically set up,
The ‘Edit DNS Preferred’ screen appears.
and you do not need to follow Steps 6 to 15. Proceed with
Home Media G
-
55.0
dB
Home Media G
-
55.0
dB
Step 16.
DNS Server Preferred
Edit DNS Preferred
[ 0.0.0.0 ]
1
[ Change ]
192:168:000:001
Home Media G
-
55.0
dB
Network IP Settings
[ Automatic (DHCP) ]
[ Static IP Address ]
Return
Return
Return
13 Enter the preferred DNS server address.
After entry, press the button or ENTER. The ‘DNS
6 Select ‘
Change
’ and press
ENTER
to confirm your
Server Alternate’ screen appears.
selection.
14 Select ‘
Change
’ and press
ENTER
to confirm your
The ‘Edit IP Address’ screen appears.
selection.
Home Media G
-
55.0
dB
Home Media G
-
55.0
dB
The ‘Edit DNS Alternate’ screen appears.
IP Address
Edit IP Address
[ 0.0.0.0 ]
1
[ Change ]
192:168:000:002
Home Media G
-
55.0
dB
Home Media G
-
55.0
dB
DNS Server Alternate
Edit DNS Alternate
[ 0.0.0.0 ]
1
[ Change ]
192:168:000:001
Return
Return
Return
Return
7 Enter the IP address.
Press the / buttons to select a number and the /
15 Enter the alternate DNS server address.
buttons to move the cursor. After you select the last
In case there is only one DNS address, you do not need
number, press the button or ENTER. You can also use
to enter the alternate DNS server adddress.
the numeric buttons to enter a number. The ‘Subnet
After entry, press the button or ENTER. The ‘Enable
Mask’ screen appears.
Proxy Server’ screen appears.
8 Select ‘
Change
’ and press
ENTER
to confirm your
16 Select ‘
No
’ or ‘
Yes
’ for the proxy server setting to
selection.
deactivate or activate the proxy server.
The ‘Edit Subnet Mask’ screen appears.
In case you select ‘No’, proceed with Step 21. In case you
select ‘Yes’, on the other hand, proceed with Step 17. The
Home Media G
-
55.0
dB
Home Media G
-
55.0
dB
Subnet Mask
Edit Subnet Mask
‘Proxy Hostname’ screen appears.
[ 0.0.0.0 ]
1
[ Change ]
255:255:255:000
Home Media G
-
55.0
dB
Enable Proxy Server
[ No ]
[ Yes ]
Return
Return
9 Enter the subnet mask.
Return
After entry, press the button or ENTER. The ‘Gateway
IP’ screen appears.
11
En
VSX_LX70_net.book Page 12 Tuesday, June 5, 2007 10:47 AM
04
Setup
17 Select ‘
Change
’ and press
ENTER
to confirm your
Checking the network settings
selection.
You can check the following network settings of this
The ‘Edit Proxy Hostname’ screen appears.
receiver: the MAC address, the IP address, the gateway
IP address, the proxy server, the Subnet mask, and the
Home Media G
-
55.0
dB
Home Media G
-
55.0
dB
Proxy Hostname
Edit Proxy Hostname
firmware version (for the Home Media Gallery of this
[ ]
[ Change ]
1
proxy
receiver).
Before proceeding with the following steps, check
whether you have followed Steps 1 and 2 on page 10.
Return
Return
3 Select ‘
Information
’ and press
ENTER
to confirm
18 Enter the address of your proxy server or the
your selection.
domain name.
The ‘Firmware Version’ (for the Home Media Gallery of
After entry, press the button or ENTER. The ‘Proxy
this receiver) screen appears.
Port’ screen appears.
Home Media G
-
55.0
dB
Firmware Version
19 Select ‘
Change
’ and press
ENTER
to confirm your
selection.
3.5.4.6292
The ‘Edit Proxy Port’ screen appears.
Home Media G
-
55.0
dB
Home Media G
-
55.0
dB
Return
Proxy Port
Edit Proxy Port
[ 0 ]
[ Change ]
1
8080
(The version of the illustration is not the latest.)
4 Check the network settings.
Press the / buttons to switch the display. Each time
Return
Return
you press the / buttons, the display switches as
20 Enter the port number of your proxy server.
follows.
Use the numeric buttons to enter the port number. After
Firmware Version MAC Address
entry, press the button or ENTER. The ‘Setting OK?’
IP Address Gateway IP Proxy Server
screen appears.
Subnet Mask
21 Press
ENTER
to complete the network setup
5 Press
RETURN
.
procedure.
The ‘Setup’ screen appears. To return to the ‘Top Menu’
The ‘Top Menu’ screen appears.
screen, press RETURN again.
12
En
Table of contents
- Features
- Connection
- Playback with Home Media Gallery
- Setup
- Additional information
- Caractéristiques
- Raccordement
- Lecture avec Home Media Gallery
- Paramétrage
- Informations supplémentaires
- Merkmale
- Anschlüsse
- Wiedergabe mit Home Media Gallery
- Einstellung
- Zusätzliche Informationen
- Funzionalità
- Collegamento
- Riproduzione con Home Media Gallery
- Impostazione
- Informazioni aggiuntive
- Características
- Conexión
- Reproducción con Home Media Gallery
- Configuración
- Información adicional
- Kenmerken
- Aansluiting
- Afspelen met Home Media Gallery
- Instellingen
- Aanvullende informatie
- Особенности
- Подключение
- Воспроизведение через Home Media Gallery
- Настройка
- Дополнительная информация


