Indesit K6G20 W: The Various Features of the Cooker
The Various Features of the Cooker: Indesit K6G20 W
The Various Features of the Cooker
The various functions featured with the oven are control-
Since the cooker is equipped with a safety device which
led using the knobs and buttons on the control panel.
makes it necessary to keep the knob pressed in for about
6 seconds after the burner has been lighted to allow the
Control Knobs for the Gas Burners on the Hob
gas to pass through freely.
The position of the gas burner controlled by each one of the
The cooking temperature is selected by matching the de-
knobs is shown by a symbol of a solid ring:
•. To light one of
sired temperature with the reference mark on the panel; the
the burners, hold a lighted match or lighter near the burner.
complete range of temperatures is shown below.
Press down and turn the corresponding knob in the counter-
Min • 160 • 180 • 220 Max
clockwise direction to the maximum
setting. Each burner
150 155 170 200 250
can be operated at its maximum, minimum or intermediate
The temperature setting is then automatically reached and
power. Shown on the knob are the different symbols for off
•
kept constant by the thermostat (which is controlled by
(the knob is on this setting when the symbol lines up with the
the knob).
reference mark on the control panel), for maximum
and
Important Notice: In the event the flame for the oven or the
minimum
.
grill accidentally goes out, turn the control knob for the burner
To obtain these settings, turn the knob counter-clockwise
to the off position and do not relight the burner for at least
with respect to the off position. To turn off the burner, turn the
one minute.
Notice: Never use the bottom shelf and never place any-
knob clockwise until it stops (corresponding again with the
•
thing on the bottom of the oven when it is in operation
symbol).
because this could damage the enamel. Always place your
cookware (dishes, aluminium foil, etc. etc.) on the grid
Electronic Lighting of the Hob Burners
provided with the appliance inserted especially along the
Some models are equipped with instant electronic lighting of
oven guides.
the gas burners located on the hob, which can be identified
by the presence of an igniter device (see detail D). This de-
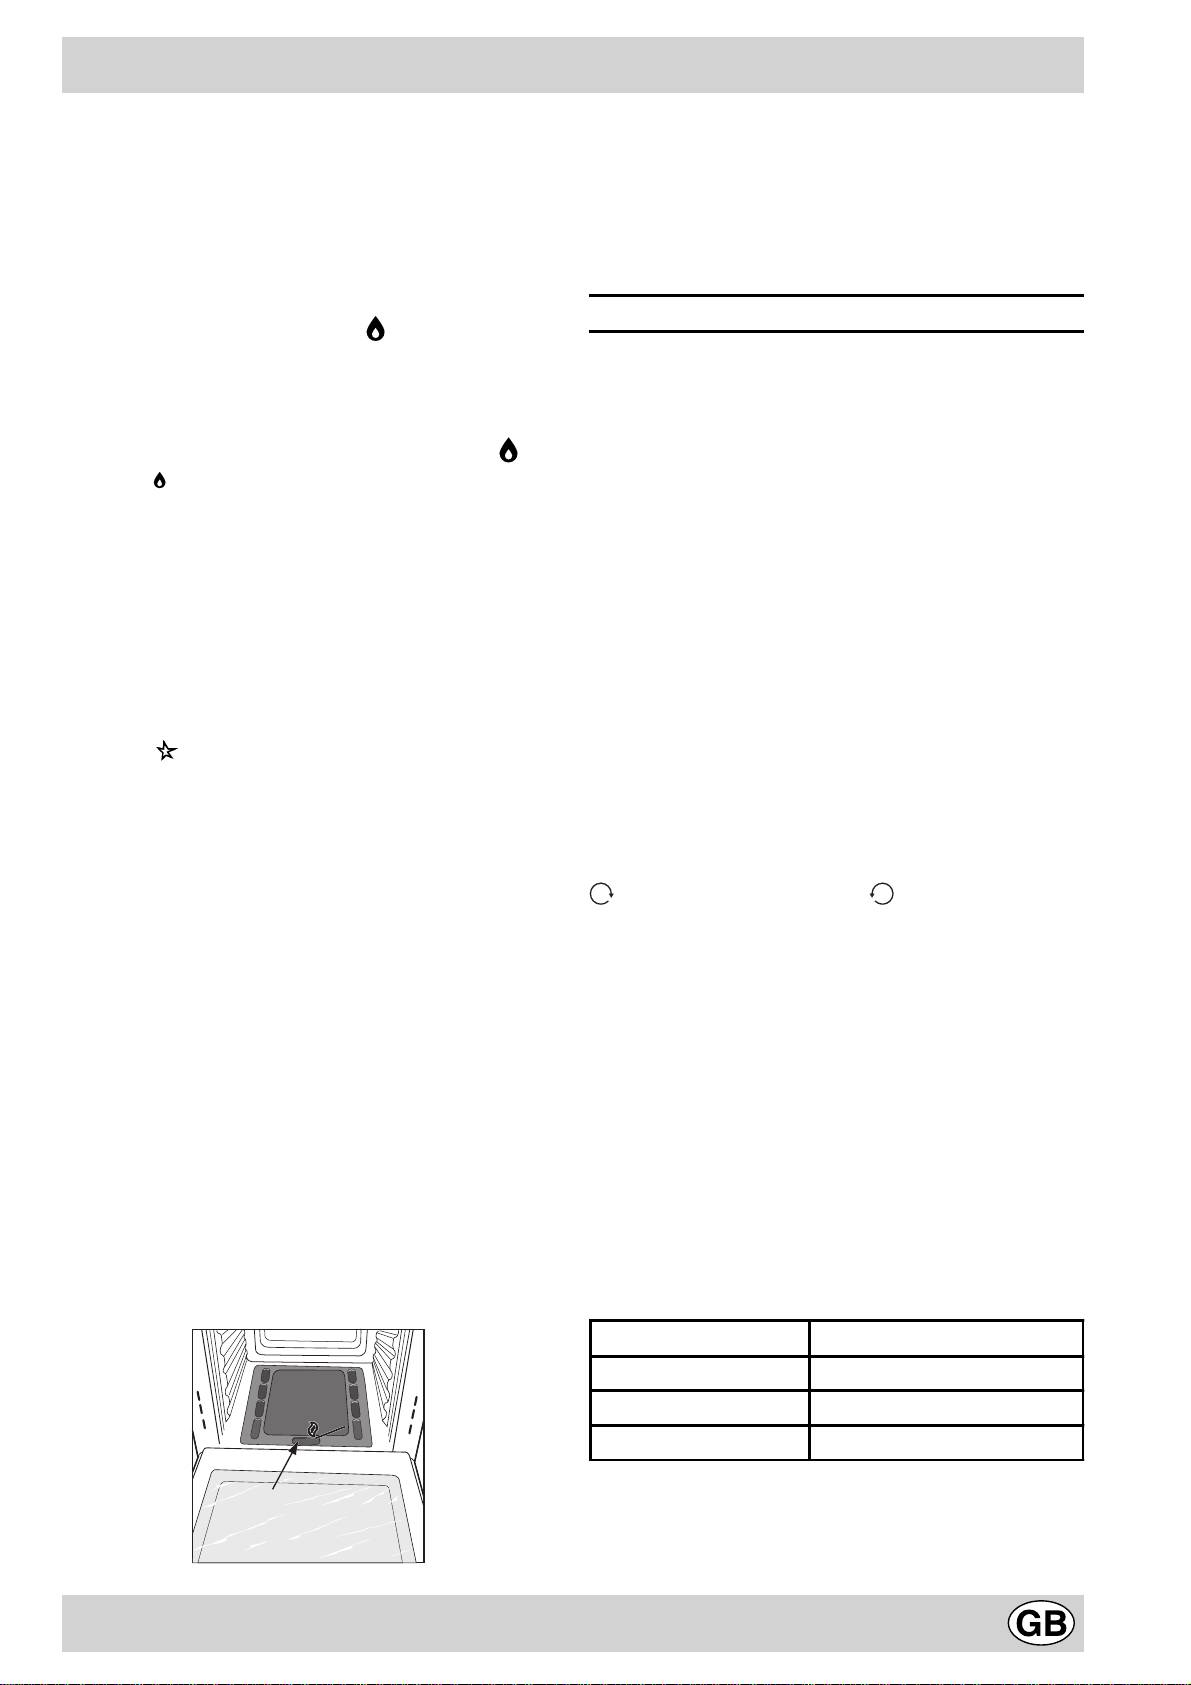
Oven Light Button (O)
vice is activated by lighting pressing on the “L” button, identi-
This button is marked by the
3 symbol and switches on the
fied by the
symbol. To turn on a burner, simply press the
light inside the oven so that you can monitor the cooking
“L” button and then press while, at the same time, pressing
process without opening the door.
in and turning the control knob for the burner in the anti-
Timer
clockwise direction until the burner lights. To light the burner
To use the timer, it must be wound using the "P" knob.
immediately, it is recommended that the button be
Turn the knob almost one full turn in the clockwise direction
pressed first and then the knob turned.
. Then, turn the knob back , and set the time by
Notice: The first time you use your appliance, we recom-
positioning the number (minutes) on the knob dial beneath
mend that you set the thermostat to the highest setting
the mark on the control panel.
and leave the oven on for about half an hour with nothing
Caution
in it, with the oven door shut. Then, open the oven door
Keep children away from the oven door when in use be-
and let the room air. The odour that is often detected dur-
cause it becomes very hot.
ing this initial use is due to the evaporation of substances
used to protect the oven during storage and until it is in-
Practical Advice on Using the Burners
stalled.
To use the burners as efficiently as possible, some basic
guidelines should be followed:
• Use cookware that is the right size for each burner (see
Oven Control Knob (M)
table) in order to prevent the flame from spreading be-
This knob allows you to select the various features of the
yond the bottom of the cookware.
oven and to set the most appropriate cooking tempera-
• Only use cookware with flat bottoms.
ture from among those indicated on the knob itself (be-
tween Min and Max).
• As soon as the boiling point is reached, turn the knob to
To light the oven burner, hold a lighted match or lighter near
the lowest setting.
the "F" hole and, at the same time, press down and turn the
• Always use lids with pots and pans.
oven knob counter-clockwise to the Max setting.
Burner ø Cookware diameter (cm)
Fast (R) 24 - 26
Semi Fast (S) 16 - 20
Auxiliary (A) 10 - 14
N.B.: On models equipped with a reduction grid, the grid
F
should only be used with the auxiliary burner when
cookware with a diameter of less than 12 cm is used.
19
Оглавление
- Avvertenze
- Installazione
- Caratteristiche dei bruciatori ed ugelli
- La cucina con forno gas
- Le diverse funzioni presenti nella cucina
- Consigli pratici per la cottura
- Consigli pratici per la cottura al forno
- Manutenzione ordinaria e pulizia della cucina
- Important
- Installation
- Burner and Nozzle Characteristics
- Cooker with Gas Oven
- The Various Features of the Cooker
- Practical Cooking Advice
- Practical Cooking Advice for the Oven
- Routine Maintenance and Cleaning
- Ïðåäóïðåæäåíèÿ
- Èíñòðóêöèè ïî ìîíòàæó
- Õàðàêòåðèñòèêè ãàçîâûõ ãîðåëîê è ôîðñóíîê
- Òåõíè÷åñêèå õàðàêòåðèñòèêè
- Ðàçíûå ôóíêöèè êóõîííîé ïëèòû
- Ïðàêòè÷åñêèå ñîâåòû ïî ïðèãîòîâëåíèþ áëþä
- Ðåãóëÿðíîå òåõíè÷åñêîå îáñëóæèâàíèå è ÷èñòêà êóõîííîé ïëèòû
- Ïðàêòè÷åñêèå ñîâåòû ïî ïðèãîòîâëåíèþ áëþä â äóõîâîì øêàôó
- Merloni Elettrodomestici
