Pioneer DJM-900SRT: Connecting to the control panel Connecting this unit and computer
Connecting to the control panel Connecting this unit and computer: Pioneer DJM-900SRT
Table of contents
- Contents
- Before start
- Installing the software
- Installation Procedure (Windows) Installing the Serato DJ software Installation procedure (Mac OS X)
- Installation Procedure (Windows) Installation procedure (Mac OS X) 9 Log in.
- 11 Read the terms of the license agreement carefully, and if you agree, click [Agree].
- Connections Rear panel
- Connecting input terminals Connecting output terminals
- Connecting to the control panel Connecting this unit and computer
- Operation Control Panel
- Basic Operation
- Advanced Operations About PRO DJ LINK Using the QUANTIZE function
- Using the FADER START function Using the SOUND COLOR FX function Using the BEAT EFFECT function Using the LINK MONITOR function
- Operating DJ software using the MIDI function Operating the [X-PAD]
- Operating an external MIDI sequencer
- Types of effects Types of SOUND COLOR FX effects Types of BEAT EFFECT
- MIDI assignment map Category
- Category
- Changing the settings About the auto standby function About the talk over function Setting preferences About the setting utility software
- Adjusting the buffer size (when using Windows ASIO) Setting the audio data output from this unit to the computer Checking the version of the driver software Checking the latest information on the driver software
- Additional information Troubleshooting
- Block Diagram
- Acquiring the manual About trademarks and registered trademarks
- Specifications
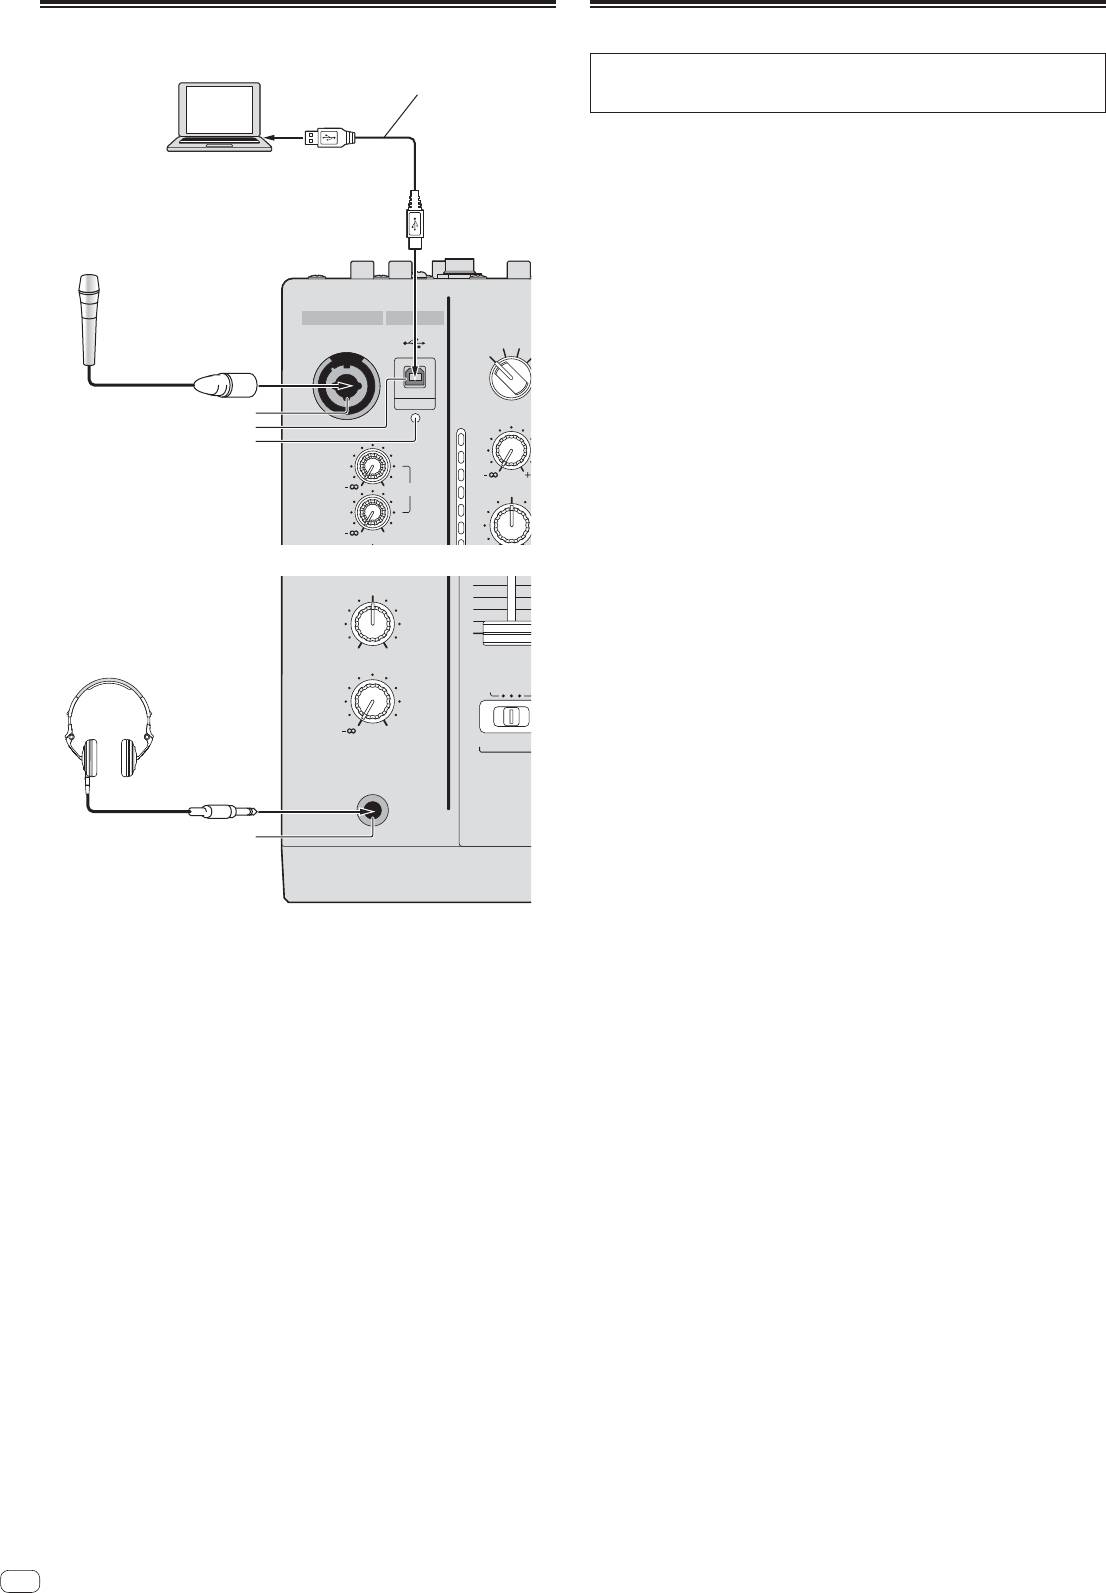
Connecting to the control panel
12
En
B
CD/ LINE PHO
DIGITAL
TRIM
OVER
10
MIC 1
7
0
LEVEL
4
HI
MIC 2
2
0
1
MIXING
CUE
MASTER
LEVEL
A THRU
0
PHONES
0
Connecting this unit and computer
Be sure to connect using the
For instructions on operating in combination with Serato DJ, see the “Quick Start
Computers
included USB cable.
Guide – Serato DJ Edition”. For details, see Downloading the latest versions of the
operating instructions and the Quick Start Guide - Serato DJ Edition (p.28).
1 Connect this unit to your computer via a USB cable.
This unit functions as an audio device conforming to the ASIO standards.
This operation does not work with computers that do not support USB 2.0.
When using ASIO-compatible applications, [USB DECK 3], [USB DECK 1], [USB
DECK 2] and [USB DECK 4] can be used as inputs.
When using DirectX-compatible applications, only [USB DECK 3] can be used as
the input.
The computer’s recommended operating environment depends on the DJ appli-
cation. Be sure to check the recommended operating environment for the DJ
application you are using.
MIC USB
Microphones
When another USB audio device is connected to the computer at the same time,
MIC1
it may not operate or be recognized normally.
We recommend only connecting the computer and this unit.
When connecting the computer and this unit, we recommend connecting
directly to this unit’s USB port.
1
2
2 Press [POWER] button.
3
Turn on the power of this unit.
For Windows
— The message [Installing device driver software] may appear when this
unit is first connected to the computer or when it is connected to a different
USB port on the computer. Wait a while until the message [Your devices
are ready for use] appears.
When installing on Windows XP
— [Can Windows connect to Windows Update to search for software?]
may appear while the installation is in progress. Select [No, not this time],
then click [Next] to continue installation.
— [What do you want the wizard to do?] may appear while the instal-
lation is in progress. Select [Install the software automatically
(Recommended)], then click [Next] to continue installation.
— If [Windows Security] appears on the screen while the installation is in
progress, click [Install this driver software anyway] and continue with the
installation.
Headphones
4
1 MIC1 terminal (page 15)
Connects a microphone here.
2 USB terminal (page 12)
Connect the computer.
3 USB connection indicator
Lights when signals are being exchanged with the computer.
4 PHONES terminal (page 14)
Connect headphones here.
