Asus T3-PH2X: Internal components Removing the cover
Internal components Removing the cover: Asus T3-PH2X
Table of contents
- Front/Rear panel features
- Internal components Removing the cover
- Lifting the power supply unit Installing a CPU Installing an Intel CPU in the LGA775 package
- Installing an AMD CPU Installing the CPU fan and heatsink assembly Installing an Intel CPU heatsink and fan
- Installing an AMD CPU heatsink and fan Installing a DIMM
- Installing an expansion card Installing a hard disk drive
- Installing an optical drive Reinstalling the cover
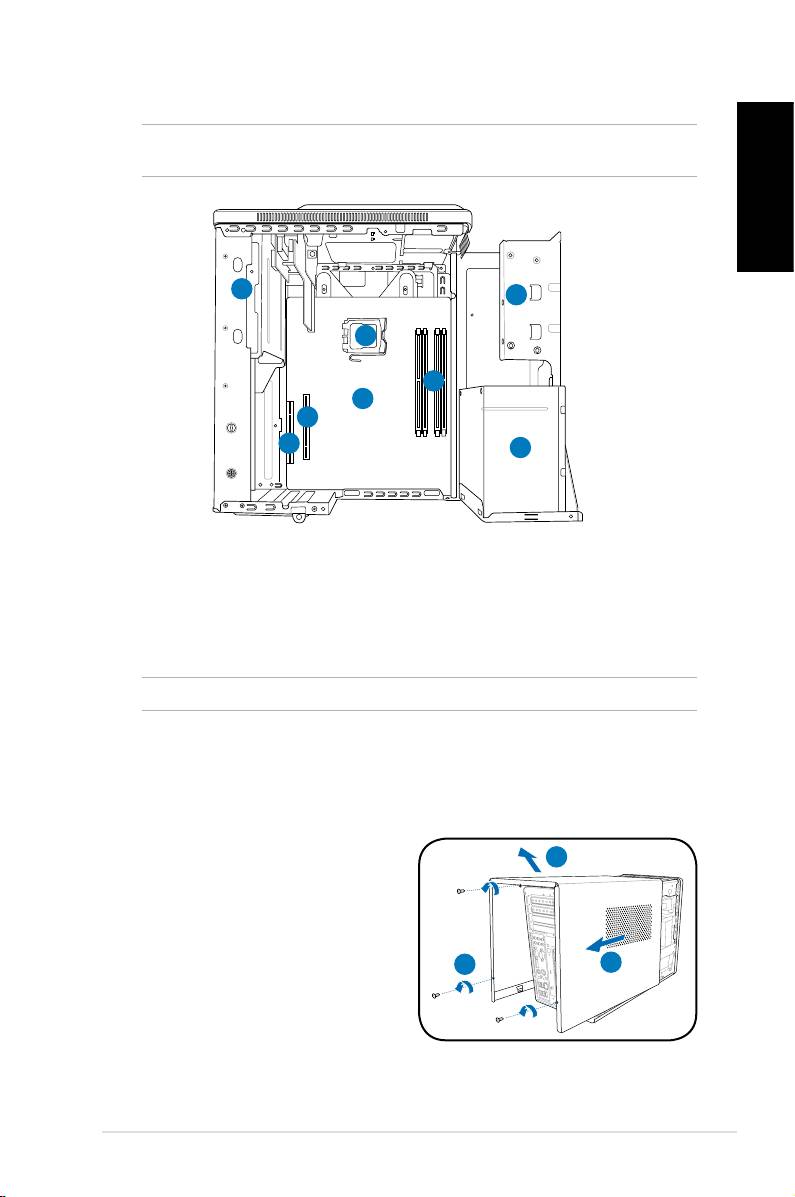
Internal components
NOTE: The illustration below shows the internal view of the system when you remove
the cover and lift the power supply unit.
English
1
2
5
4
6
7
8
3
1. 5.25-inch optical drive cage
5. CPU socket
2. 3.5-inch hard disk drive cage
6.* ASUS motherboard
3. Power supply unit
7. PCI Express x16 slot
4. DIMM sockets
8. PCI slot
NOTE: *Refer to the system User Guide for motherboard details.
Removing the cover
1. Remove the three cover screws on
3
the rear panel. Keep the screws for
later use.
2. Pull the cover toward the rear panel.
3. Lift the cover, then set it aside.
1
2
3Installation manual
Top 10 manuals
100.00
NZXT HALE90 1000W99.99
Samsung SM-R38099.97
AEG BSB 18C99.97
Dell 2700W99.97
Smeg KSEC70X99.96
Beurer HDE 4099.96
Pyramida KH 50 v.299.96
MSI CSM-H81M-P3299.96
AEG HR 562799.95
Melissa 640-048