Asus T3-PH2X: Installing an expansion card Installing a hard disk drive
Installing an expansion card Installing a hard disk drive: Asus T3-PH2X
Table of contents
- Front/Rear panel features
- Internal components Removing the cover
- Lifting the power supply unit Installing a CPU Installing an Intel CPU in the LGA775 package
- Installing an AMD CPU Installing the CPU fan and heatsink assembly Installing an Intel CPU heatsink and fan
- Installing an AMD CPU heatsink and fan Installing a DIMM
- Installing an expansion card Installing a hard disk drive
- Installing an optical drive Reinstalling the cover
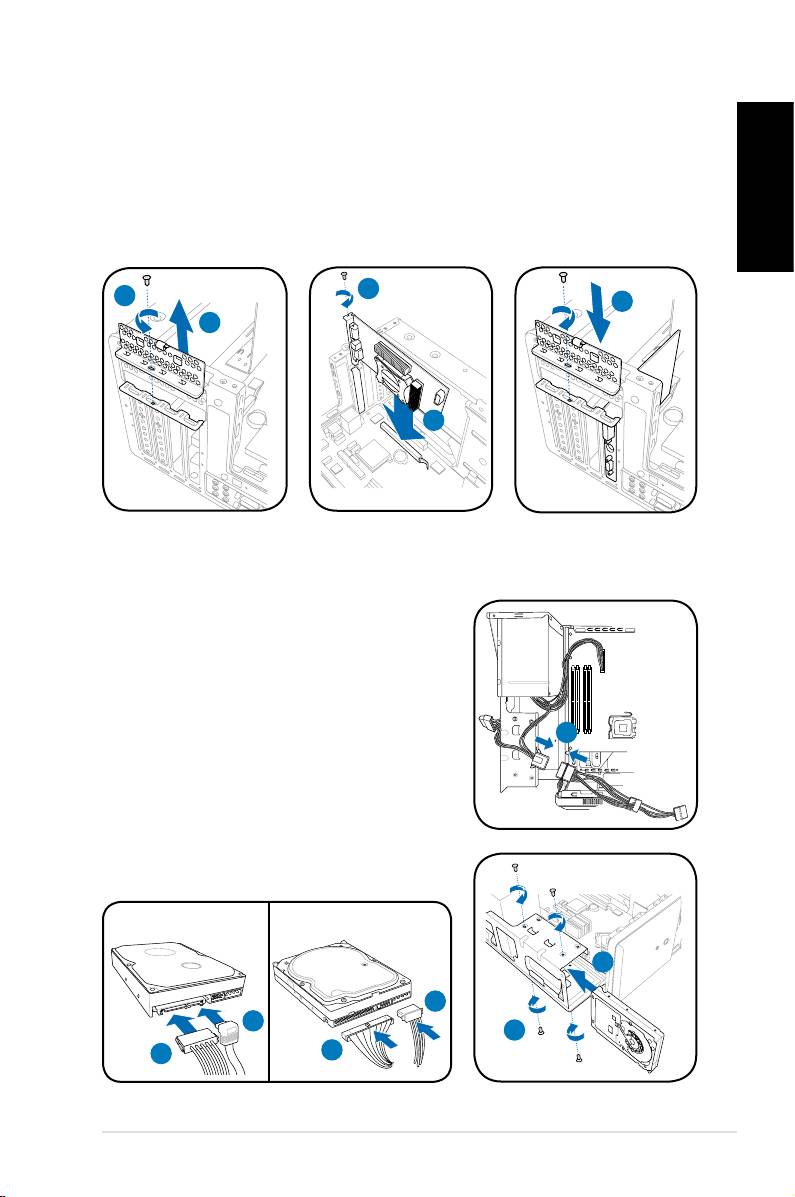
Installing an expansion card
1. Locate and remove one metal bracket lock screw.
2. Remove the metal bracket lock.
3. Alignthecardconnectorwiththeslot,thenpressrmly.
4. Secure the card with one screw.
English
5. Replace the metal braket lock, then secure it with one screw.
4
1
5
2
3
Installing a hard disk drive
1. Connect the SATA/IDE power cable to the
plug of the power supply unit.
2. Connect the SATA/IDE (2A) and power (2B)
plugs to the connectors at the back of the
SATA/IDE hard disk drives.
3. Locate the HDD tray.
1
4. Insert a hard disk drive (with the HDD PCB
facing the top of the chassis) to the tray,
then secure it with four screws.
5. Connect the SATA/IDE signal cable to the
SATA/IDE connector on the motherboard, and
tighten all the cables with the plastic coils.
SATA
IDE
4
2B
2A
4
2A
2B
7Installation manual
