Asus T3-PH2: Installing an AMD CPU heatsink and fan Installing a DIMM
Installing an AMD CPU heatsink and fan Installing a DIMM: Asus T3-PH2
Table of contents
- Front/Rear panel features
- Internal components Removing the cover
- Lifting the power supply unit Installing a CPU Installing an Intel CPU in the LGA775 package
- Installing an AMD CPU Installing the CPU fan and heatsink assembly Installing an Intel CPU heatsink and fan
- Installing an AMD CPU heatsink and fan Installing a DIMM
- Installing an expansion card Installing a hard disk drive
- Installing an optical drive Reinstalling the cover
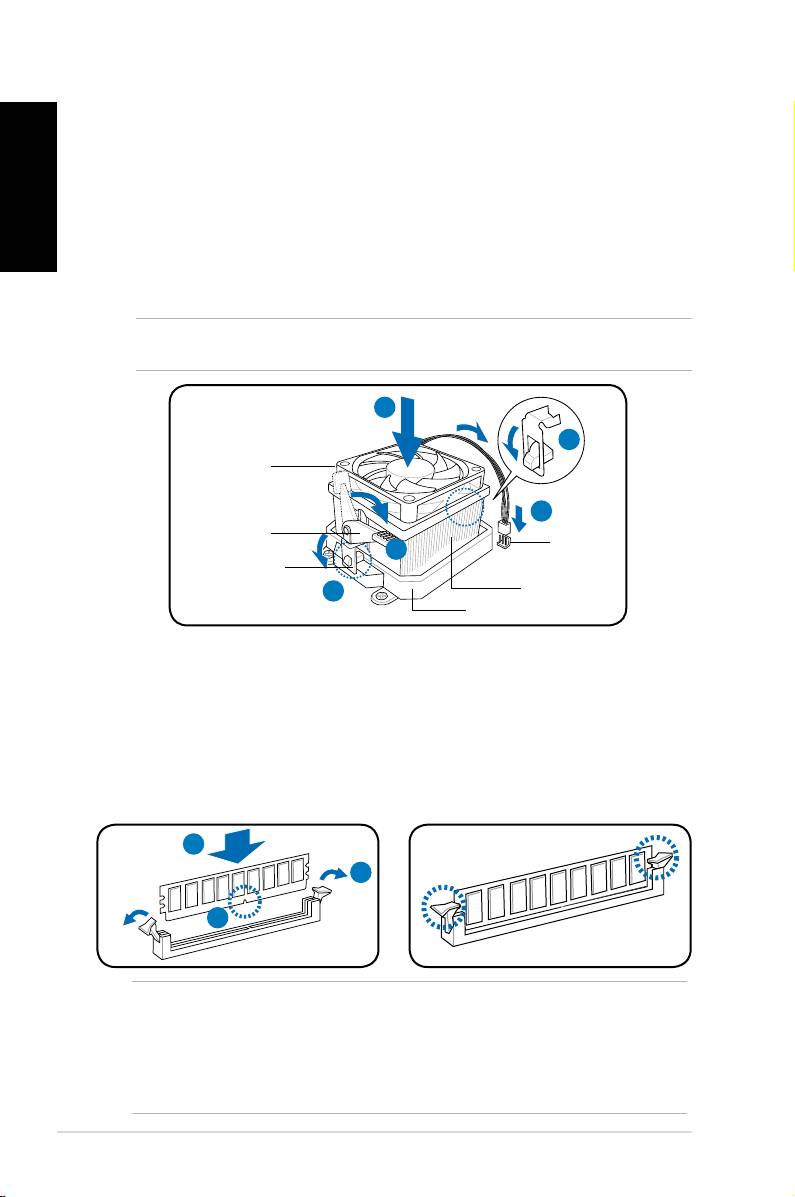
Installing an AMD CPU heatsink and fan
English
1. Place the heatsink on top of the installed CPU.
2. Attach one end of the retention bracket to the retention module base.
3. Attach the other end of the retention bracket (near the retention bracket lock)
to the retention module base until it clicks in place.
4. Push down the retention bracket lock on the retention mechanism to secure
the fan and heatsink to the module retention module base.
5. Connect the CPU fan cable to the connector on the motherboard.
CAUTION. Do not forget to connect the CPU fan connector! Hardware monitoring error
can occur if you fail to plug this connector.
1
2
CPU fan
5
Retention
CPU fan
bracket lock
4
connector
Retention bracket
3
CPU heatsink
Retention module base
Installing a DIMM
1. Locate the DIMM sockets in the motherboard.
2. Unlock a DIMM socket by pressing the retaining clips outward.
3. Align a DIMM on the socket such that the notch on the DIMM matches the
break on the socket.
4. Push the DIMM to the socket until the retaining clips snap inward.
4
2
3
CAUTION:
• Unplug the power supply before adding or removing DIMMs. Failure to do so may
cause damage to the motherboard and/or components.
• ADDRDIMMiskeyedwithanotchsothatittsinonlyonedirection.Donotforce
a DIMM into a socket to avoid damaging the DIMM.
6 Installation manual
