Asus T3-M2NC51PV: Installing an AMD CPU Installing the CPU fan and heatsink assembly
Installing an AMD CPU Installing the CPU fan and heatsink assembly: Asus T3-M2NC51PV
Table of contents
- Front/Rear panel features
- Internal components Removing the cover
- Lifting the power supply unit Installing a CPU
- Installing an AMD CPU Installing the CPU fan and heatsink assembly
- Installing an AMD CPU heatsink and fan Installing a DIMM
- Installing an expansion card Installing a hard disk drive
- Installing an optical drive Reinstalling the cover
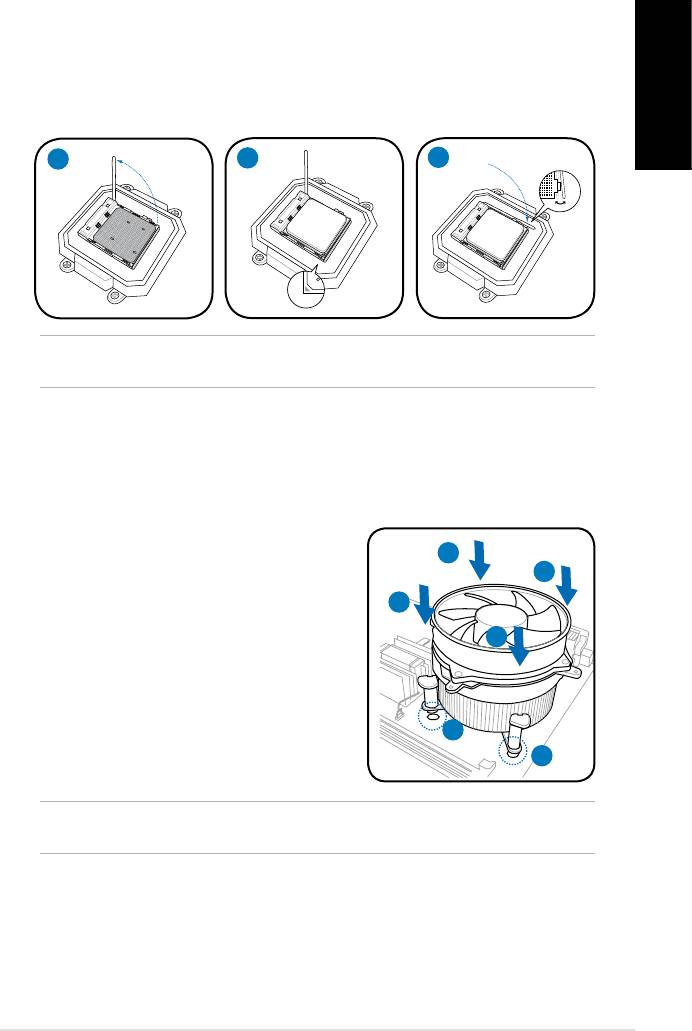
Installing an AMD CPU
1. Locate the CPU socket, then lift the socket lever to a 90º angle.
2. Install the CPU to the socket, making sure that the CPU corner with the gold
triangle matches the socket corner with a small triangle.
3. Push down the socket lever to secure the CPU.
English
1
2
3
CAUTION: Incorrect installation of the CPU into the socket may bend the pins and
severely damage the CPU.
Installing the CPU fan and heatsink assembly
®
Installing an Intel
CPU heatsink and fan
1. Place the heatsink on top of the installed
A
CPU, making sure that the four fasteners
B
match the holes on the motherboard.
B
2. Push down two fasteners at a time in a
diagonal sequence to secure the heatsink
A
and fan assembly in place.
3. When the fan and heatsink assembly is in
place, connect the CPU fan cable to the
connector on the motherboard.
1
1
CAUTION. Do not forget to connect the CPU fan connector! Hardware monitoring error
can occur if you fail to plug this connector.
5Installation manual


