Yamaha RX-397: PLAYING AND RECORDING
PLAYING AND RECORDING: Yamaha RX-397
PLAYING AND RECORDING
15
OPERA
T
ION
English
Extreme caution should be exercised when you play back CDs encoded in DTS.
If you play back a CD encoded in DTS on a DTS-incompatible CD player, you will only hear some unwanted noise that may damage
your speakers. Check whether your CD player supports CDs encoded in DTS. Also, check the sound output level of your CD player
before you play back a CD encoded in DTS.
1
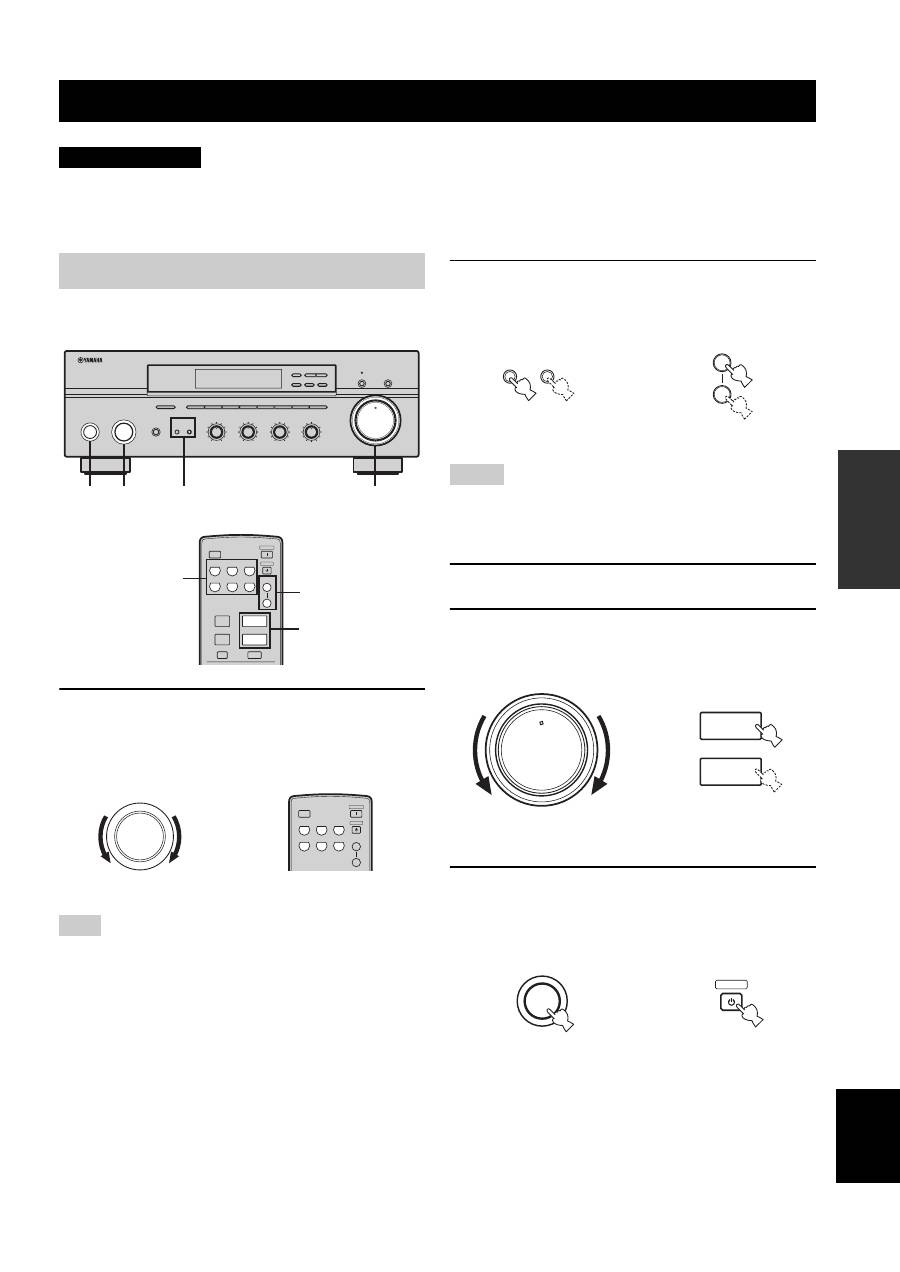
Rotate the INPUT selector on the front panel
(or press one of the input selector buttons on
the remote control) to select the desired
input source.
You cannot select any input source while the
TAPE MON
indicator lights up in the front panel display.
2
Press SPEAKERS A and/or SPEAKERS B on
the front panel or on the remote control to
select speakers A and/or speakers B.
• Both SPEAKERS A and B can be selected.
• Make sure that the IMPEDANCE SELECTOR switch is
correctly set (see page 10).
3
Play the source.
4
Rotate VOLUME on the front panel (or press
VOLUME +/– on the remote control) to adjust
the sound output level.
5
Press STANDBY/ON on the front panel again
(or press STANDBY on the remote control) to
finish using this unit and set it to the standby
mode.
PLAYING AND RECORDING
CAUTION
Playing a source
Note
STANDBY
/ON
INPUT
PHONES
BASS
SPEAKERS
TAPE MONITOR
PURE DIRECT
5
5
1
0
1
4
4
2
2
3
3
+
–
VOLUME
l
TUNING
h
FM/AM
EDIT
A/B/C/D/E
1
2
3
4
5
6
7
8
MEMORY
MAN'L/AUTO FM
TUNING MODE
AUTO/MAN'L
B
A
TREBLE
5
5
1
0
1
4
4
2
2
3
3
+
–
BALANCE
5
5
1
0
1
4
4
2
2
3
3
R
L
LOUDNESS
5
7
1
FLAT
6
4
8
2
10
–30dB
3
9
1
2
5
4
0
12
12
2
8
4
∞
20
20
60
60
26
26
40
40
16
16
-dB
-dB
CD/DVD
PHONO
TUNER
MD
TAPE
AUX
SPEAKERS
B
A
POWER
STANDBY
+
–
u
d
SLEEP
A/B/C/D/E
MUTE
PRESET
VOLUME
2
4
1
INPUT
CD/DVD
PHONO
TUNER
MD
TAPE
AUX
SPEAKERS
B
A
POWER
STANDBY
SLEEP
Front panel
Remote control
or
Notes
SPEAKERS
B
A
A
B
SPEAKERS
or
Front panel
Remote control
0
12
12
2
8
4
∞
20
20
60
60
26
26
40
40
16
16
-dB
-dB
VOLUME
+
–
VOLUME
Remote control
Front panel
or
STANDBY
/ON
STANDBY
Remote control
Front panel
or
16
PLAYING AND RECORDING
■
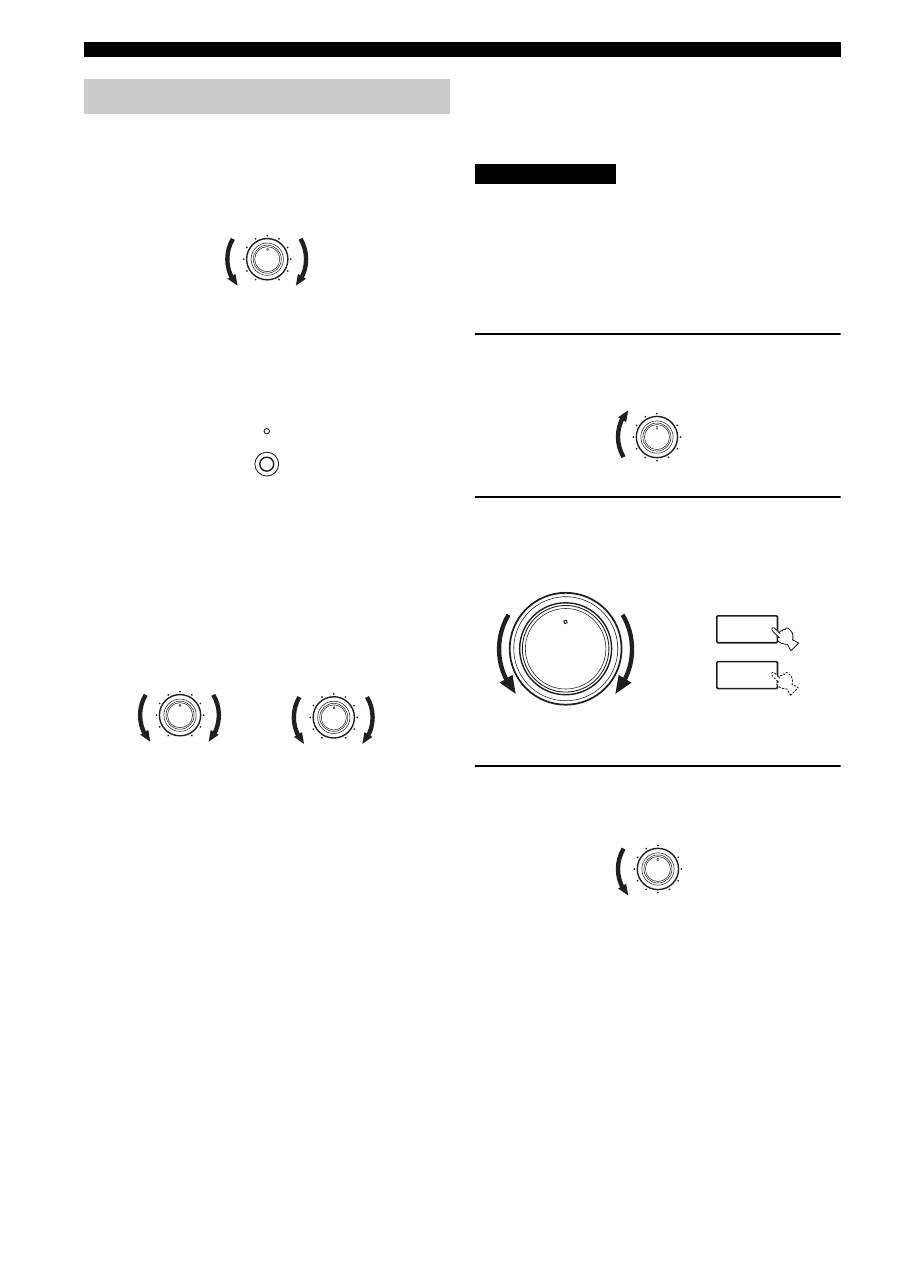
Adjusting the BALANCE control
Adjusts the sound output balance of the left and right
speakers to compensate for sound imbalance caused by
speaker locations or listening room conditions.
■
Using the PURE DIRECT button
Routes input signals from your audio sources so that the
input signals bypass the BASS, TREBLE, BALANCE and
LOUDNESS controls, thus eliminating any alterations to
the audio signals and creating the purest possible sound.
■
Adjusting the BASS and TREBLE
controls
Adjust the high and low frequency response.
BASS
Increases or decreases the low frequency response.
TREBLE
Increases or decreases the high frequency response.
■
Adjusting the LOUDNESS control
Retains a full tonal range at any volume level, thus
compensating for the human ears’ loss of sensitivity to
high and low-frequency ranges at a low volume level.
If the PURE DIRECT button is turned on with the LOUDNESS
control set at a certain level, the input signals bypass the
LOUDNESS control, resulting in a sudden increase in the sound
output level. To prevent your ears or the speakers from being
undesirably damaged, be sure to press the PURE DIRECT button
AFTER lowering the sound output level or AFTER checking that
the LOUDNESS control is properly set.
1
Rotate the LOUDNESS control on the front
panel to the FLAT position.
2
Rotate VOLUME on the front panel (or press
VOLUME +/– on the remote control) to set the
sound output level to the loudest listening
level that you would listen to.
3
Rotate the LOUDNESS control until the
desired volume is obtained.
Adjusting the tonal quality
BALANCE
5
5
1
0
1
4
4
2
2
3
3
R
L
PURE DIRECT
BASS
5
5
1
0
1
4
4
2
2
3
3
+
–
TREBLE
5
5
1
0
1
4
4
2
2
3
3
+
–
CAUTION
LOUDNESS
5
7
1
FLAT
6
4
8
2
10
–30dB
3
9
0
12
12
2
8
4
∞
20
20
60
60
26
26
40
40
16
16
-dB
-dB
VOLUME
+
–
VOLUME
Remote control
Front panel
or
LOUDNESS
5
7
1
FLAT
6
4
8
2
10
–30dB
3
9
17
PLAYING AND RECORDING
OPERA
T
ION
English
• The VOLUME, BASS, TREBLE, BALANCE and
LOUDNESS controls and the PURE DIRECT buttons have no
effect on the source being recorded.
• Check the copyright laws in your country to record from
records, CDs, radio, etc. Recording copyright-protected
material may infringe on copyright laws.
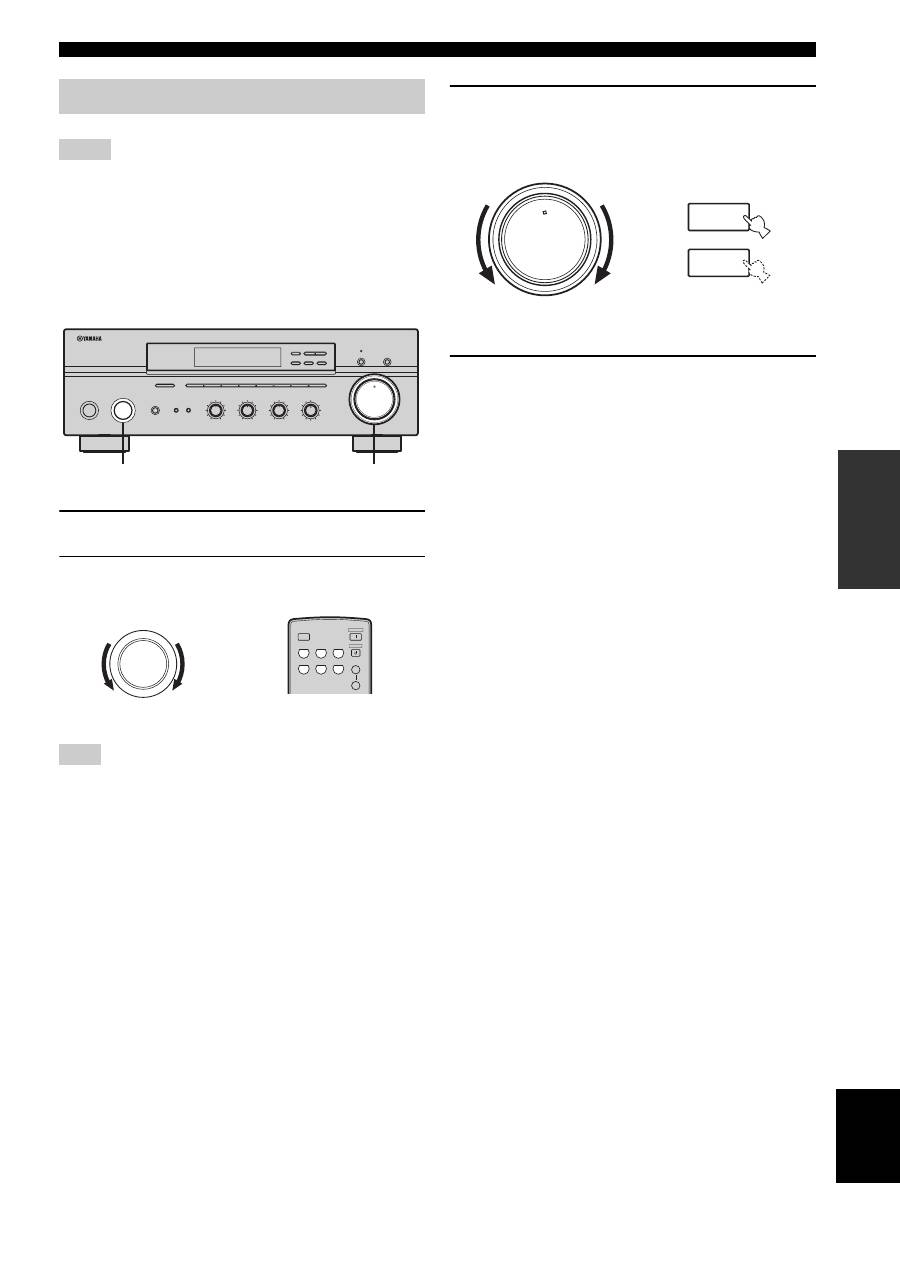
1
Play the selected source to record from.
2
Rotate the INPUT selector on the front panel
to select the source you want to record from.
You cannot select any input source while the
TAPE MON
indicator lights up in the front panel display.
3
Rotate VOLUME on the front panel (or press
VOLUME +/– on the remote control) to adjust
the sound output level of the selected source
to record from.
4
Begin recording on the MD recorder, the tape
deck or the VCR connected to this unit.
y
If the 3-head tape deck is used for recording, you can monitor the
sound of recording by pressing TAPE MONITOR.
Recording a source
Notes
Note
STANDBY
/ON
INPUT
PHONES
BASS
TAPE MON
PURE DIRECT
5
5
1
0
1
4
4
2
2
3
3
+
–
VOLUME
l
TUNING
h
FM/AM
EDIT
A/B/C/D/E
1
2
3
4
5
6
7
8
MEMORY
MAN'L/AUTO FM
TUNING MODE
AUTO/MAN'L
TREBLE
5
5
1
0
1
4
4
2
2
3
3
+
–
BALANCE
5
5
1
0
1
4
4
2
2
3
3
R
L
LOUDNESS
5
7
1
FLAT
6
4
8
2
10
–30dB
3
9
SPEAKERS
B
A
2
3
0
12
12
2
8
4
∞
20
20
60
60
26
26
40
40
16
16
-dB
-dB
INPUT
CD/DVD
PHONO
TUNER
MD
TAPE
AUX
SPEAKERS
B
A
POWER
STANDBY
SLEEP
Front panel
Remote control
or
0
12
12
2
8
4
∞
20
20
60
60
26
26
40
40
16
16
-dB
-dB
VOLUME
+
–
VOLUME
Remote control
Front panel
or
18
PLAYING AND RECORDING
Use this feature to automatically set this unit to the
standby mode after a certain amount of time. The sleep
timer is useful when you are going to sleep while this unit
is playing or recording a source. The sleep timer also
automatically turns off any external components
connected to the AC OUTLET(S).
The sleep timer can only be set with the remote control.
1
Press one of the input selector buttons on
the remote control to select an input source.
2
Start playback on the selected input source.
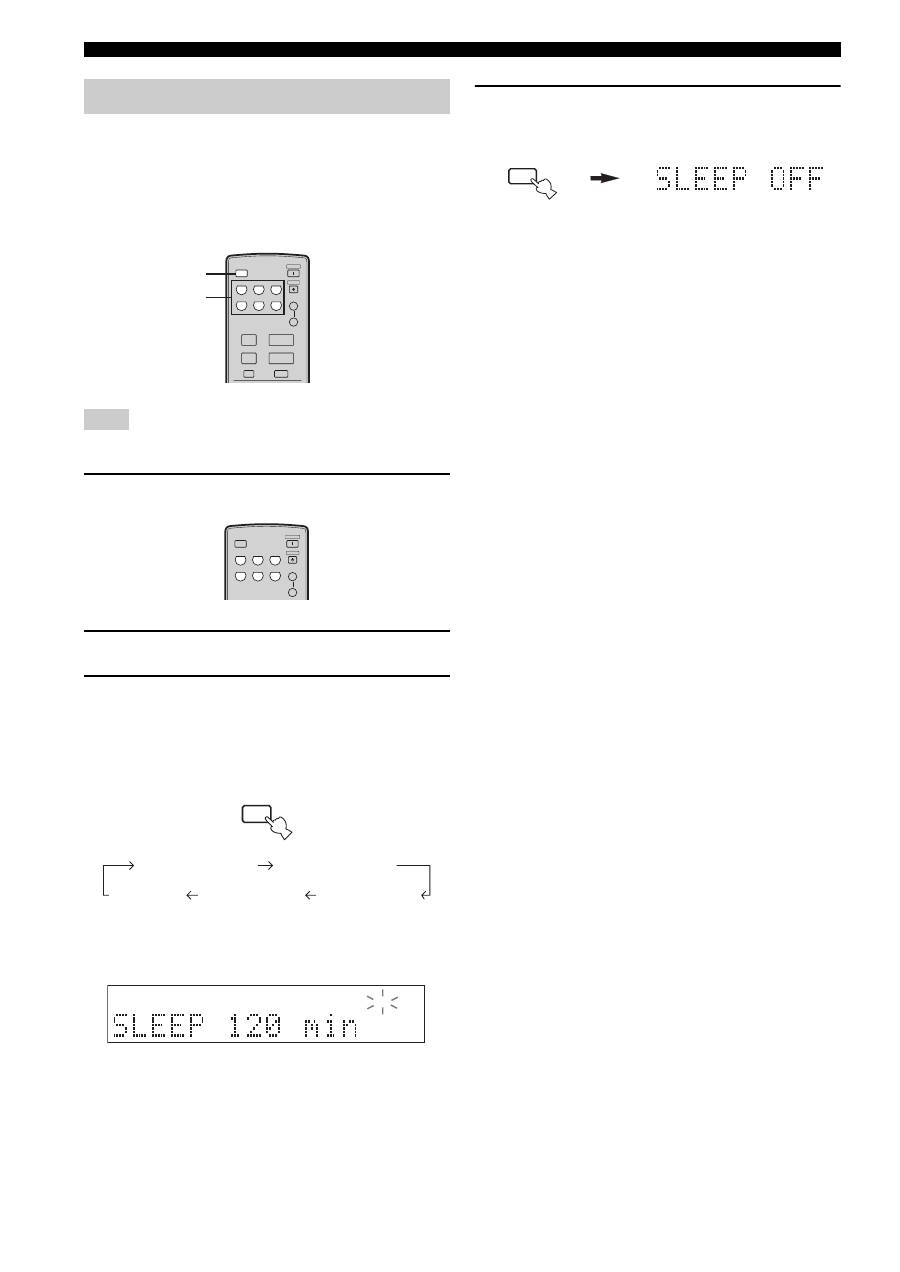
3
Press SLEEP repeatedly to set the amount of
time before this unit is set to the standby
mode.
Each time you press SLEEP, the front panel display
changes as shown below.
The SLEEP indicator flashes while switching the
amount of time for the sleep timer.
4
Press SLEEP repeatedly so that SLEEP OFF
appears in the front panel display.
After a few seconds, SLEEP OFF disappears from the
front panel display, and the SLEEP indicator turns
off.
y
The sleep timer setting can also be canceled by pressing
STANDBY on the remote control (or STANDBY/ON on the front
panel) to set this unit to the standby mode.
Using the sleep timer
Note
CD/DVD
PHONO
TUNER
MD
TAPE
AUX
SPEAKERS
B
A
POWER
STANDBY
+
–
u
d
SLEEP
A/B/C/D/E
MUTE
PRESET
VOLUME
1
3
CD/DVD
PHONO
TUNER
MD
TAPE
AUX
SPEAKERS
B
A
POWER
STANDBY
SLEEP
SLEEP
SLEEP 120 min
SLEEP 90 min
SLEEP 60 min
SLEEP 30 min
SLEEP OFF
SLEEP
SLEEP
19
PLAYING AND RECORDING
OPERA
T
ION
English
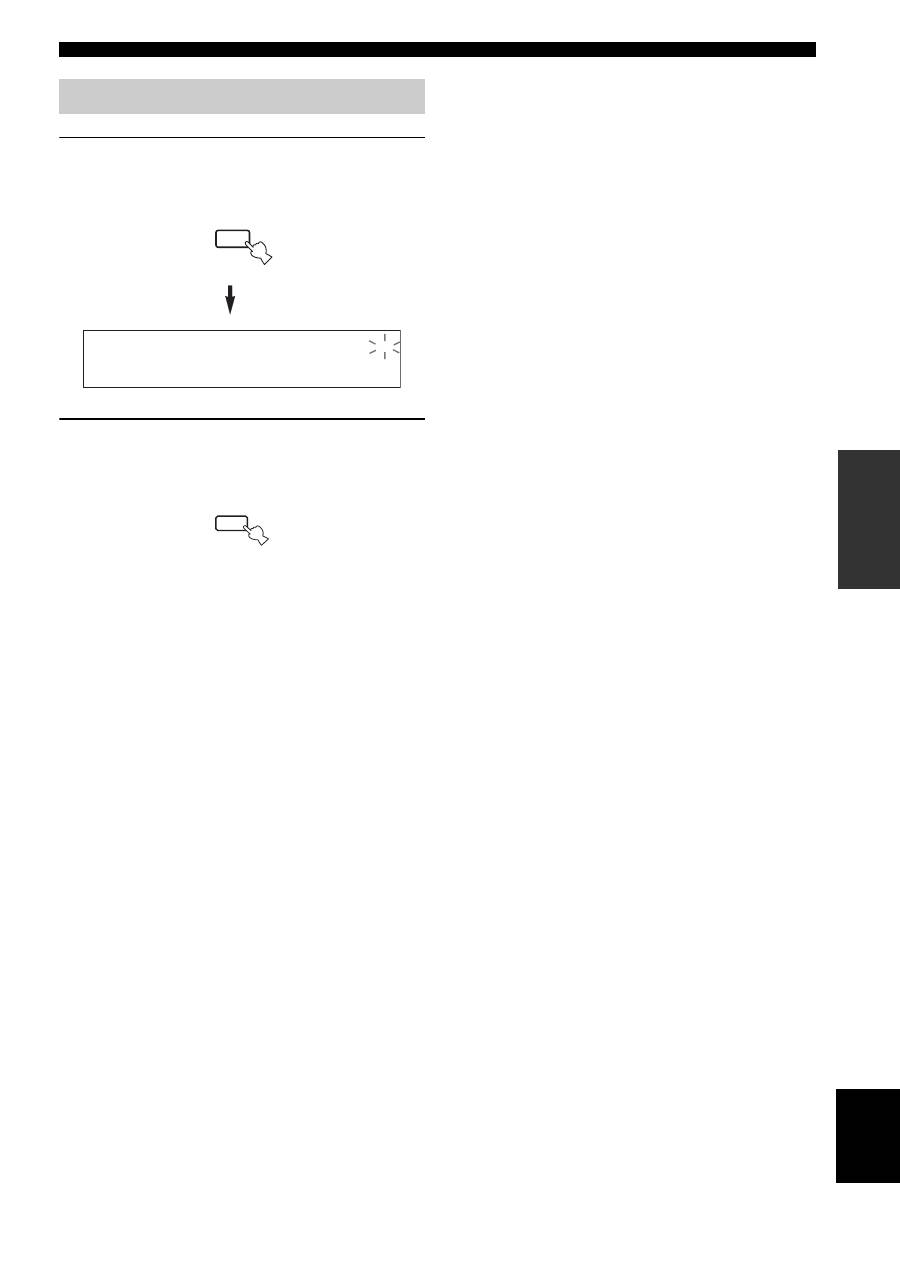
1
Press MUTE on the remote control to mute
the sound output.
The MUTE indicator flashes in the front panel
display.
2
Press MUTE on the remote control again to
resume the sound output.
The MUTE indicator disappears from the front panel
display.
Muting the sound output
MUTE
MUTE
MUTE
Оглавление
- CAUTION: READ THIS BEFORE OPERATING YOUR UNIT.
- CONTENTS
- FEATURES SUPPLIED ACCESSORIES
- CONTROLS AND FUNCTIONS
- CONNECTIONS
- PLAYING AND RECORDING
- FM/AM TUNING
- RADIO DATA SYSTEM (EUROPE MODEL ONLY)
- ADVANCED SETUP
- TROUBLESHOOTING
- SPECIFICATIONS
- ATTENTION: VEUILLEZ LIRE CE QUI SUIT AVANT D’UTILISER L’APPAREIL.
- TABLE DES MATIÉRES
- PARTICULARITÉS ACCESSOIRES FOURNIS
- COMMANDES ET FONCTIONS
- RACCORDEMENTS
- LECTURE ET ENREGISTREMENT
- SYNTONISATION FM/AM
- RADIO DATA SYSTEM (MODÈLE POUR L’EUROPE SEULEMENT)
- RÉGLAGES APPROFONDIS
- GUIDE DE DÉPANNAGE
- CARACTÉRISTIQUES TECHNIQUES
- VORSICHT: VOR DER BEDIENUNG DIESES GERÄTES DURCHLESEN.
- INHALTSVERZEICHNIS
- MERKMALE MITGELIEFERTES ZUBEHÖR
- BEDIENUNGSELEMENTE UND IHRE FUNKTIONEN
- ANSCHLÜSSE
- WIEDERGABE UND AUFNAHME
- UKW-/MW-ABSTIMMUNG
- RADIO DATA SYSTEM (NUR MODELL FÜR EUROPA)
- WEITERFÜHRENDES SETUP
- STÖRUNGSBESEITIGUNG
- TECHNISCHE DATEN
- OBSERVERA: LÄS DETTA INNAN ENHETEN TAS I BRUK.
- INNEHÅLL
- EGENSKAPER MEDFÖLJANDE TILLBEHÖR
- BESKRIVNING AV REGLAGE M.M.
- ANSLUTNINGAR
- LJUDÅTERGIVNING OCH INSPELNING
- FM/AM-MOTTAGNING
- RADIO DATA SYSTEM (ENDAST MODELLER FÖR EUROPA)
- AVANCERAD INSTÄLLNING
- FELSÖKNING
- TEKNISKA DATA
- LET OP: LEES HET VOLGENDE VOOR U DIT TOESTEL IN GEBRUIK NEEMT.
- INHOUD
- KENMERKEN MEEGELEVERDE ACCESSOIRES
- BEDIENINGSORGANEN EN FUNCTIES
- AANSLUITINGEN
- WEERGAVE EN OPNAME
- AFSTEMMEN OP FM/AM RADIO
- RADIO DATA SYSTEEM (ALLEEN MODELLEN VOOR EUROPA)
- GEAVANCEERDE SETUP
- OPLOSSEN VAN PROBLEMEN
- TECHNISCHE GEGEVENS
- ПРЕДУПРЕЖДЕНИЕ: ВНИМАТЕЛЬНО ИЗУЧИТЕ ЭТО ПЕРЕД ИСПОЛЬЗОВАНИЕМ АППАРАТА.
- СОДЕРЖАНИЕ
- ОПИСАНИЕ ПОСТАВЛЯЕМЫЕ АКСЕССУАРЫ
- СИСТЕМЫ УПРАВЛЕНИЯ И ФУНКЦИИ
- СОЕДИНЕНИЯ
- ВОСПРОИЗВЕДЕНИЕ И ЗАПИСЬ
- НАСТРОЙКА ДИАПАЗОНА ЧМ/AM
- СИСТЕМА РАДИОДАННЫХ RADIO DATA SYSTEM (ТОЛЬКО МОДЕЛЬ ДЛЯ ЕВРОПЫ)
- ДОПОЛНИТЕЛЬНЫЕ НАСТРОЙКИ
- ВОЗМОЖНЫЕ НЕИСПРАВНОСТИ И СПОСОБЫ ИХ УСТРАНЕНИЯ
- ТЕХНИЧЕСКИЕ ХАРАКТЕРИСТИКИ
