Yamaha RX-V663 Black: инструкция
Раздел: Видео Аудио Фото Оборудование
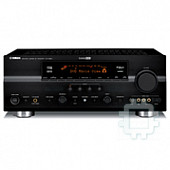
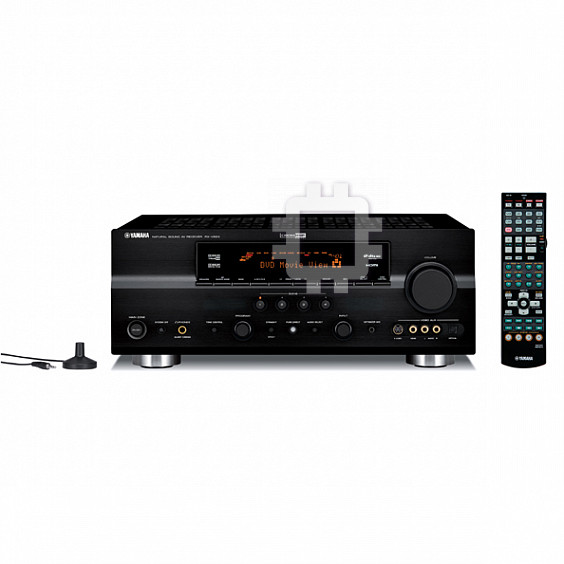
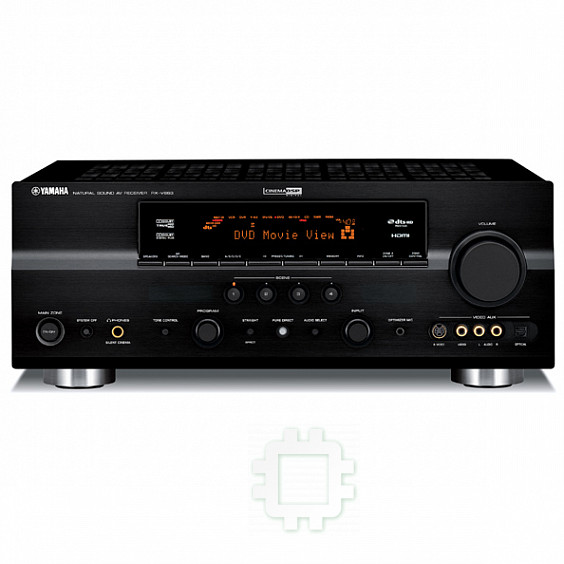
Тип: Ресивер
Характеристики, спецификации
Инструкция к Ресиверу Yamaha RX-V663 Black

YAMAHA ELECTRONICS CORPORATION, USA
6660 ORANGETHORPE AVE., BUENA PARK, CALIF. 90620, U.S.A.
YAMAHA CANADA MUSIC LTD.
135 MILNER AVE., SCARBOROUGH, ONTARIO M1S 3R1, CANADA
YAMAHA ELECTRONIK EUROPA G.m.b.H.
SIEMENSSTR. 22-34, 25462 RELLINGEN BEI HAMBURG, GERMANY
YAMAHA ELECTRONIQUE FRANCE S.A.
RUE AMBROISE CROIZAT BP70 CROISSY-BEAUBOURG 77312 MARNE-LA-VALLEE CEDEX02, FRANCE
YAMAHA ELECTRONICS (UK) LTD.
YAMAHA HOUSE, 200 RICKMANSWORTH ROAD WATFORD, HERTS WD18 7GQ, ENGLAND
YAMAHA SCANDINAVIA A.B.
J A WETTERGRENS GATA 1, BOX 30053, 400 43 VÄSTRA FRÖLUNDA, SWEDEN
YAMAHA MUSIC AUSTRALIA PTY. LTD.
LEVEL 1, 99 QUEENSBRIDGE STREET, SOUTHBANK, VIC 3006, AUSTRALIA
©
RX-V663_F-cv.fm Page 1 Tuesday, January 29, 2008 9:47 AM
F
SYLVANIA 0027, 0062, 0108,
MINOLTA 0069
RCA 0062, 0069, 0087,
HUGHES NETWORK SYSTEMS
MITSUBISHI 0068, 0070, 0094,
0069
0267, 0834, 1062,
0070, 1808
1087
HYPSON 0099
0108, 0834
SYMPHONIC 0027
TMK 0267
ITT 0068, 0131, 0267
MOTOROLA 0062, 0075
RADIOSHACK 0027
MULTITECH 0027, 0099
RADIOLA 0108
TANDY 0027, 0131
ITV 0064, 0305
RADIX 0064
TASHIKO 0027, 0064
MURPHY 0027
IMPERIAL 0027
TATUNG 0027, 0068, 0072,
RANDEX 0064
MYRYAD 0108
INTERFUNK 0108
NAD 0131
REALISTIC 0027, 0062, 0064,
JVC 0068, 0072, 0094
0094, 0108
NEC 0062, 0064, 0068,
0074, 0075, 0131
JENSEN 0068
TEAC 0027, 0068, 0305,
REOC 0375
0334, 0669
0075, 0094, 0131
KEC 0064, 0305
NATIONAL 0253
KLH 0099
TECHNICS 0062, 0253
REPLAYTV 0641, 0643
REX 0068
KAISUI 0099
TECO 0062, 0064, 0068,
NECKERMANN 0108
KENWOOD 0068, 0094
0075
ROADSTAR 0064, 0099, 0267,
NESCO 0099
KODAK 0062, 0064
NEWAVE 0064
TEKNIKA 0027, 0062, 0064
0305
TELEAVIA 0068
NIKKO 0064
KOLIN 0068, 0070
RUNCO 0066
NOBLEX 0267
TELEFUNKEN 0068, 0347
KORPEL 0099
SBR 0108
NOKIA 0068, 0131, 0267
SEG 0267
LG 0064, 0069, 0072,
TENOSAL 00 99
SEI 0108
TENSAI 0027
0507
RX-V663
NORDMENDE 0068, 0347
STS 0069
OCEANIC 0027, 0068
LXI 0064
THOMAS 0027
RX-V663
SABA 0068, 0347
LENCO 0305
THOMSON 0068, 0087, 0094,
OKANO 0342, 0375
OLYMPUS 0062, 0253
SALORA 0070
0347
LEYCO 0099
OPTIMUS 0064, 0075, 0131,
LLOYD’S 0027
SAMPO 0064, 0075
THORN 0068, 0131
SAMSUNG 0072, 0267, 0459
TIVO 0645, 0663
LOEWE 0064, 0108, 1589
0459
TOSHIBA 0068, 0070, 0072,
SANKY 0066, 0075
LOGIK 0099, 0267
ORION 0211, 0375, 0379,
AV Receiver
SANSUI 0027, 0068, 0094,
LUXOR 0070, 0075, 0131
0094, 0108, 0872
1506
TOTEVISION 0064, 0267
M ELECTRONIC
OSAKI 0027, 0064, 0099
1506
OTTO VERSAND 0108
UHER 0267
SANYO 0074, 0131, 0267
0027
PALLADIUM 0064, 0068, 0099
UNITECH 0267
MEI 0062
SAVILLE 0379
PANASONIC 0062, 0252, 0253,
UNIVERSUM 0027, 0064, 0108,
SCHAUB LORENZ 0027, 0068,
MGA 0070, 0267
0131
0643, 1062, 1589
0267
MGN TECHNOLOGY
SCHNEIDER 0027, 0099, 0108
0267
PATHE MARCONI 0068
VECTOR 0072
SCOTT 0070, 0072, 0211
MTC 0027, 0267
VICTOR 0068, 0094
PENNEY 0062, 0064, 0069,
SEARS 0027, 0062, 0064,
0267, 1062, 1264
VIDEO CONCEPTS 0072
MAGNASONIC
VIDEOMAGIC 0064
1305
PENTAX 0069
0069, 0074, 0131,
MAGNAVOX 0027, 0062, 0066,
PERDIO 0027
1264
VIDEOSONIC 0267
SELECO 0068
VILLAIN 0027
0108, 1808
PHILCO 0062
MAGNIN 0267
SEMP 0072
WARDS 0027, 0062, 0069,
PHILIPS 0062, 0108, 0645,
SHARP 0075, 0834
MANESTH 0072, 0099
0074, 0075, 0087,
1108, 1208
MARANTZ 0062, 0108
0099, 0108, 0267
SHINTOM 0099, 0131
PHONOLA 0108
MARTA 0064
PILOT 0064
WHITE WESTINGHOUSE
SIEMENS 0064, 0108, 0131
PIONEER 0069, 0094, 0108
0099
SILVA 0064
MATSUI 0375, 0379
SINGER 0072, 0099
POLK AUDIO 0108
XR-1000 0027, 0062, 0099
MATSUSHITA
SINUDYNE 0108
0062
PROFITRONIC 0267
YAMAHA 0068
SONIC BLUE 0641, 0643
MEDION 0375
YAMISHI 0099
PROLINE 0027
YOKAN 0099
PROSCAN 0087, 1087
MEMOREX 0027, 0062, 0064,
SONTEC 0064
PROTEC 0099
SONY 0027, 0059, 0060,
0066, 0074, 0075,
YOKO 0267
ZENITH 0027, 0060, 0066,
0131, 0267, 0334,
PULSAR 0066
0062, 0663, 1259
PYE 0108
0375, 1264
SUNKAI 0375
1506
SUNSTAR 0027
MEMPHIS 0099
QUASAR 0062, 1062
METZ 0064, 0374, 1589
QUELLE 0108
SUNTRONIC 0027
2008 All rights reserved.
OWNER’S MANUAL
ИНСТРУКЦИЯ ПО ЭКСПЛУАТАЦИИ
Printed in Malaysia WN24980
Black process 45.0° 240.0 LPI
CAUTION: READ THIS BEFORE OPERATING YOUR UNIT.
Caution: Read this before operating your unit.
1 To assure the finest performance, please read this manual
19 VOLTAGE SELECTOR (Asia and General models only)
carefully. Keep it in a safe place for future reference.
The VOLTAGE SELECTOR on the rear panel of this unit
2 Install this sound system in a well ventilated, cool, dry, clean
must be set for your local main voltage BEFORE plugging
into the AC wall outlet. Voltages are:
place – away from direct sunlight, heat sources, vibration,
Asia model ............................ 220/230–240 V AC, 50/60 Hz
dust, moisture, and/or cold. Allow ventilation space of at least
General model ........ 110/120/220/230–240 V AC, 50/60 Hz
30 cm on the top, 20 cm on the left and right, and 20 cm on
the back of this unit.
20 The batteries shall not be exposed to excessive heat such as
sunshine, fire or like.
3 Locate this unit away from other electrical appliances, motors,
or transformers to avoid humming sounds.
21 Excessive sound pressure from earphones and headphones can
cause hearing loss.
4 Do not expose this unit to sudden temperature changes from
cold to hot, and do not locate this unit in an environment with
WARNING
high humidity (i.e. a room with a humidifier) to prevent
TO REDUCE THE RISK OF FIRE OR ELECTRIC
condensation inside this unit, which may cause an electrical
SHOCK, DO NOT EXPOSE THIS UNIT TO RAIN OR
shock, fire, damage to this unit, and/or personal injury.
MOISTURE.
5 Avoid installing this unit where foreign objects may fall onto
this unit and/or this unit may be exposed to liquid dripping or
splashing. On the top of this unit, do not place:
As long as this unit is connected to the AC wall outlet, it is
– other components, as they may cause damage and/or
not disconnected from the AC power source even if you
turn off this unit by
L
SYSTEM OFF. In this state, this
discoloration on the surface of this unit.
unit is designed to consume a very small quantity of
– burning objects (i.e. candles), as they may cause fire,
power.
damage to this unit, and/or personal injury.
– containers with liquid in them, as they may fall and liquid
■ For U.K. customers
may cause electrical shock to the user and/or damage to
If the socket outlets in the home are not suitable for the plug
this unit.
supplied with this appliance, it should be cut off and an
6 Do not cover this unit with a newspaper, tablecloth, curtain,
appropriate 3 pin plug fitted. For details, refer to the
etc. in order not to obstruct heat radiation. If the temperature
instructions described below.
inside this unit rises, it may cause fire, damage to this unit,
and/or personal injury.
Note
7 Do not plug in this unit to a wall outlet until all connections
are complete.
The plug severed from the mains lead must be destroyed, as a
plug with bared flexible cord is hazardous if engaged in a live
8 Do not operate this unit upside-down. It may overheat,
socket outlet.
possibly causing damage.
9 Do not use force on switches, knobs and/or cords.
■ Special Instructions for U.K. Model
10 When disconnecting the power cable from the wall outlet,
IMPORTANT
grasp the plug; do not pull the cable.
THE WIRES IN MAINS LEAD ARE COLOURED IN
11 Do not clean this unit with chemical solvents; this might
ACCORDANCE WITH THE FOLLOWING CODE:
damage the finish. Use a clean, dry cloth.
12 Only voltage specified on this unit must be used. Using this
Blue: NEUTRAL
unit with a higher voltage than specified is dangerous and may
Brown: LIVE
cause fire, damage to this unit, and/or personal injury. Yamaha
As the colours of the wires in the mains lead of this apparatus
will not be held responsible for any damage resulting from use
may not correspond with the coloured markings identifying
of this unit with a voltage other than specified.
the terminals in your plug, proceed as follows:
The wire which is coloured BLUE must be connected to the
13 To prevent damage by lightning, keep the power cord and
terminal which is marked with the letter N or coloured
outdoor antennas disconnected from a wall outlet or the unit
BLACK. The wire which is coloured BROWN must be
during a lightning storm.
connected to the terminal which is marked with the letter L or
14 Do not attempt to modify or fix this unit. Contact qualified
coloured RED.
Making sure that neither core is connected to the earth
Yamaha service personnel when any service is needed. The
terminal of the three pin plug.
cabinet should never be opened for any reasons.
15 When not planning to use this unit for long periods of time
(i.e. vacation), disconnect the AC power plug from the wall
This symbol mark is according to the EU
outlet.
directive 2002/96/EC.
16 Install this unit near the AC outlet and where the AC power
This symbol mark means that electrical
plug can be reached easily.
and electronic equipment, at their end-of-
17 Be sure to read the “Troubleshooting” section on common
life, should be disposed of separately from
operating errors before concluding that this unit is faulty.
your household waste.
Please act according to your local rules
18 Before moving this unit, press
L
SYSTEM OFF to set this
and do not dispose of your old products
unit to the standby mode, and then disconnect the AC power
with your normal household waste.
plug from the AC wall outlet.
En

Contents
INTRODUCTION
ADVANCED OPERATION
Features ................................................................... 2
Advanced sound configurations...........................64
Supplied accessories .................................................. 2
Changing sound field parameter settings................. 64
Notice ....................................................................... 3
Selecting decoders ................................................... 69
Getting started ........................................................ 4
Customizing this unit (MANUAL SETUP).........71
Quick start guide .................................................... 5
Using SET MENU ................................................... 75
1 BASIC MENU...................................................... 76
2 VOLUME MENU ................................................ 80
PREPARATIONINTRODUCTION
PREPARATION
3 SOUND MENU.................................................... 81
Connections ........................................................... 10
4 INPUT MENU...................................................... 84
Optimizing the speaker setting for your listening
5 OPTION MENU................................................... 87
room (YPAO) .................................................... 32
Remote control features........................................91
Using AUTO SETUP .............................................. 32
Controlling this unit, a TV,
or other components ............................................ 91
Setting remote control codes ................................... 93
BASIC OPERATION
Programming codes from other remote controls ..... 95
Changing source names in the display window....... 96
Selecting the SCENE templates........................... 37
OPERATION
Macro programming features .................................. 97
Selecting the desired SCENE template
Clearing configurations ......................................... 100
BASIC
to the SCENE buttons.......................................... 37
Using multi-zone configuration..........................103
Creating your original SCENE templates................ 40
Connecting Zone 2................................................. 103
Using the remote control for the SCENE feature .... 41
Controlling Zone 2................................................. 104
Playback ................................................................ 42
Advanced setup....................................................106
Basic procedure ....................................................... 42
Using the advanced setup ...................................... 106
Selecting the MULTI CH INPUT component......... 43
Selecting the front speaker set ................................. 43
Selecting audio input jacks (AUDIO SELECT)...... 44
ADDITIONAL INFORMATION
OPERATION
ADVANCED
Displaying the current status of this unit
on a video monitor............................................... 44
Troubleshooting...................................................110
Using your headphones............................................ 45
Resetting the system............................................118
Muting the audio output........................................... 45
Glossary................................................................119
Playing video sources in the background
Sound field program information......................122
of an audio source................................................ 45
Specifications .......................................................123
Displaying the input source information ................. 46
Index .....................................................................125
Using the sleep timer ............................................... 47
INFORMATION
ADDITIONAL
Sound field programs .......................................... 48
APPENDIX
Selecting sound field programs ............................... 48
Sound field program descriptions ............................ 48
(at the end of this manual)
Enjoying unprocessed input sources
(Straight decoding mode) .................................... 51
Front panel................................................................i
Using audio features ............................................. 52
Remote control ....................................................... ii
Adjusting the speaker level...................................... 52
List of remote control codes ................................. iii
Enjoying pure hi-fi sound ........................................ 52
Adjusting the tonal quality....................................... 52
FM/AM tuning ...................................................... 53
Overview.................................................................. 53
Basic tuning operations............................................ 53
APPENDIX
Using station preset feature ..................................... 54
Radio Data System tuning
(Europe and Russia models only).................... 57
Selecting the Radio Data System program type
(PTY SEEK mode) .............................................. 57
Using the enhanced other networks (EON) data
service.................................................................. 58
Displaying the Radio Data System information ...... 59
Using iPod™.......................................................... 60
Controlling iPod™................................................... 60
English
Using Bluetooth™ components ........................... 62
“
A
SPEAKERS” or “
5
DVD” (example) indicates the name
Pairing the Bluetooth™ adapter
of the parts on the front panel or the remote control. Refer to
and your Bluetooth™ component ....................... 62
Playback of the Bluetooth™ component ................. 62
the attached sheet or the pages at the end of this manual for
Recording .............................................................. 63
the information about each position of the parts.
1 En
Оглавление
- Caution: Read this before operating your unit.
- Contents
- Features
- Notice
- Getting started
- Quick start guide
- Connections
- Optimizing the speaker setting for your listening room (YPAO)
- Selecting the SCENE templates
- Playback
- Sound field programs
- Using audio features
- FM/AM tuning
- Radio Data System tuning (Europe and Russia models only)
- Using iPod™
- Using Bluetooth™ components
- Recording
- Advanced sound configurations
- Customizing this unit (MANUAL SETUP)
- Remote control features
- Using multi-zone configuration
- Advanced setup
- Troubleshooting
- Resetting the system
- Glossary
- Sound field program information
- Specifications
- Index
- Предупреждение: Внимательно изучите это перед использованием аппарата.
- Содержание
- Описание
- Уведомление
- Начало работы
- Краткое руководство пользователя
- Подключения
- Оптимизация настройки колонок для комнаты для прослушивания (YPAO)
- Выборе шаблонов SCENE
- Воспроизведение
- Программы звукового поля
- Использование аудиофункций
- Настройка радиопрограмм диапазона ЧМ/AM
- Функция настройки Системы Радиоданных (Только модели для Европы и России)
- Использование iPod™
- Использование компонентов Bluetooth™
- Запись
- Дополнительные конфигурации звучания
- Настройка данного аппарата (MANUAL SETUP)
- Функции пульта ДУ
- Использование многозонной конфигурации
- Дополнительные настройки
- Возможные неисправности и способы по их устранению
- Перезагрузка системы
- Справочник
- Информация программы звукового поля
- Технические характеристики
- Предметный указател


