Yamaha RX-V663 Black: Selecting the SCENE templates
Selecting the SCENE templates: Yamaha RX-V663 Black
SELECTING THE SCENE TEMPLATES
Selecting the SCENE templates
This unit is equipped with 17 preset SCENE templates for
various situations of using this unit. As the initial factory
2 Rotate the
R
INPUT selector (or set the
setting, the following SCENE templates are assigned to
operation mode selector to
F
AMP and then
each SCENE button (see page 8):
press
9
l / h) to select the desired
template.
SCENE 1: DVD Movie Viewing
SCENE 2: Music Disc Listening
SCENE 3: TV Viewing
SCENE 4: Radio Listening
DVD Viewing
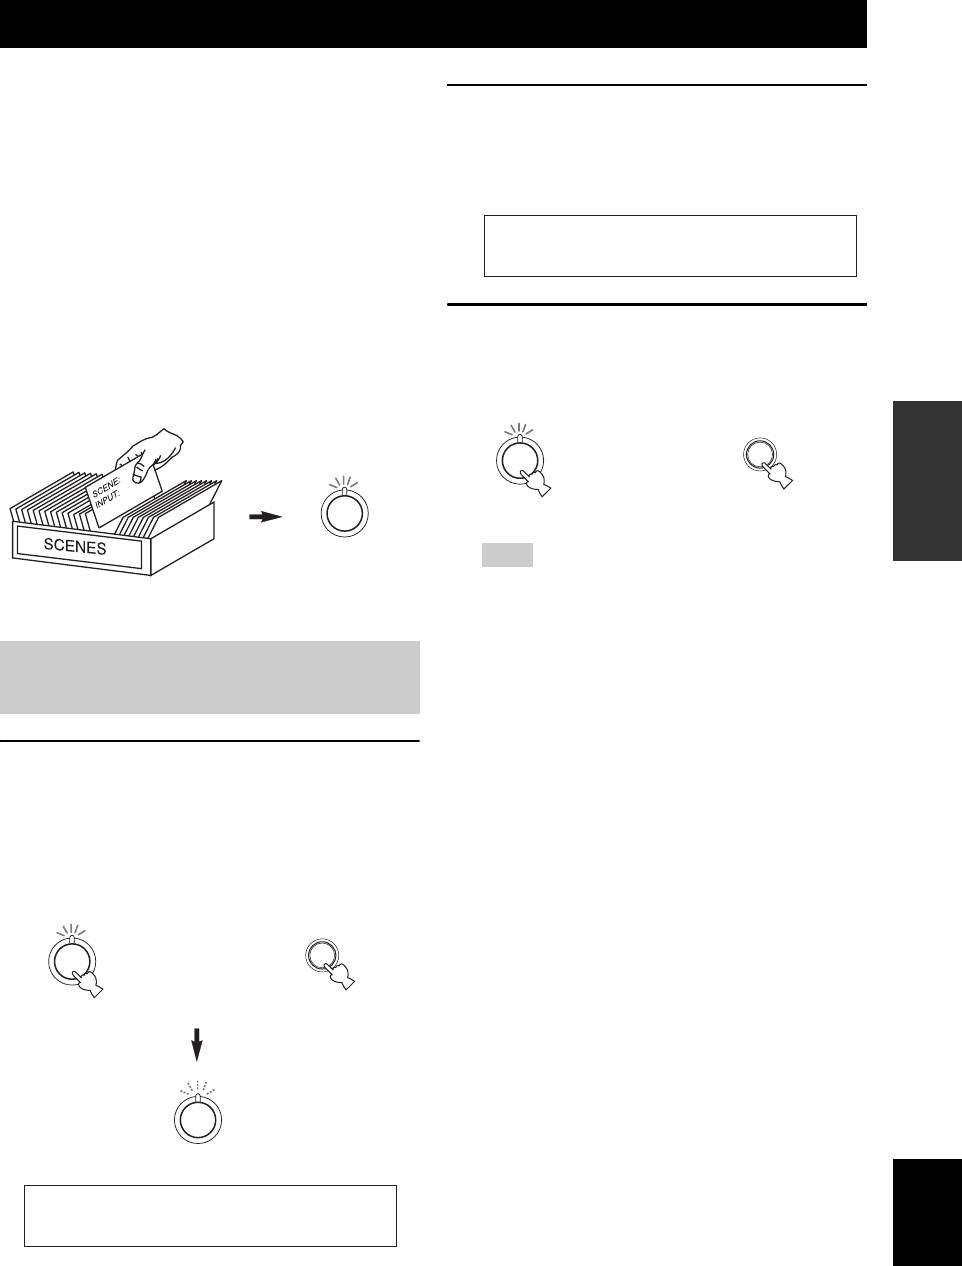
If you want to use other SCENE templates, you can select
the desired SCENE templates from the SCENE template
3 Press the
S
SCENE (or
4
SCENE) button
library and assign the templates to the selected SCENE
again to confirm the selection.
buttons on the front panel and the remote control.
The selected SCENE template is assigned to the
SCENE button.
Select the desired SCENE
template
OPERATION
BASIC
or
1
1
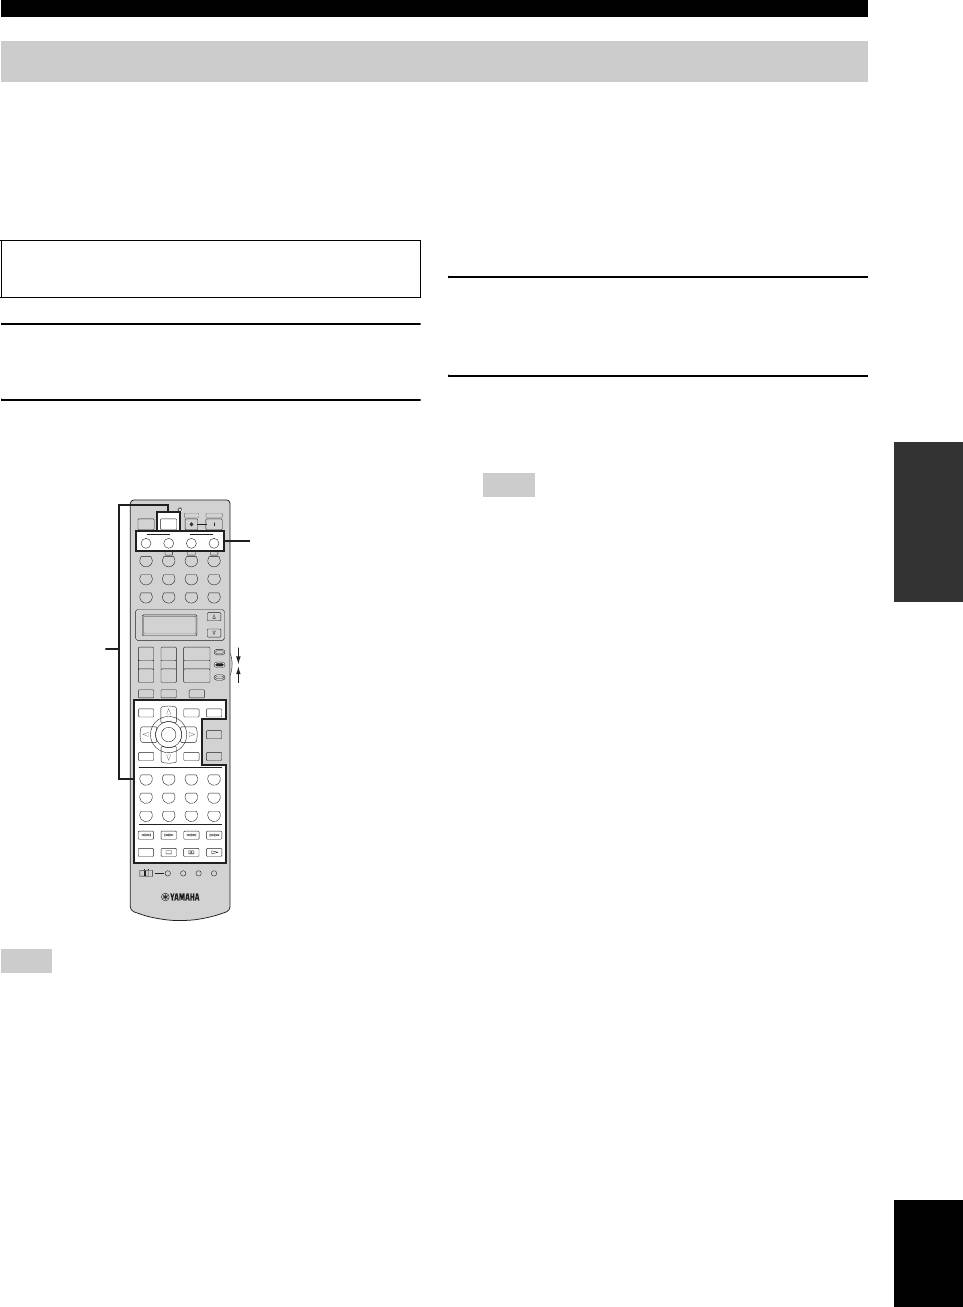
Remote control
Front panel
1
Assign the
Note
SCENE
SCENE template library
template to the
Once the desired SCENE templates are assigned to the
(Image)
SCENE button
corresponding SCENE buttons, you need to set the input
source of the SCENE template on the remote control. See
page 41 for details.
Selecting the desired SCENE
template to the SCENE buttons
1 Press and hold the
S
SCENE (or
4
SCENE)
button for 3 seconds.
The indicator on the selected SCENE button on the
front panel starts to flash, and the name of the
currently assigned SCENE template appears in the
front panel display.
3 seconds
3 seconds
or
1
1
1
Remote control
Front panel
1
Flashes
English
DVD MovieView
37 En
Selecting the SCENE templates
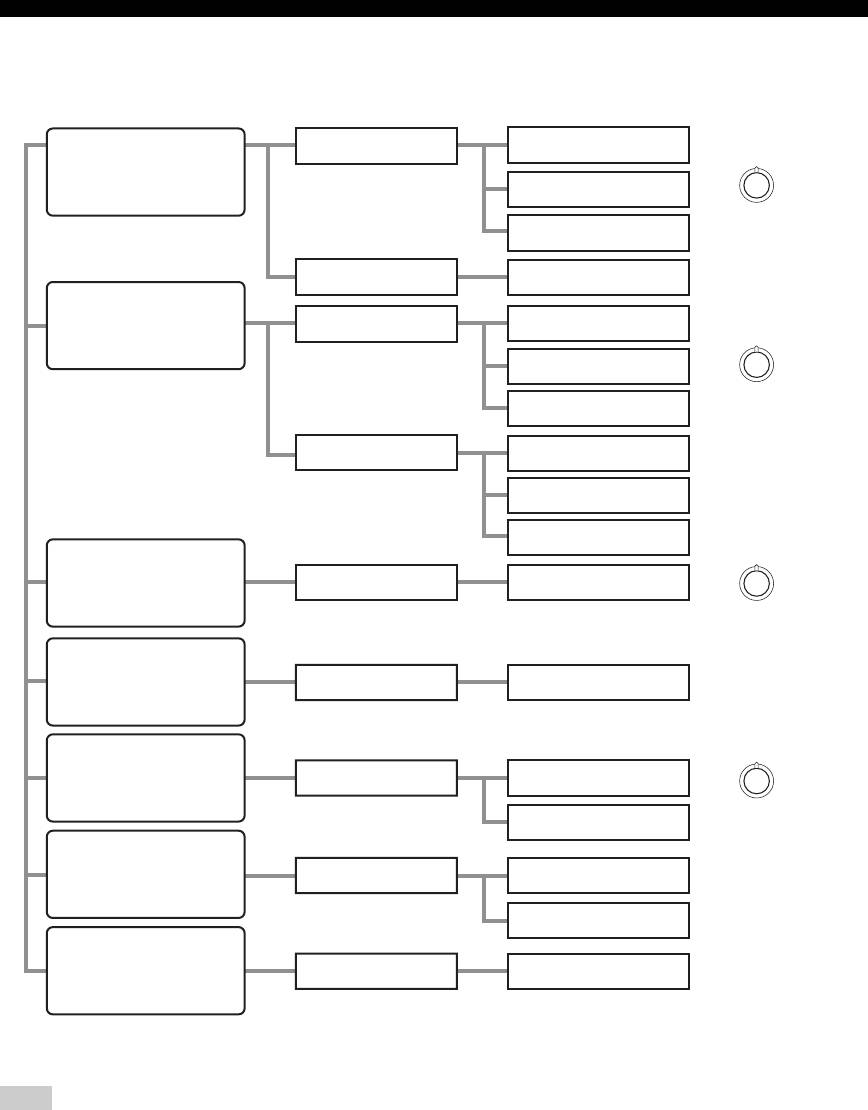
■ Which SCENE template would you like to select?
Which source do you like to
Which component do you
Default
play back?
like for playback?
SCENE templates
SCENE buttons
DVD
DVD Viewing
Video sources
(DVD video,
DVD Movie Viewing
1
Recorded video)
DVD Live Viewing
DVR
DVR Viewing
Music discs (CD,
DVD
Disc Hi-fi Listening
SA-CD or DVD-Audio)
Music Disc Listening
2
Disc Listening
CD
CD Hi-fi Listening
CD Listening
CD Music Listening
Radio programs
TUNER (FM/AM)
Radio Listening
4
iPod or Bluetooth
DOCK
*
Dock Listening
component
TV programs
DTV/CBL
TV Viewing
3
TV Sports Viewing
Video games
V-AUX
*
Action Game Playing
RPG Playing
Vinyl records
PHONO
LP Record Listening
Note
*
When iPod is connected to the Yamaha iPod universal dock or a Bluetooth component is connected to the Bluetooth adapter, this unit
plays back the audio sources input at the DOCK terminal.
y
You can create your original SCENE templates by editing the preset SCENE templates. See page 40 for details.
38 En
Selecting the SCENE templates
■ Preset SCENE templates descriptions
The illustrations of the SCENE button in the following table indicate the assigned SCENE buttons in the default setting.
SCENE template Input source Playback mode Features
DVD Viewing
DVD
*
Straight
Select this SCENE template when you play back general
contents on the DVD player.
DVD Movie Viewing
DVD
*
MOVIE
Select this SCENE template when you play back movies on
Sci-Fi
your DVD player.
1
DVD Live Viewing
DVD
*
ENTERTAINMENT
Select this SCENE template when you enjoy the music live
Music Video
video on your DVD player.
DVR Viewing
DVR MOVIE
Select this SCENE template when you play back movies on
Drama
your digital video recorder.
Disc Hi-fi Listening
DVD
*
Pure Direct
Select this SCENE template when you enjoy the high fidelity
sound of the music discs on your DVD player.
Music Disc
DVD
*
STEREO
Select this SCENE template when you play back music discs
Listening
2ch Stereo
on your DVD player.
2
OPERATION
Disc Listening
DVD
*
STEREO
Select this SCENE template when you play back music
BASIC
7ch Stereo
sources on your DVD player as the background music.
CD Hi-fi Listening
CD
*
Pure Direct
Select this SCENE template when you enjoy the high fidelity
sound of the music discs on your CD player.
CD Listening
CD
*
STEREO
Select this SCENE template when you play back music discs
7ch Stereo
on your CD player.
CD Music Listening
CD
*
STEREO
Select this SCENE template when you play back music source
2ch Stereo
on your CD player as the background music.
Radio Listening
TUNER MUSIC ENHANCER
Select this SCENE template when you enjoy FM or AM radio
7ch Enhancer
programs.
4
Dock Listening
V-AUX MUSIC ENHANCER
Select this SCENE template when you play back music on
7ch Enhancer
your iPod stationed in a Yamaha iPod universal dock or
Bluetooth component that is connected to the Bluetooth
adapter.
TV Viewing
DTV/CBL Straight
Select this SCENE template when you enjoy general
programs on your TV.
3
TV Sports Viewing
DTV/CBL ENTERTAINMENT
Select this SCENE template when you enjoy sports programs
Sports
on your TV.
Action Game
V-AUX ENTERTAINMENT
Select this SCENE template when you play action games such
as car racing and FPS games.
Playing
Action Game
RPG Playing
V-AUX ENTERTAINMENT
Select this SCENE template when you play role-playing
Roleplaying Game
games.
LP Record Listening
PHONO Pure Direct
Select this SCENE template when you play back vinyl records
on your turntable.
*
When the connected DVD player or CD player has the capability of the SCENE control signals and is connected to the REMOTE
OUT jack of this unit, this unit operates the DVD player or CD player worked with the SCENE features.
English
39 En
Selecting the SCENE templates
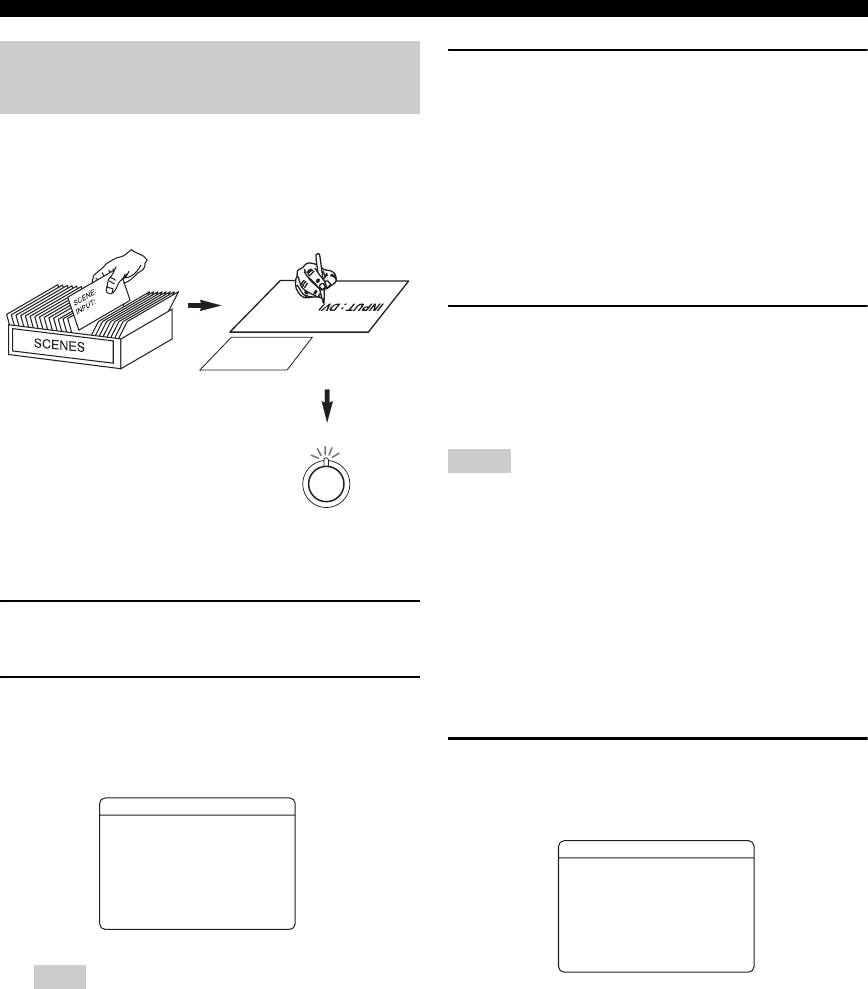
Creating your original SCENE
3 Press
9
k / n to select the desired parameter
of the SCENE template and then
9
l / h to
templates
select the desired value of the selected
You can create your original SCENE templates for each
parameter.
SCENE button. You can refer to the preset 17 SCENE
You can adjust the following parameters for a SCENE
templates to create the original SCENE templates.
template:
Select the desired SCENE
Create an original SCENE
• INPUT: The input source component.
template
template
• MODE: The active sound field programs,
“Straight” or “Pure Direct” mode.
SCENE : DVD Viewing
4 Press the
4
SCENE button again to confirm
: DVD
INPUT
the edit.
: DVD Viewing
SCENE
SCENE template library
y
(Image)
An asterisk mark (*) appears by the name of the original SCENE
template.
Notes
1
• Once the desired SCENE templates are assigned to the
corresponding
4
SCENE buttons, you need to set the input
Assign the SCENE
source of the SCENE template on the remote control. See
template to the
page 41 for details.
SCENE button
• You can create a customized SCENE template for each SCENE
button, and if you create another customized SCENE template,
this unit overwrites the old customized SCENE template with
1 Turn on the video monitor connected to this
the new one.
unit.
• The newly created template is only available for the assigned
SCENE button.
2 Press and hold the desired
4
SCENE button
■ Rename the SCENE templates
for 3 seconds.
The SCENE template customizing screen appears on
Select the name of the SCENE template at step 3
the video monitor.
of “Creating your original SCENE templates” and
SCENE1
then press
9
ENTER.
.pDVDMovieViewing[
[
INPUT: DVD
SCENE1
MODE:Sci-Fi
RENAME
DVDMovieViewing
-
[ENTER]:Rename
[SCENE1]:SET
[RETURN]:EXIT
p
[
[]/[]:Character
[p]/[[]:Position
[ENTER]:SET
[RETURN]:CANCEL
Note
•Press
9
k / n to select the desired character.
When the SCENE template you want to customize is not
•Press
9
l / h to place an “_” (underscore) under the
assigned to any of the
4
SCENE buttons, press
9
l / h
space or the desired character.
repeatedly to recall the desired SCENE template on the
•Press
0
RETURN to cancel the new name.
menu screen.
•Press
9
ENTER to confirm the new name.
40 En
Selecting the SCENE templates
Using the remote control for the SCENE feature
■ Controlling the input source
■ Setting the input source of the
components in the SCENE mode
customized SCENE template on the
You can operate both this unit and the input source
remote control
component by using the remote control. You must set the
If you customize the input source of the selected SCENE
appropriate remote control code for each input source in
template, you must set the input source of the SCENE
advance (see page 93).
template on the remote control to operate the input source
component correctly.
Before performing the following operations, set the operation
mode selector on the remote control to
F
SOURCE.
1 Press and hold the
4
SCENE button and the
desired input selector button (
5
).
1 Press the desired
4
SCENE button on the
The transmit indicator (
2
) flashes twice.
remote control.
2 Keep holding down the buttons pressed in
2 Press the desired buttons in the * area below
step 2 until “OK” appears in the display
to control the input source component of the
window (
6
) on the remote control.
selected SCENE template.
OPERATION
Note
BASIC
POWER
POWER
STANDBY
POWER
TV
AV
If the setting of the input source is not successful, “NG”
SCENE
1234
SCENE
appears in the display window (
6
). In this case, repeat the
TUNER
CBA
buttons
setting procedure.
V
-
AUX/DOCK
DTV/CBL
CD
MD/CD-R
DVD
DVR
VCR
PHONO
SELECT
AMP
+
+
+
SOURCE
*
TV VOL TV CH
VOLUME
Set to
–
––
TV
SOURCE
TV MUTE
TV INPUT
MUTE
LEVEL
PRESET/CH
SET MENU
TITLE
MENU
AUDI O
BAND
SRCH MODE
PURE DIRECT
ENTER
A/B/C/D/E
STRAIGHT
RETURN
DISPLAY
MEMORY
CLASSICAL
LIVE/CLUB
ENTERTAIN
MOVIE
1
2
3
4
STEREO
ENHANCER
SUR. DECODE
PARAMETER
5
6
7
8
MULTI CH IN
SLEEP
9
0
+
10
ENT
INFO EON MODE- PTY SEEK-START
REC
OFF
ON
MACRO
LEARN
CLEAR
RENAME
Note
*
These buttons control the input source component. See page 92
for details of the function of each button.
English
41 En
Оглавление
- Caution: Read this before operating your unit.
- Contents
- Features
- Notice
- Getting started
- Quick start guide
- Connections
- Optimizing the speaker setting for your listening room (YPAO)
- Selecting the SCENE templates
- Playback
- Sound field programs
- Using audio features
- FM/AM tuning
- Radio Data System tuning (Europe and Russia models only)
- Using iPod™
- Using Bluetooth™ components
- Recording
- Advanced sound configurations
- Customizing this unit (MANUAL SETUP)
- Remote control features
- Using multi-zone configuration
- Advanced setup
- Troubleshooting
- Resetting the system
- Glossary
- Sound field program information
- Specifications
- Index
- Предупреждение: Внимательно изучите это перед использованием аппарата.
- Содержание
- Описание
- Уведомление
- Начало работы
- Краткое руководство пользователя
- Подключения
- Оптимизация настройки колонок для комнаты для прослушивания (YPAO)
- Выборе шаблонов SCENE
- Воспроизведение
- Программы звукового поля
- Использование аудиофункций
- Настройка радиопрограмм диапазона ЧМ/AM
- Функция настройки Системы Радиоданных (Только модели для Европы и России)
- Использование iPod™
- Использование компонентов Bluetooth™
- Запись
- Дополнительные конфигурации звучания
- Настройка данного аппарата (MANUAL SETUP)
- Функции пульта ДУ
- Использование многозонной конфигурации
- Дополнительные настройки
- Возможные неисправности и способы по их устранению
- Перезагрузка системы
- Справочник
- Информация программы звукового поля
- Технические характеристики
- Предметный указател


