Yamaha RX-V663 Black: Using multi-zone configuration
Using multi-zone configuration: Yamaha RX-V663 Black
USING MULTI-ZONE CONFIGURATION
Using multi-zone configuration
This unit allows you to configure a multi-zone audio system. The Zone 2 feature allows you to set this unit to reproduce
separate input sources in the main zone and the second zone (Zone 2). You can control this unit from the second zone
using the supplied remote control.
Only analog signals are sent to the second zone. Any source you want to listen to in the second zone must be
connected to the analog AUDIO IN jacks of this unit.
Connecting Zone 2
You need the following additional equipment to use the multi-zone functions of this unit:
• An infrared signal receiver in the second zone.
• An infrared signal emitter in the main zone. This emitter transmits the infrared signals from the remote control via the
infrared signal receiver in the second zone to a CD player or a DVD player, etc. in the main zone.
• An amplifier and speakers in the second zone.
y
• Since there are many possible ways to connect and use this unit in a multi-zone configuration, we recommend that you consult with
your nearest authorized Yamaha dealer or service center about the Zone 2 connections that best meet your requirements.
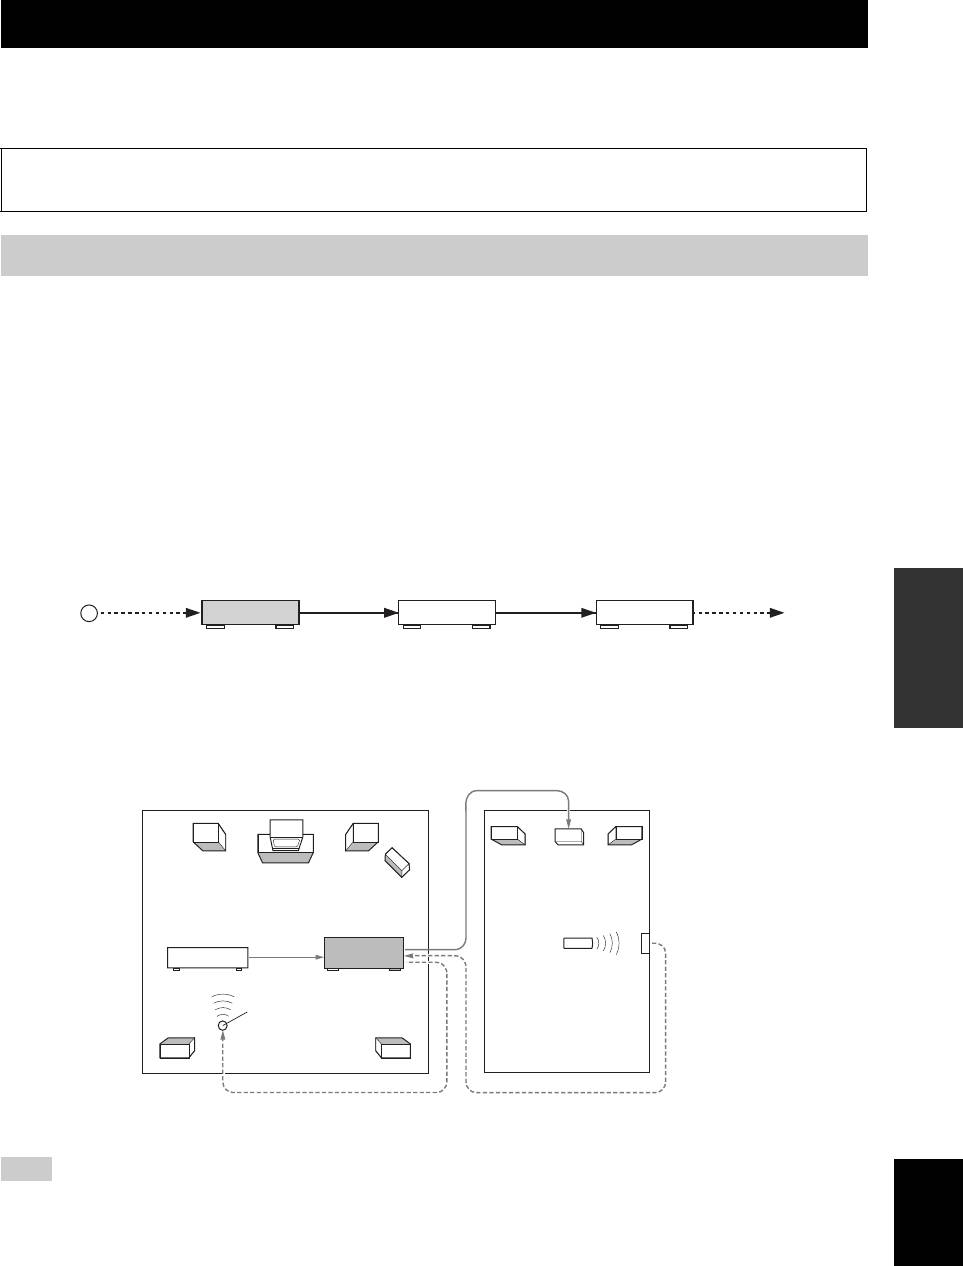
• Some Yamaha models are able to connect directly to the REMOTE jacks of this unit. If you own these products, you may not need to
use an infrared signal emitter. Up to 6 Yamaha components can be connected as shown below.
REMOTE
REMOTE
REMOTE
REMOTE
OPERATION
ADVANCED
IN
IN
OUT
IN
OUTOUT
Infrared signal
This unit
Yamaha
Yamaha
receiver
component
component
■ Using the external amplifier
Connect the amplifier/receiver in the second zone and other components to this unit as follows.
From the ZONE 2 OUT jacks
Amplifier
Main zone
Second zone
(Zone 2)
Infrared signal receiver
Remote control
DVD player (etc.)
This unit
Infrared signal emitter
From the REMOTE OUT jack
From the REMOTE IN jack
Note
English
To avoid unexpected noise, DO NOT USE the Zone 2 feature with CDs encoded in DTS.
103 En
Using multi-zone configuration
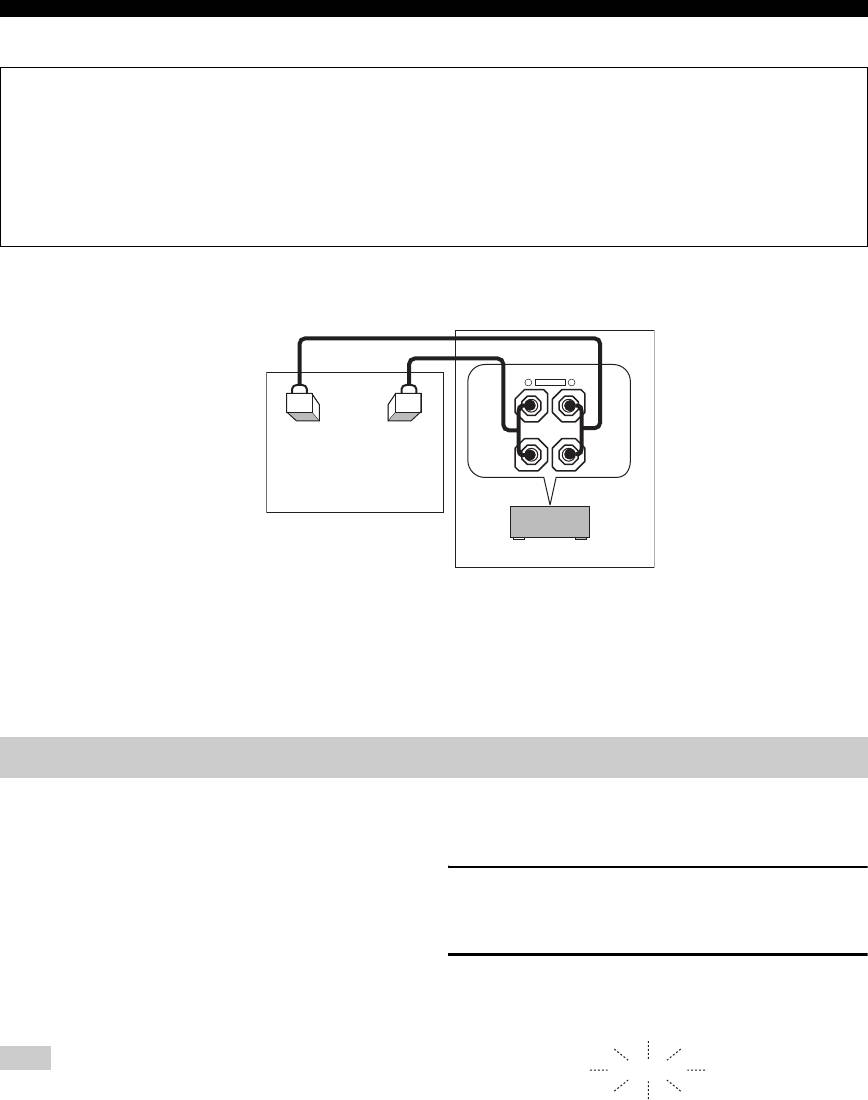
■ Using the internal amplifier of this unit
Important safety notice
The EXTRA SP speaker terminals of this Receiver should not be connected to a Passive Loudspeaker Selector Box or
more than one loudspeaker per channel.
Connection to a Passive Loudspeaker Selector Box or multiple speakers per channel could create an abnormally low
impedance load resulting in amplifier damage. See this owner’s manual for correct usage.
Compliance with minimum speaker impedance information for all channels must be maintained at all times. This
information is found on the back panel of your Receiver.
Connect the speakers in the second zone to the EXTRA SP speaker terminals and then set the “EXTRA SP ASSIGN” to
“ZONE2” (see page 76).
FRONT B/ZONE2/
PRESENCE
R
EXTRA SP
L
Second zone
(Zone 2)
This unit
Main zone
y
• You can use the speakers connected EXTRA SP speaker terminals as the front speaker system of another zone. Set “EXTRA SP
ASSIGN” to “ZONE B” (see page 76).
• When you use the internal amplifiers for the Zone 2 speakers, you can adjust the volume level and set the initial volume level and
maximum volume level of the Zone 2 speakers (see page 90).
Controlling Zone 2
You can select and control Zone 2 by using the control
■ Controlling Zone 2 with the front panel
buttons on the front panel or on the remote control. The
available operations are as follows:
Turning on Zone 2
• Selecting the input source of Zone 2.
• Tuning into FM or AM when “TUNER” is selected as
Press
H
ZONE 2 ON/OFF to turn on Zone 2.
the input source of Zone 2 (see page 53).
• Enjoying music stored on your iPod stationed in a
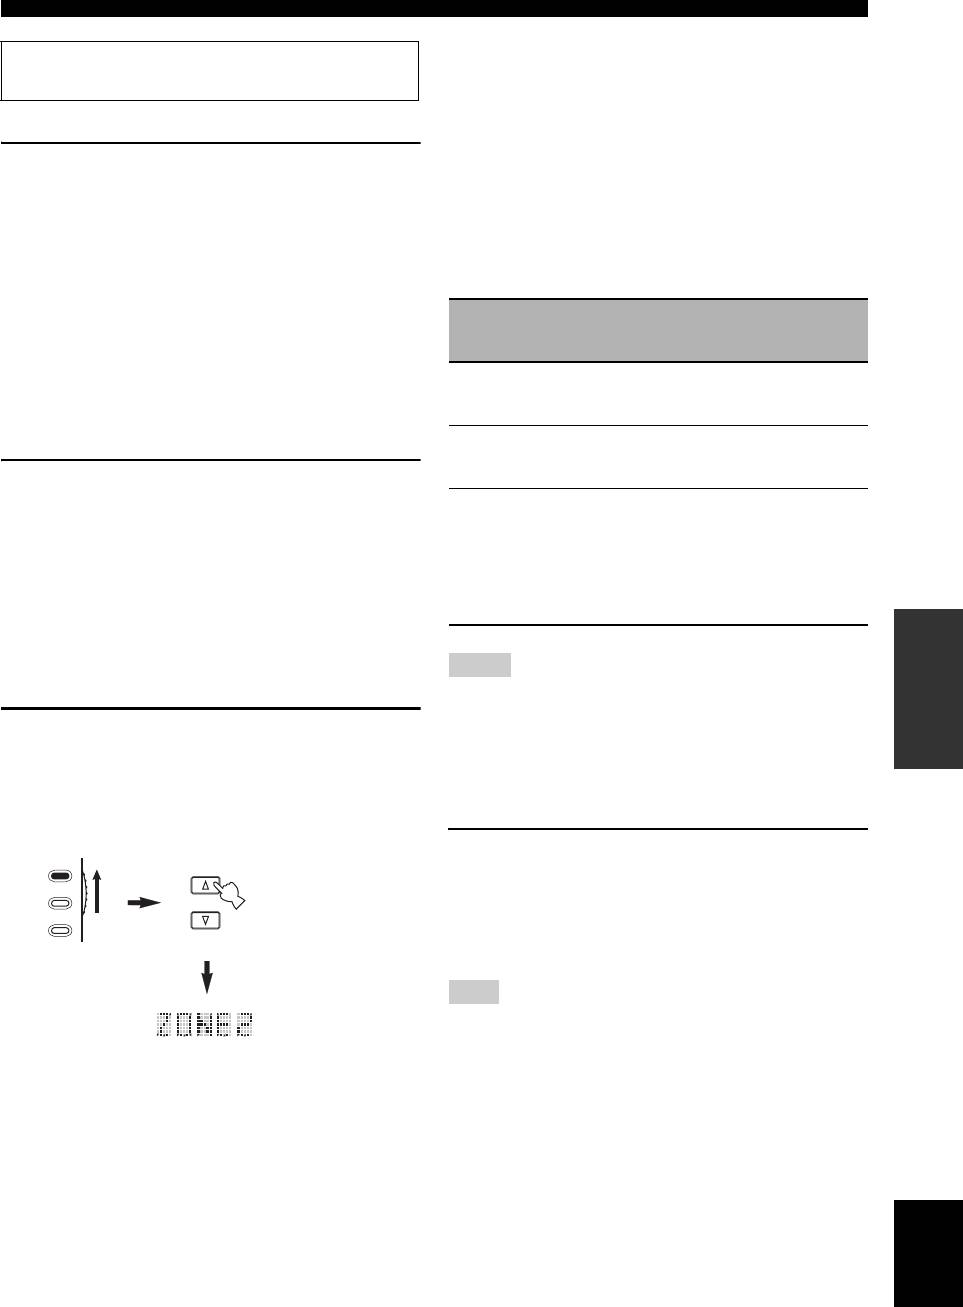
Activating the Zone 2 operation mode
Yamaha iPod universal dock (such as YDS-10 sold
separately) connected to the DOCK terminal of this
Press
I
ZONE CONTROL to control Zone 2.
unit when “V-AUX” is selected as the input source
The ZONE2 indicator flashes in the front panel display for
(see page 60).
approximately 10 seconds.
Note
ZONE2
You must complete each step while the ZONE2 indicator is
flashing in the front panel display. Otherwise, the Zone 2 mode is
Flashes
automatically canceled and this unit returns to the normal
operation mode. In this case, repeat the Zone 2 selection
procedure.
104 En
Using multi-zone configuration
Turning on or off Zone 2 using the remote control
Operate the following operations after activating the Zone 2
operation mode.
E
POWER and
D
STANDBY on the remote control
work differently depending on the selected zone that
Operating Zone 2
appears in the display window (
6
) on the remote control.
• When the main zone, Zone 2 mode is selected, you can
Rotate the
R
INPUT selector to select the
turn on the main zone or Zone 2 or set them to the
desired input source while the ZONE2 indicator
standby mode individually.
is flashing in the front panel display.
• When the all mode is selected, pressing
E
POWER
• Select “TUNER” as the input source to use the TUNER
turns on the main zone and Zone 2 simultaneously and
features in Zone 2. For details about the TUNER
pressing
D
STANDBY sets them to the standby mode
operations, see “FM/AM tuning” on page 53.
simultaneously.
• Select “V-AUX” as the input source to use iPod
POWER
Display window
features or Bluetooth features in Zone 2. For details
Control mode
and
(
6
)
about the iPod operations, see “Using iPod™” on
STANDBY
page 60 or “Using Bluetooth™ components” on
Main zone
Name of the selected
Turns on the main
page 62.
mode
input area
zone only or sets it to
the standby mode.
Set Zone 2 to the standby mode
Zone 2 mode
“ZONE 2” or “2;name
Turns on Zone 2 or
of the selected input
sets it to the standby
area”
mode.
Press
H
ZONE 2 ON/OFF to set Zone 2 to the
standby mode.
All mode
“ALL” E
POWER: turns on
the main zone and
y
Zone 2.
Press
L
SYSTEM OFF to set the main zone and Zone 2 to the
D
STANDBY: sets
standby mode simultaneously.
the main zone and
Zone 2 to the standby
mode.
■ Controlling Zone 2 with the remote
OPERATION
ADVANCED
control
Notes
Activating the Zone 2 operation mode
• When the remote control is in the main zone mode, “MAIN”
appears for a few seconds when
E
POWER or
D
STANDBY
Set the operation mode selector to
F
AMP and
is pressed.
then press
6
SELECT k repeatedly to select the
• “ALL” appears in the display window (
6
) on the remote
Zone 2 operation mode.
control only when
6
SELECT n is pressed.
“ZONE 2” is displayed in the display window (
6
) on the
Selecting the input source of Zone 2
remote control.
Press one of the input selector buttons (
5
) to
AMP
select the input source of the selected zone.
SOURCE
If the remote control is used to select the input source, “2;
SELECT
TV
name of the selected input area” is displayed in the display
window (
6
) on the remote control when Zone 2 is
selected respectively.
Note
The selected input source is shared across all zones.
y
To deactivate the Zone 2 operation mode, press
6
SELECT
k
/
n
repeatedly to select other than “ZONE 2”.
English
105 En
Оглавление
- Caution: Read this before operating your unit.
- Contents
- Features
- Notice
- Getting started
- Quick start guide
- Connections
- Optimizing the speaker setting for your listening room (YPAO)
- Selecting the SCENE templates
- Playback
- Sound field programs
- Using audio features
- FM/AM tuning
- Radio Data System tuning (Europe and Russia models only)
- Using iPod™
- Using Bluetooth™ components
- Recording
- Advanced sound configurations
- Customizing this unit (MANUAL SETUP)
- Remote control features
- Using multi-zone configuration
- Advanced setup
- Troubleshooting
- Resetting the system
- Glossary
- Sound field program information
- Specifications
- Index
- Предупреждение: Внимательно изучите это перед использованием аппарата.
- Содержание
- Описание
- Уведомление
- Начало работы
- Краткое руководство пользователя
- Подключения
- Оптимизация настройки колонок для комнаты для прослушивания (YPAO)
- Выборе шаблонов SCENE
- Воспроизведение
- Программы звукового поля
- Использование аудиофункций
- Настройка радиопрограмм диапазона ЧМ/AM
- Функция настройки Системы Радиоданных (Только модели для Европы и России)
- Использование iPod™
- Использование компонентов Bluetooth™
- Запись
- Дополнительные конфигурации звучания
- Настройка данного аппарата (MANUAL SETUP)
- Функции пульта ДУ
- Использование многозонной конфигурации
- Дополнительные настройки
- Возможные неисправности и способы по их устранению
- Перезагрузка системы
- Справочник
- Информация программы звукового поля
- Технические характеристики
- Предметный указател


