Yamaha RX-V365 Silver: инструкция
Раздел: Видео Аудио Фото Оборудование
Тип: Ресивер
Характеристики, спецификации
Инструкция к Ресиверу Yamaha RX-V365 Silver

F
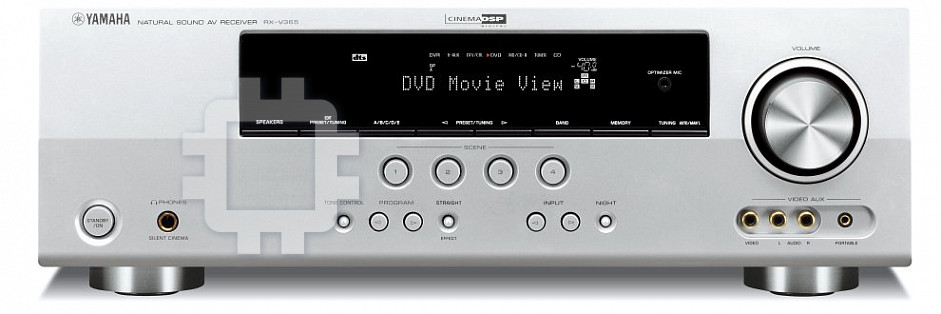
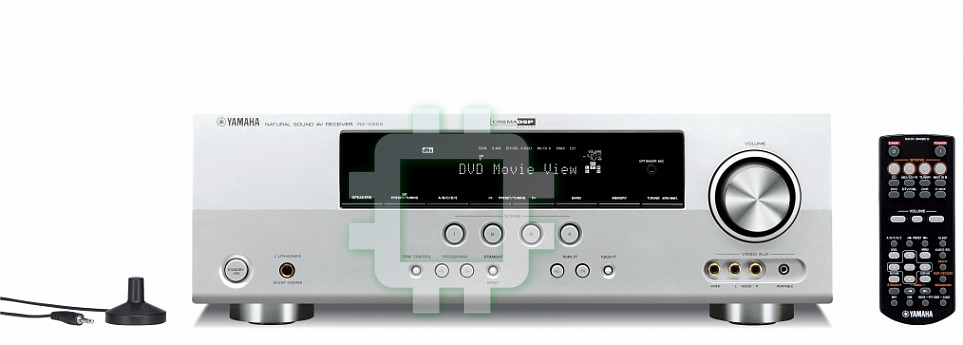
RX-V365
AV Receiver
OWNER’S MANUAL
Caution: Read this before operating your unit.
1 To assure the finest performance, please read this manual
18 Before moving this unit, press
ASTANDBY/ON to set this
carefully. Keep it in a safe place for future reference.
unit in the standby mode, and disconnect the AC power plug
2 Install this sound system in a well ventilated, cool, dry, clean
from the wall outlet.
place – away from direct sunlight, heat sources, vibration,
19 VOLTAGE SELECTOR (Asia and General models only)
dust, moisture, and/or cold. Allow ventilation space of at least
The VOLTAGE SELECTOR on the rear panel of this unit
30 cm on the top, 20 cm on the left and right, and 20 cm on
must be set for your local main voltage BEFORE plugging
the back of this unit.
into the AC wall outlet. Voltages are:
3 Locate this unit away from other electrical appliances, motors,
........................................AC 110–120/220–240 V, 50/60 Hz
or transformers to avoid humming sounds.
20 The batteries shall not be exposed to excessive heat such as
4 Do not expose this unit to sudden temperature changes from
sunshine, fire or like.
cold to hot, and do not locate this unit in an environment with
21 Excessive sound pressure from earphones and headphones can
high humidity (i.e. a room with a humidifier) to prevent
cause hearing loss.
condensation inside this unit, which may cause an electrical
22 When replacing the batteries, be sure to use batteries of the
shock, fire, damage to this unit, and/or personal injury.
same type. Danger of explosion may happen if batteries are
5 Avoid installing this unit where foreign objects may fall onto
incorrectly replaced.
this unit and/or this unit may be exposed to liquid dripping or
splashing. On the top of this unit, do not place:
WARNING
– Other components, as they may cause damage and/or
TO REDUCE THE RISK OF FIRE OR ELECTRIC
discoloration on the surface of this unit.
SHOCK, DO NOT EXPOSE THIS UNIT TO RAIN
– Burning objects (i.e. candles), as they may cause fire,
OR MOISTURE.
damage to this unit, and/or personal injury.
– Containers with liquid in them, as they may fall and liquid
As long as this unit is connected to the AC wall outlet,
may cause electrical shock to the user and/or damage to
it is not disconnected from the AC power source even
this unit.
if you turn off this unit by ASTANDBY/ON. In this
6 Do not cover this unit with a newspaper, tablecloth, curtain,
state, this unit is designed to consume a very small
etc. in order not to obstruct heat radiation. If the temperature
inside this unit rises, it may cause fire, damage to this unit,
quantity of power.
and/or personal injury.
■ For U.K. customers
7 Do not plug in this unit to a wall outlet until all connections
If the socket outlets in the home are not suitable for the
are complete.
plug supplied with this appliance, it should be cut off and
8 Do not operate this unit upside-down. It may overheat,
possibly causing damage.
an appropriate 3 pin plug fitted. For details, refer to the
9 Do not use force on switches, knobs and/or cords.
instructions described below.
10 When disconnecting the power cable from the wall outlet,
grasp the plug; do not pull the cable.
Note
11 Do not clean this unit with chemical solvents; this might
The plug severed from the mains lead must be destroyed, as a
damage the finish. Use a clean, dry cloth.
plug with bared flexible cord is hazardous if engaged in a live
socket outlet.
12 Only voltage specified on this unit must be used. Using this
unit with a higher voltage than specified is dangerous and may
■ Special Instructions for U.K. Model
cause fire, damage to this unit, and/or personal injury. Yamaha
will not be held responsible for any damage resulting from use
IMPORTANT
of this unit with a voltage other than specified.
THE WIRES IN MAINS LEAD ARE COLOURED IN
13 To prevent damage by lightning, keep the power cord and
ACCORDANCE WITH THE FOLLOWING CODE:
outdoor antennas disconnected from a wall outlet or the unit
Blue: NEUTRAL
during a lightning storm.
Brown: LIVE
14 Do not attempt to modify or fix this unit. Contact qualified
As the colours of the wires in the mains lead of this apparatus
Yamaha service personnel when any service is needed. The
may not correspond with the coloured markings identifying
cabinet should never be opened for any reasons.
the terminals in your plug, proceed as follows:
15 When not planning to use this unit for long periods of time
The wire which is coloured BLUE must be connected to the
(i.e. vacation), disconnect the AC power plug from the wall
terminal which is marked with the letter N or coloured
BLACK. The wire which is coloured BROWN must be
outlet.
connected to the terminal which is marked with the letter L or
16 Install this unit near the AC outlet and where the AC power
coloured RED.
plug can be reached easily.
Making sure that neither core is connected to the earth
terminal of the three pin plug.
17 Be sure to read the “Troubleshooting” section on common
operating errors before concluding that this unit is faulty.
Caution-i En
Caution: Read this before operating your unit.
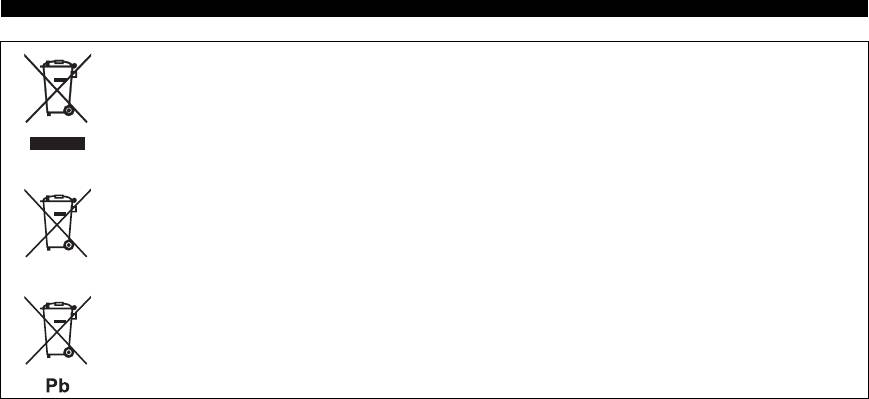
Information for Users on Collection and Disposal of Old Equipment and used Batteries
These symbols on the products, packaging, and/or accompanying documents mean that used electrical
and electronic products and batteries should not be mixed with general household waste.
For proper treatment, recovery and recycling of old products and used batteries, please take them to
applicable collection points, in accordance with your national legislation and the Directives 2002/96/
EC and 2006/66/EC.
By disposing of these products and batteries correctly, you will help to save valuable resources and
prevent any potential negative effects on human health and the environment which could otherwise
arise from inappropriate waste handling.
For more information about collection and recycling of old products and batteries, please contact your
local municipality, your waste disposal service or the point of sale where you purchased the items.
[Information on Disposal in other Countries outside the European Union]
These symbols are only valid in the European Union. If you wish to discard these items, please contact
your local authorities or dealer and ask for the correct method of disposal.
Note for the battery symbol (bottom two symbol examples):
This symbol might be used in combination with a chemical symbol. In this case it complies with the
requirement set by the Directive for the chemical involved.
Caution-ii En

Contents
INTRODUCTION
ADVANCED OPERATION
INTRODUCTION
Features.................................................................... 2
Set menu ................................................................ 31
Supplied accessories .................................................. 2
Using set menu......................................................... 32
Functional overview................................................ 3
1 SOUND MENU .................................................... 32
Front panel ................................................................. 3
2 INPUT MENU ...................................................... 34
Front panel display..................................................... 4
3 OPTION MENU ................................................... 35
Remote control........................................................... 5
Advanced setup..................................................... 37
Rear panel .................................................................. 6
Quick start guide..................................................... 7
ADDITIONAL INFORMATION
L
PREPARATION
Troubleshooting.................................................... 38
PREPARATION
Glossary ................................................................. 43
Preparation of remote control ............................... 8
Specifications......................................................... 44
Connections .............................................................9
Index ...................................................................... 45
Placing speakers......................................................... 9
Connecting speakers .................................................. 9
Connecting video components................................. 11
About this manual
Connecting other components ................................. 13
• y indicates a tip for your operation.
Using the VIDEO AUX jacks on the front panel .... 14
• Some operations can be performed by using either the buttons on the
Connecting the FM and AM antennas ..................... 15
front panel or the ones on the remote control. In case the button
OPERATION
Connecting the power cable..................................... 15
names differ between the front panel and the remote control, the
BASIC
Turning on and off the power .................................. 15
button name on the remote control is given in parentheses.
Optimizing the speaker setting for your listening
• This manual is printed prior to production. Design and specifications
are subject to change in part as a result of improvements, etc. In case
room (YPAO) ....................................................16
of differences between the manual and product, the product has
Using AUTO SETUP............................................... 16
priority.
• “ASTANDBY/ON” or “eDVD” (example) indicates the name of
the parts on the front panel or the remote control. Refer to the
BASIC OPERATION
“Functional overview” on page 3.
Playback................................................................. 18
OPERATION
ADVANCED
Basic procedure........................................................ 18
Additional operations............................................... 19
Selecting the SCENE templates ...........................22
Selecting the desired SCENE template.................... 22
Creating your original SCENE templates ................ 24
Sound field programs ...........................................25
Selecting sound field programs................................ 25
FM/AM tuning ......................................................27
INFORMATION APPENDIX
Overview.................................................................. 27
ADDITIONAL
FM/AM tuning operations ....................................... 27
Preset FM/AM stations ............................................ 27
Radio Data System tuning (Europe and Russia
models only).......................................................29
Displaying the Radio Data System information ...... 29
Selecting the Radio Data System program type (PTY
SEEK mode) ........................................................ 29
Using the enhanced other networks (EON) data
service.................................................................. 30
English
1 En


")