Indesit K6G21S/R: The different functions and uses of the oven
The different functions and uses of the oven: Indesit K6G21S/R
The different functions and uses of the oven
The various functions included in the cooker are selected by
The oven and grill knob (M)
operating the control devices located on the cooker control panel.
This knob is used to select the different functions of the oven
and choose the right cooking temperature for the food to be
Control Knobs for the Gas Burners on the Hob
prepared in the oven among the temperatures shown on the
The position of the gas burner controlled by each one of the
knob (from Min to Max).
knobs is shown by a symbol of a solid ring:
•. To light one of the
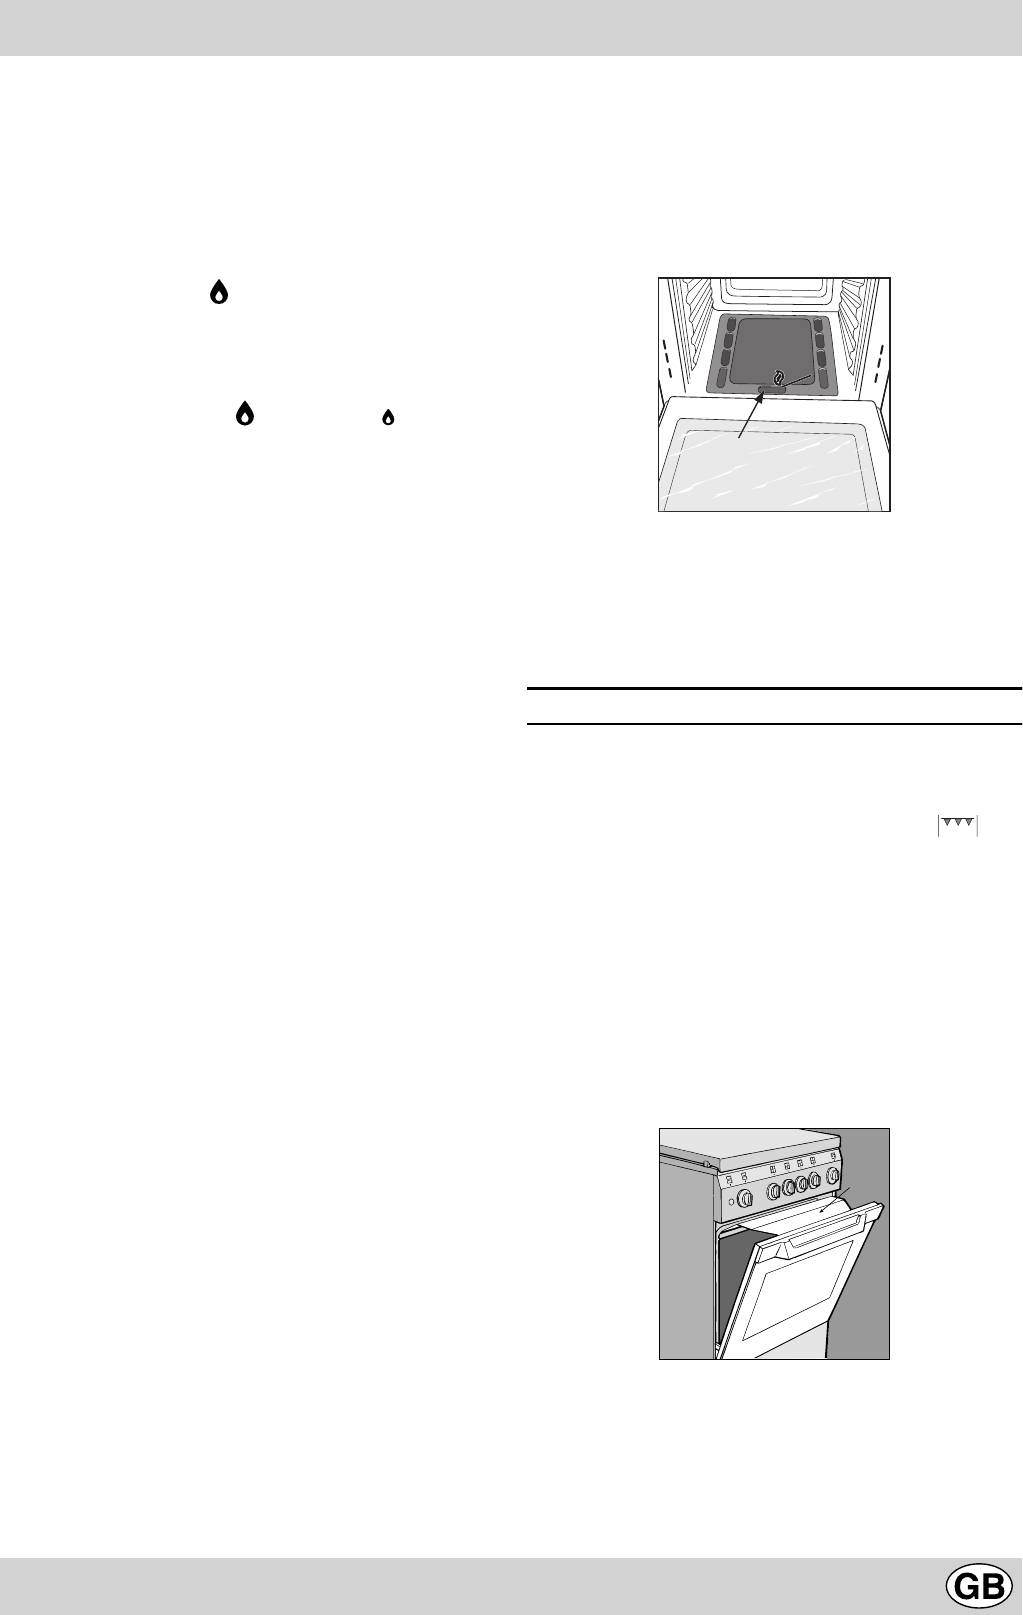
To light the oven burner, hold a lighted match or lighter near hole
burners, hold a lighted match or lighter near the burner. Press
“F” and turn the oven knob counter anti clockwise up to the Max
down and turn the corresponding knob in the counter-clockwise
position.
direction to the maximum
setting. Each burner can be oper-
ated at its maximum, minimum or intermediate power. Shown on
the knob are the different symbols for off
• (the knob is on this
setting when the symbol lines up with the reference mark on the
control panel), for maximum
and minimum .
To obtain these settings, turn the knob counter-clockwise with
F
respect to the off position. To turn off the burner, turn the knob
clockwise until it stops (corresponding again with the
• symbol).
The models equipped with a safety device on oven burner,
Electronic Lighting of the Hob Burners
the knob must be kept pressed in for about 6 seconds to
Some models are equipped with instant electronic lighting of the
activate the flame failure device. (For the models provided
gas burners located on the hob, which can be identified by the
with electronic lighting see the relative paragraph).
presence of an igniter device (see detail C). This device is acti-
The cooking temperature is selected by matching the desired
vated by lighting pressing on the “L” button, identified by the
temperature with the permanent reference on the panel; the com-
symbol. To turn on a burner, simply press the “L” button and
plete range of temperatures is shown below:
1
then press while, at the same time, pressing in and turning the
Min • 160 • 180 • 220 Max
control knob for the burner in the anticlockwise direction until the
burner lights. To light the burner immediately, it is recom-
150 155 170 200 250
mended that the button be pressed first and then the knob
The selected temperature is reached automatically and it is kept
turned.
constant by the knob-controlled thermostat.
Caution: If the burner accidentally goes out, turn off the burner
To use the grill, turn the knob clockwise till to setting
, after
using the knob and wait at least one minute before relight-
holding a lighted match or a lighter close to the grill burner.
ing.
In the grill burner equipped with a safety device, the knob
Models with Hob Gas Burner Safety Devices to Prevent
must be held pressed in for about 6 seconds in order to
Leaks (only on a few models)
activate the flame failure device (for the model provided with
These models can be identified by the presence of the device
electronic lighting see the relative paragraph). In this way the
itself (see detail J).
infrared ray comes on for browning the food or cooking roast,
Important: Since the hob burners are equipped with a safety
chops, sausages, roast-beef, etc.; for grill cooking, place a drip-
device, you must hold the control knob in for about 3 seconds
pan under the grill to catch the grease.
after the burner has been lighted to allow the gas to pass until the
Important: when using the grill, the oven door must be left
safety thermocouple has heated.
partly open by positioning the deflector “D” between door and
panel to prevent the cooker knobs from overheating.
Notice: The first time you use your appliance, we recom-
mend that you set the thermostat to the highest setting
and leave the oven on for about half an hour with nothing
in it, with the oven door shut. Then, open the oven door
D
and let the room air. The odour that is often detected dur-
ing this initial use is due to the evaporation of substances
used to protect the oven during storage and until it is in-
stalled.
Attention: Only use the bottom shelf of the oven when
using the rotisserie to cook (where present). For all other
types of cooking, never use the bottom shelf and never
place anything on the bottom of the oven when it is in
Important Notice: In the event the flame for the oven acciden-
operation because this could damage the enamel. Always
tally goes out, turn the control knob for the burner to the off
place your cookware (dishes, aluminium foil, etc. etc.) on
position and do not relight the burner for at least one minute.
the grate provided with the appliance inserted especially
along the oven guides.
19
Оглавление
- Avvertenze
- Istruzioni per l’installazione
- Caratteristiche dei bruciatori ed ugelli
- La cucina con forno gas e grill gas
- Le diverse funzioni presenti nella cucina
- I
- Consigli pratici per la cottura
- Consigli pratici per la cottura al forno
- Important safety warnings
- Installation
- Burner and nozzle characteristics
- The cooker with gas oven and gas grill
- The different functions and uses of the oven
- I
- Cooking advice
- Ïðåäóïðåæäåíèÿ
- Èíñòðóêöèè ïî ìîíòàæó
- Õàðàêòåðèñòèêè ãàçîâûõ ãîðåëîê è ôîðñóíîê
- Òåõíè÷åñêèå õàðàêòåðèñòèêè
- Ðàçíûå ôóíêöèè êóõîííîé ïëèòû
- I
- Ïðàêòè÷åñêèå ñîâåòû ïî ïðèãîòîâëåíèþ áëþä
- Ðåãóëÿðíîå òåõíè÷åñêîå îáñëóæèâàíèå è ÷èñòêà êóõîííîé ïëèòû
- Ïðàêòè÷åñêèå ñîâåòû ïî ïðèãîòîâëåíèþ áëþä â äóõîâîì øêàôó
- • jelez. A gázégõ begyújtásához
- I
- Instruc þ iuni pentru instalare
- Caracteristici ale arzãtoarelor ºi duzelor (injectoarelor)
- CARACTERISTICI TEHNICE
- Diverse funcþii ale aragazului
- I
- Sfaturi practice pentru procesul de coacere
- Sfaturi practice pentru coacerea la cuptor
- ÑÂÅÒÎÂÅÍ ÒÚÐÃÎÂÑÊÈ ÖÅÍÒÚÐ ÈÍÒÅÐÏÐÅÄ Áóë. Äðàãàí Öàíêîâ ¹ 36, îôèñ 412, ÑÎÔÈß 1057
- Ïðåïîðúêè
- Èíñòðóêöèè çà ìîíòàæ
- Õàðàêòåðèñòèêè íà ãîðåëêèòå è äþçèòå
- Òåõíè÷åñêè õàðàêòåðèñòèêè
- Ôóíêöèè íà ãîòâàðñêàòà ïå÷êà
- I
- Ïðàêòè÷åñêè ñúâåòè çà èçïîëçâàíå íà êîòëîíèòå
- Ïðàêòè÷åñêè ñúâåòè çà ãîòâåíå íà ôóðíà


