Pioneer F-F3MK2-K: Connecting analog audio sources Plugging in
Connecting analog audio sources Plugging in: Pioneer F-F3MK2-K
Table of contents
- IMPORTANT
- POWER-CORD CAUTION IMPORTANT: THE MOULDED PLUG
- Chapter 1: Before you start Features What’s in the box
- Inserting the battery Installing the tuner
- Chapter 2: Connections Connecting antennas Making cable connections
- Connections02
- Connecting analog audio sources Plugging in
- Chapter 3: Controls and displays Front panel
- Remote control unit
- Controls and displays03
- Chapter 4: Listening to FM/AM Auto preset memory DEFAULT VALUE
- Manual tuning Search Mode Auto tuning
- Improving FM stereo sound Recalling preset stations
- Preset stations
- An introduction to RDS RDS Search/PTY Search/TP Search
- Naming station presets
- Last function memory Initialization of the microprocessor
- Chapter 5: Other connections Connecting external antennas Operating this tuner with the remote sensor of your Pioneer amplifier
- Chapter 6: Additional information Troubleshooting
- Additional information06 Problem Remedy
- Specifications
01_F-F3MK2_en.book 9 ページ 2009年4月3日 金曜日 午後1時45分
Connections 02
English
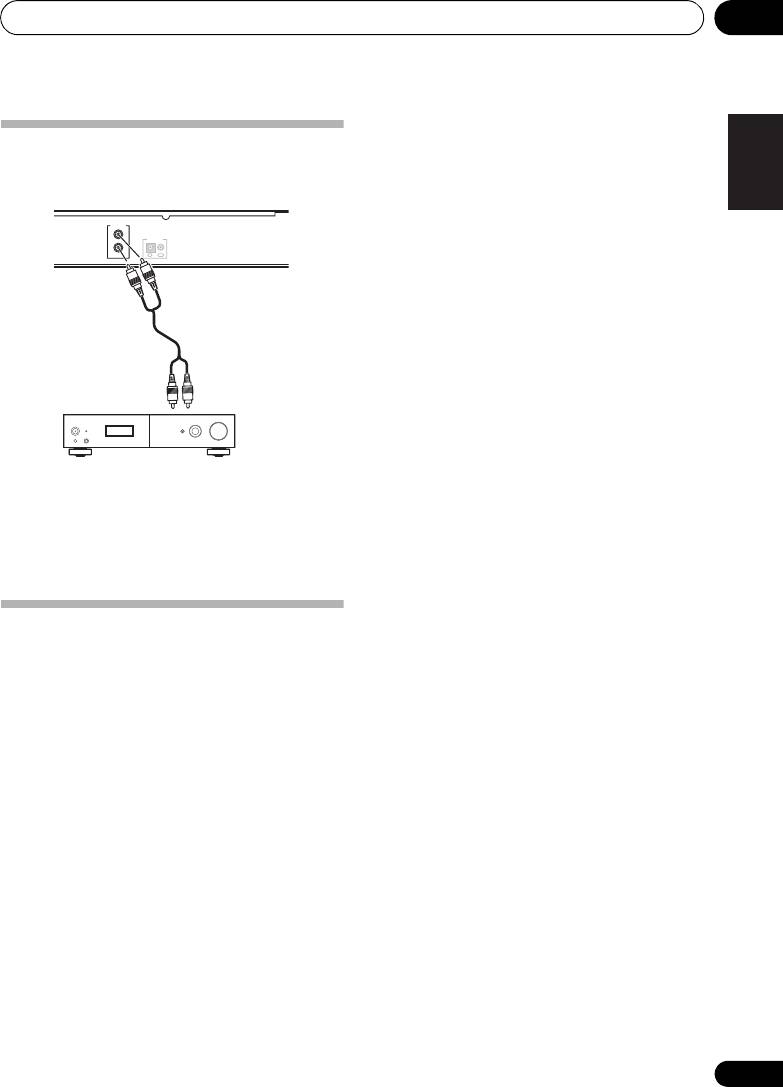
Connecting analog audio
sources
LINEOUT
L
CONTROL
R
OUTIN
FrançaisDeutsch
To analog input
Italiano Español
Amplifier
• Use the RCA/phono jack audio cable to
connect this unit’s LINE OUT connectors
to the analog input connectors of an
amplifier.
Nederlands
Plugging in
Make sure to complete all connections before
connecting to an AC outlet.
• Connect the power cord to the AC inlet
(AC IN) on the rear panel of the tuner, then
plug into a AC outlet.
9
En
Top 10 manuals
100.00
NZXT HALE90 1000W99.99
Samsung SM-R38099.97
AEG BSB 18C99.97
Dell 2700W99.97
Smeg KSEC70X99.96
Beurer HDE 4099.96
Pyramida KH 50 v.299.96
MSI CSM-H81M-P3299.96
AEG HR 562799.95
Melissa 640-048