Dell LATITUDE D400: External Media Bay: Dell™Latitude™CS/CS
External Media Bay: Dell™Latitude™CS/CS: Dell LATITUDE D400
Back to Contents Page
External Media Bay: Dell™Latitude™CS/CS
x
Portable Computers User's Guide
Using the External Media Bay
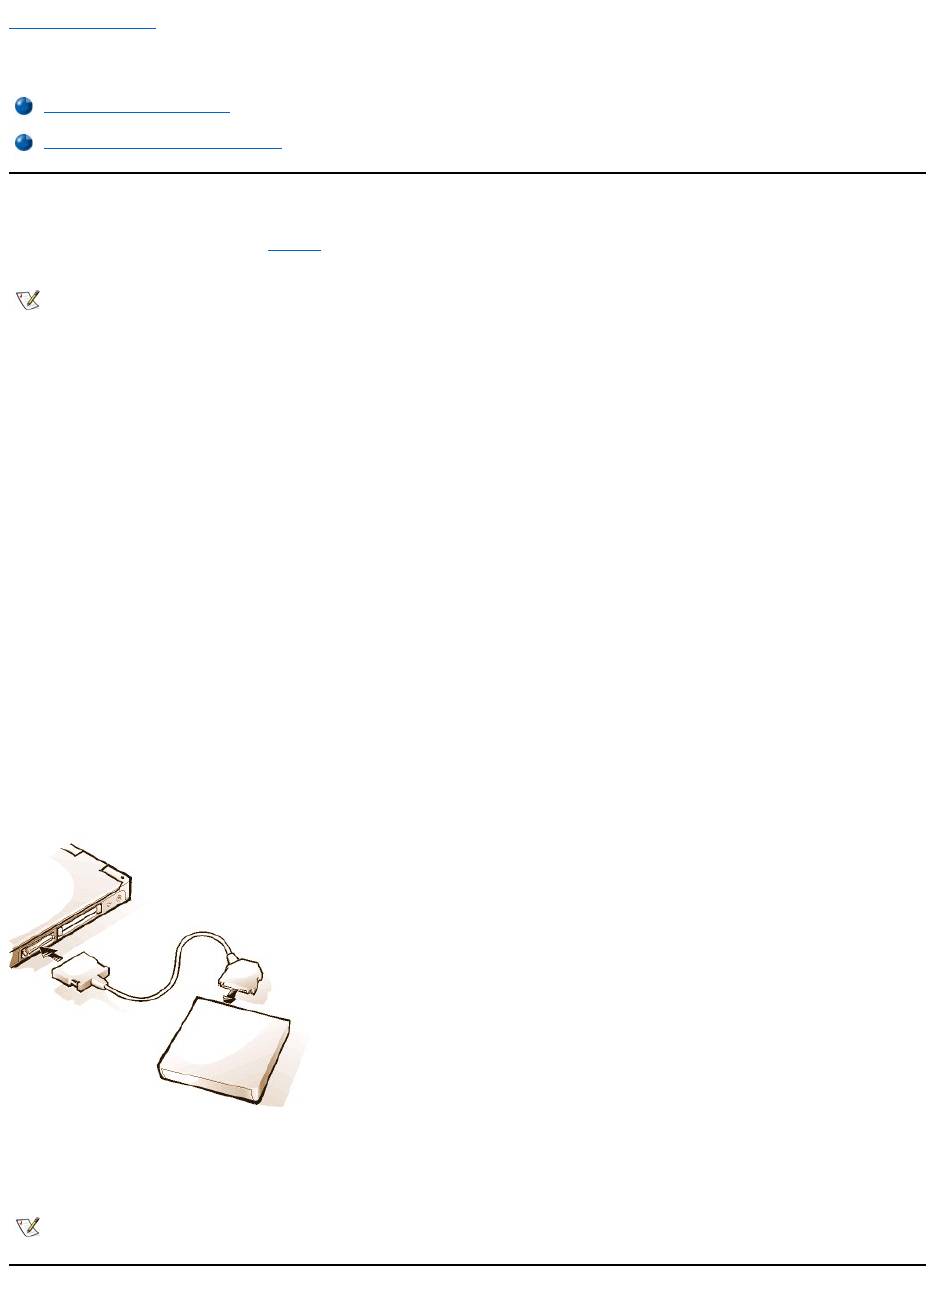
You can use the external media bay (see Figure 1) for the diskette drive that comes with your system. Alternatively, you can install an optional
device (such as a CD-ROM, DVD-ROM, SuperDisk LS-120, or second hard-disk drive) in the bay.
To install a device in the external media bay, perform the following steps:
1. If your computer is running the Dell-installed Microsoft®Windows NT®operating system with Softex Docking Services, or if it is running
the Dell-installed Microsoft Windows®95 or Windows 98 operating system with Softex Bay Manager: Right-click the Softex icon (the icon
looks like a tiny open portable computer) in the system tray at the bottom right on your display, and select either Remove or Swap Devices
or Insert Bay Devices.
If your computer is not running one of the Softex programs: Save your work, close all open files and application programs, and turn off the
computer.
NOTICE: When a device is not inside the external media bay, it is fragile and must be handled carefully to avoid damage. Do not
pressdownonitorplaceaheavyobjectontopofit.Placethedeviceinatravelcasetokeepitfreeofdustandliquids.Storethe
device in a safe place.
2. If the external media bay contains a device, remove the media bay cable from the back of the bay. Then remove the device by sliding the
release latch on the bottom of the bay to the release position, holding it there, and pulling the device out of the bay.
3. Slide the new device firmly into the external media bay.
You should hear a click when the device is fully seated.
4. Connect the media bay cable.
Position the larger of the cable connectors with its shiny metal lip down, and connect it firmly to the back of the device through the slot in the
back of the bay. Make sure that the securing clips are fully engaged and the connector is fully seated. Make sure that the other end of the
cable is connected to the media bay connector on the right-hand side of the computer (see Figure 1).
Figure 1. External Media Bay
5. If your computer is running Softex Docking Services or Softex Bay Manager: Click OK at the Softex Docking Services or Softex Bay
Managerscreen.ClickOK at the Device Removal screen (if it appears), and then click OK at the Device Configured screen.
If you turned off the computer in step 1: Press the power button to turn the computer back on.
Using the External Media Bay
Setting Up a Second Hard-Disk Drive
NOTE:Ifdesired,youcanusethemediabaycabletoconnectadevicedirectlytotheexternalmediabayconnector,withoutusingthe
external media bay.
NOTE:ForthelatestinformationonSoftexDockingServicessoftware,see
http://www.dell.com/products/notebook/latitude/NT40.htm.

Setting Up a Second Hard-Disk Drive
The first time you install a second hard-disk drive in the external media bay, you must format that drive. For instructions, see the documentation that
came with the device.
Back to Contents Page
Оглавление
- Dell™Latitude™CS/CS
- AC Adapter: Dell™Latitude™CS/CS
- Power Management Settings: Dell™Latitude™CS/CS
- Batteries:Dell™Latitude™CS/CS
- CD-ROM and DVD-ROMDrives:Dell™Latitude™CS/CS
- ContactingDell:Dell™Latitude™CS/CS
- CustomizingYourComputer:Dell™Latitude™CS/CS
- Dell™Diagnostics:DellLatitude™CS/CS
- Diskette Drive: Dell™Latitude™CS/CS
- Display: Dell™Latitude™CS/CS
- Drivers:Dell™Latitude™CS/CS
- ErrorMessagesandFlashCodes:Dell™Latitude™CS/CS
- Connecting External Devices: Dell™Latitude™CS/CS
- GettingHelp:Dell™Latitude™CS/CS
- HelpOverview:Dell™Latitude™CSPortableComputersUser'sGuide
- Introduction:Dell™Latitude™CS/CS
- Keyboard: Dell™Latitude™CS/CS
- External Media Bay: Dell™Latitude™CS/CS
- MediaOptions:Dell™Latitude™CS/CS
- PC Cards: Dell™Latitude™CS/CS
- PoweringYourComputer:Dell™Latitude™CS/CS
- Preface:Dell™Latitude™CS/CS
- Removing and Replacing Parts: Dell™Latitude™CS/CS
- Suspend-to-Disk Utility: Dell™Latitude™CS/CS
- Securing Your Computer: Dell™Latitude™CS/CS
- Using the System Setup Program:Dell™Latitude™CS/CS
- SystemSetupOptions:Dell™Latitude™CS/CS
- TechnicalSpecifications:Dell™Latitude™CS/CS
- SetupandOperation:Dell™Latitude™CS/CS
- Touch Pad: Dell™Latitude™CS/CS
- TravelingWithYourComputer:Dell™Latitude™CS/CS
- TroubleshootingYourComputer:Dell™Latitude™CS/CS
- Installing the Microsoft® Windows® 95 and Windows 98 Operating System Drivers: Dell™Latitude™CS/CS
- Installing the Microsoft® Windows NT® Operating System Drivers: Dell™Latitude™ CS/CS
