Dell Precision M2300 (Late 2007): инструкция
Раздел: Компьютерная техника, комплектующие, аксессуары
Тип: Ноутбук
Инструкция к Ноутбуку Dell Precision M2300 (Late 2007)
Оглавление
- Примечания, уведомления и предупреждения
- Содержание
- Источники информации Что требуется найти? Информация находится здесь
- Что требуется найти? Информация находится здесь
- Что требуется найти? Информация находится здесь
- Что требуется найти? Информация находится здесь
- Что требуется найти? Информация находится здесь
- Настройка компьютера 1 2 3 4
- О компьютере Вид спереди
- Вид слева Вид справа
- Вид сзади Вид снизу
- Использование аккумулятора Работа аккумулятора
- Время работы значительно снижается при выполнении операций с повышенным энергопотреблением, включая следующие, но не ограничиваясь ими:
- Проверка заряда аккумулятора Программа Dell™ QuickSet Battery Meter Индикатор питания Microsoft Индикатор заряда
- Проверка заряда аккумулятора Проверка работоспособности аккумулятора Предупреждение о недостаточном заряде аккумулятора
- Зарядка аккумулятора Извлечение аккумулятора
- Для извлечения аккумулятора: Хранение аккумулятора
- Поиск и устранение неисправностей Блокировки и неполадки программного обеспечения Компьютер не запускается Компьютер не отвечает Программа не отвечает, или постоянно возникают сбои Завершение программы.
- Программа, разработанная для более ранних версий операционной системы Microsoft Windows Запустите мастер совместимости программ. Windows XP Windows Vista Появляется сплошной синий экран Другие неполадки программ
- Сохраните и закройте все открытые файлы или программы, а затем выключите компьютер с помощью меню «Пуск». Когда использовать программу Dell Diagnostics
- Запуск программы Dell Diagnostics с жесткого диска
- Запуск программы Dell Diagnostics с компакт$диска Drivers and Utilities (Драйверы и утилиты)
- Главное меню Dell Diagnostics Параметр Функция Вкладка Функция
- Вкладка Функция
- Указатель
- Указатель
- Указатель

Dell Precision™ M2300
Quick Reference Guide
Model PP18L
www.dell.com | support.dell.com

Notes, Notices, and Cautions
NOTE: A NOTE indicates important information that helps you make better use of
your computer.
NOTICE: A NOTICE indicates either potential damage to hardware or loss of data
and tells you how to avoid the problem.
CAUTION: A CAUTION indicates a potential for property damage, personal injury,
or death.
If you purchased a Dell™ n Series computer, any references in this document to
®
®
Microsoft
Windows
operating systems are not applicable.
____________________
Information in this document is subject to change without notice.
© 2007 Dell Inc. All rights reserved.
Trademarks used in this text: Dell, ExpressCharge, the DELL logo and Dell Precision are trademarks
of Dell Inc.; Core, Active Management Technology, Centrino, and Intel are registered trademarks of
Intel Corporation; Microsoft, Outlook, Windows, Windows Vista are either registered trademarks or
trademarks of Microsoft Corporation in the United States and/or other countries; Bluetooth is a
registered trademark owned by Bluetooth SIG, Inc. and is used by Dell under license; TouchStrip is
a trademark of UPEK, Inc.; EMC is a registered trademark of EMC Corporation; ENERGY STAR is
a registered trademark of the U.S. Environmental Protection Agency. As an ENERGY STAR partner,
Dell Inc. has determined that this product meets the ENERGY STAR guidelines for energy efficiency.
Other trademarks and trade names may be used in this document to refer to either the entities claiming
the marks and names or their products. Dell Inc. disclaims any proprietary interest in trademarks and
trade names other than its own.
Model PP18L
September 2007 P/N YU151 Rev. A00

Contents
Finding Information . . . . . . . . . . . . . . . . . . . . 5
Setting Up Your Computer
. . . . . . . . . . . . . . . . 10
About Your Computer
. . . . . . . . . . . . . . . . . . 11
Front View
. . . . . . . . . . . . . . . . . . . . . 11
Left Side View
. . . . . . . . . . . . . . . . . . . . 12
Right Side View
. . . . . . . . . . . . . . . . . . . 12
Back View
. . . . . . . . . . . . . . . . . . . . . 13
Bottom View
. . . . . . . . . . . . . . . . . . . . 13
Using a Battery
. . . . . . . . . . . . . . . . . . . . . . 14
Battery Performance
. . . . . . . . . . . . . . . . 14
Checking the Battery Charge
. . . . . . . . . . . . 15
Charging the Battery
. . . . . . . . . . . . . . . . 17
Removing the Battery
. . . . . . . . . . . . . . . . 18
Storing a Battery
. . . . . . . . . . . . . . . . . . 19
Troubleshooting
. . . . . . . . . . . . . . . . . . . . . 19
Lockups and Software Problems
. . . . . . . . . . 19
Dell Diagnostics
. . . . . . . . . . . . . . . . . . 21
Index . . . . . . . . . . . . . . . . . . . . . . . . . . . . . . . 27
Contents 3

4 Contents
Finding Information
NOTE: Some features or media may be optional and may not ship with your
computer. Some features or media may not be available in certain countries.
NOTE: Additional information may ship with your computer.
What Are You Looking For? Find It Here
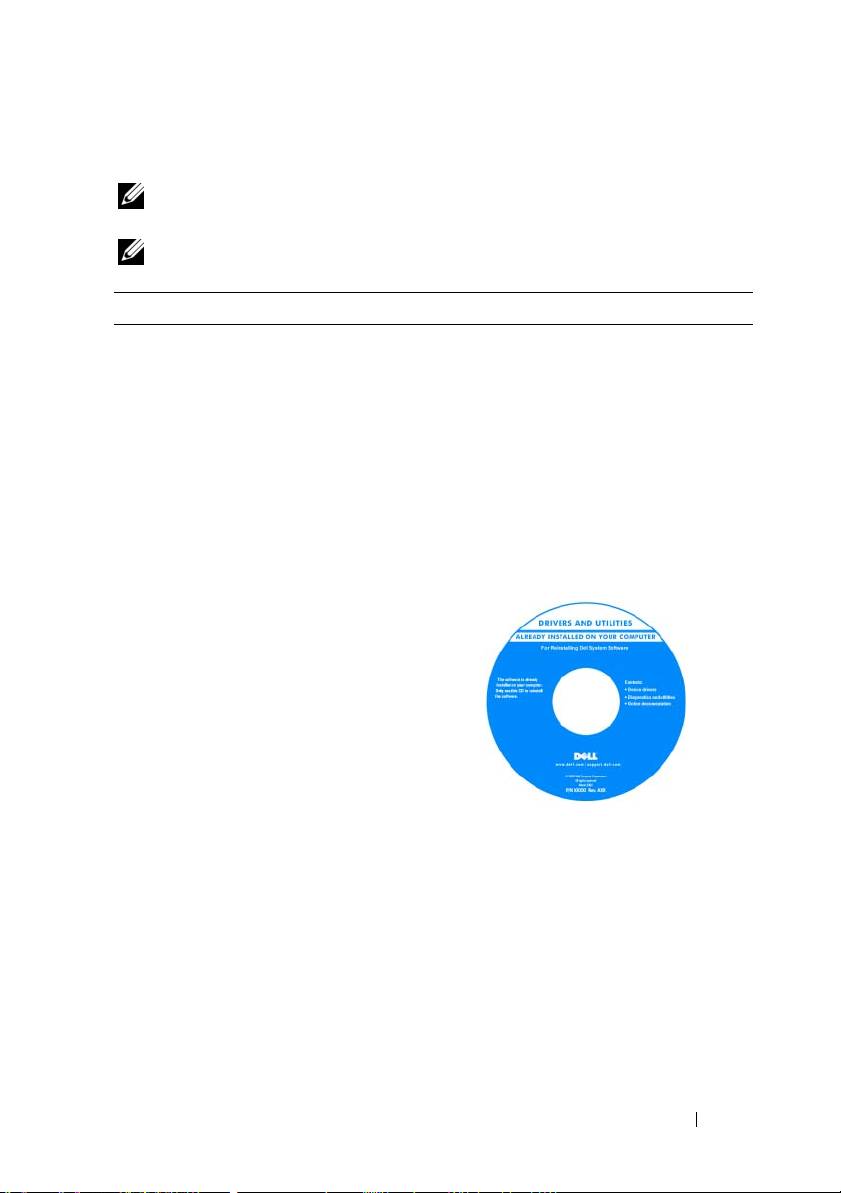
• A diagnostic program for my computer
Drivers and Utilities Media
• Drivers for my computer
NOTE: The Drivers and Utilities media may
be optional and may not ship with your
• My device documentation
computer.
• Notebook System Software (NSS)
Documentation and drivers are already
installed on your computer. You can use
the media to reinstall drivers (see
"Reinstalling Drivers and Utilities" in your
User’s Manual) or to run the Dell
Diagnostics (see "Dell Diagnostics" on
page 21).
Readme files may be included on your
media to provide last-minute updates
about technical changes to your computer
or advanced technical-reference material
for technicians or experienced users.
NOTE: Drivers and documentation updates
can be found at support.dell.com.
Quick Reference Guide 5
What Are You Looking For? Find It Here
• How to set up my computer
In this document
• Basic troubleshooting information
NOTE: This document is available as a PDF
• How to run the Dell™ Diagnostics
at support.dell.com.
• How to open my computer
• Warranty information
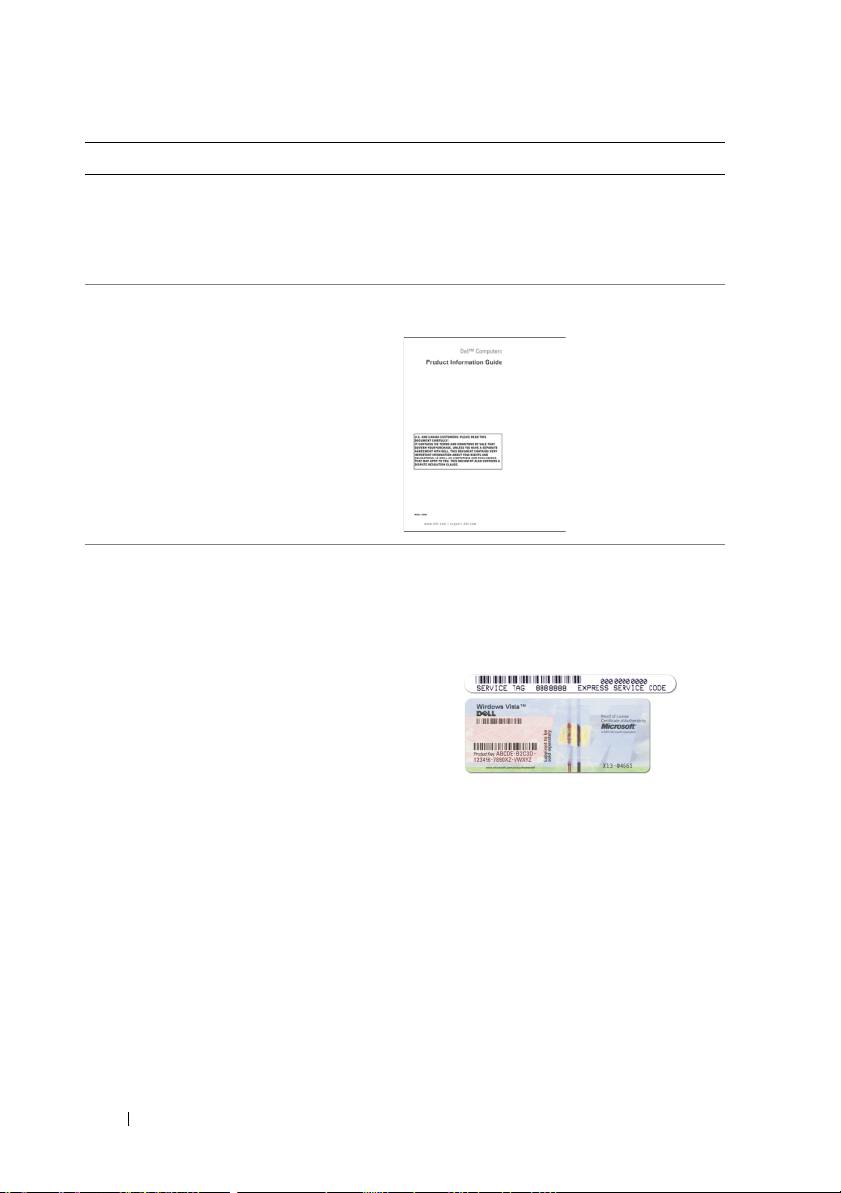
Dell Product Information Guide
• Terms and Conditions (U.S. only)
• Safety instructions
• Regulatory information
• Ergonomics information
• End User License Agreement
• Service Tag and Express Service Code
Service Tag and Microsoft Windows
®
®
License
• Microsoft
Windows
License Label
These labels are located on your
computer:
• Use the Service Tag to identify your
computer when you use
support.dell.com
or contact support.
• Enter the Express Service Code to direct
your call when contacting support.
6 Quick Reference Guide

What Are You Looking For? Find It Here
• Solutions — Troubleshooting hints and
Dell Support Website — support.dell.com
tips, articles from technicians, and
NOTE: Select your region or business
online courses, frequently asked
segment to view the appropriate support
questions
site.
• Community — Online discussion with
other Dell customers
• Upgrades — Upgrade information for
components, such as memory, the hard
drive, and the operating system
• Customer Care — Contact
information, service call and order
status, warranty, and repair information
• Service and support — Service call
status and support history, service
contract, online discussions with
technical support
• Dell Technical Update Service —
Proactive e-mail notification of
software and hardware updates for your
computer
• Reference — Computer
documentation, details on my
computer configuration, product
specifications, and white papers
• Downloads — Certified drivers,
patches, and software updates
• Notebook System Software (NSS) — If
you reinstall the operating system for
To download Notebook System Software:
your computer, you should also reinstall
1
Go to
support.dell.com
, select your
the NSS utility. NSS provides critical
region or business segment, and enter
updates for your operating system and
your Service Tag.
support for processors, optical drives,
2
Select
Drivers & Downloads
and
USB devices, and so on. NSS is
click
Go
.
necessary for correct operation of your
3
Click your operating system and search
Dell computer. The software
for the keywords
Notebook System
automatically detects your computer
Software
.
and operating system and installs the
updates appropriate for your
NOTE: The support.dell.com user interface
configuration.
may vary depending on your selections.
Quick Reference Guide 7

What Are You Looking For? Find It Here
• Software upgrades and troubleshooting
Dell Support Utility
hints — Frequently asked questions,
The Dell Support Utility is an automated
hot topics, and general health of your
upgrade and notification system installed
computing environment
on your computer. This support provides
real-time health scans of your computing
environment, software updates, and
relevant self-support information. Access
the Dell Support Utility from the
icon in the taskbar.
• How to use Windows XP
Windows Help and Support Center
• How to work with programs and files
1
Click
Start
→
Help and Support
.
• How to personalize my desktop
2
Type a word or phrase that describes
your problem and click the arrow icon.
3
Click the topic that describes your
problem.
4
Follow the instructions on the screen.
• Information on network activity, the
Dell QuickSet Help
Power Management Wizard, hotkeys,
To view
Dell QuickSet Help
,
right-click the
and other items controlled by Dell
QuickSet icon in the Microsoft Windows
QuickSet.
taskbar.
For more information on Dell QuickSet,
see "Dell QuickSet" In your User’s Guide.
8 Quick Reference Guide
What Are You Looking For? Find It Here
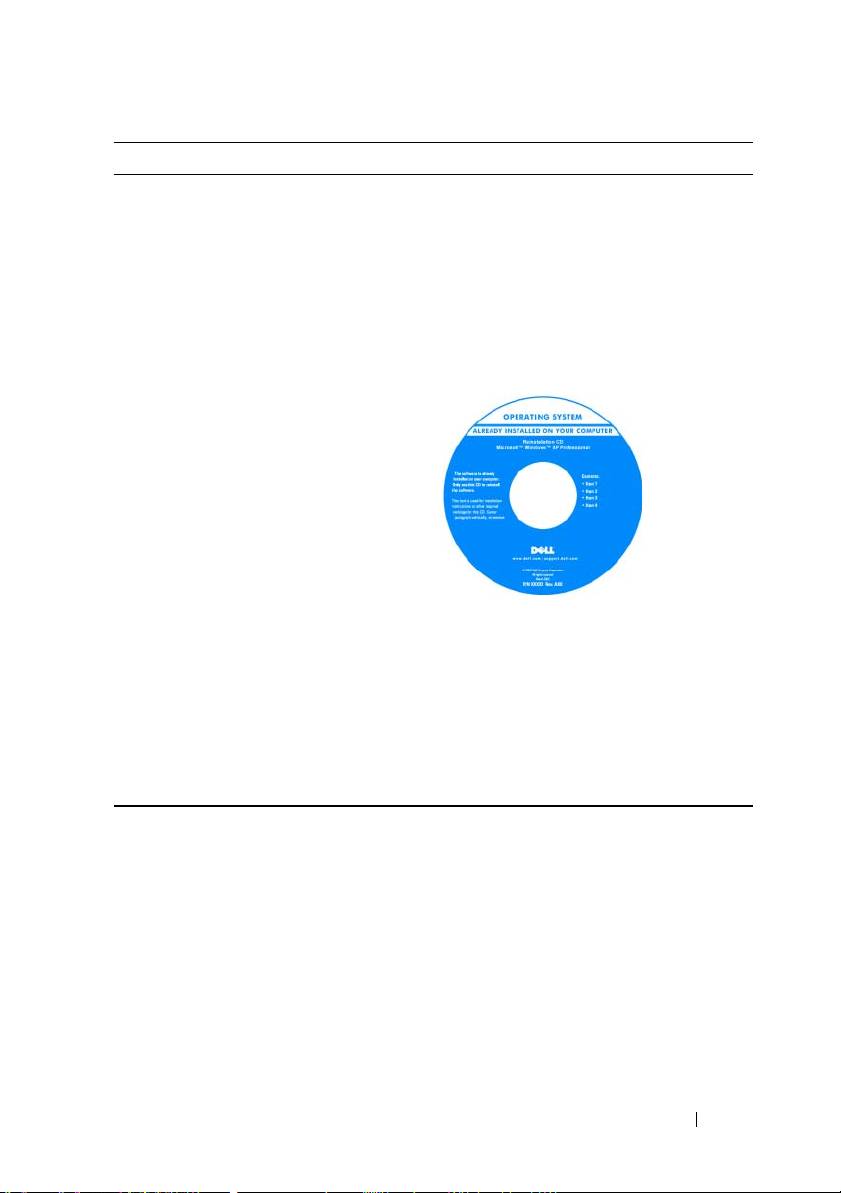
• How to reinstall my operating system
Operating System Media
NOTE: The Operating System media may be
optional and may not ship with your
computer.
The operating system is already installed
on your computer. To reinstall your
operating system, use the Operating
System media (see "Reinstalling Windows"
in your User’s Guide).
After you reinstall your operating system,
use the optional Drivers and Utilities
media to reinstall drivers for the devices
that came with your computer.
Your operating system product key label is
located on your computer.
NOTE: The color of your media varies
based on the operating system you ordered.
Quick Reference Guide 9
Setting Up Your Computer
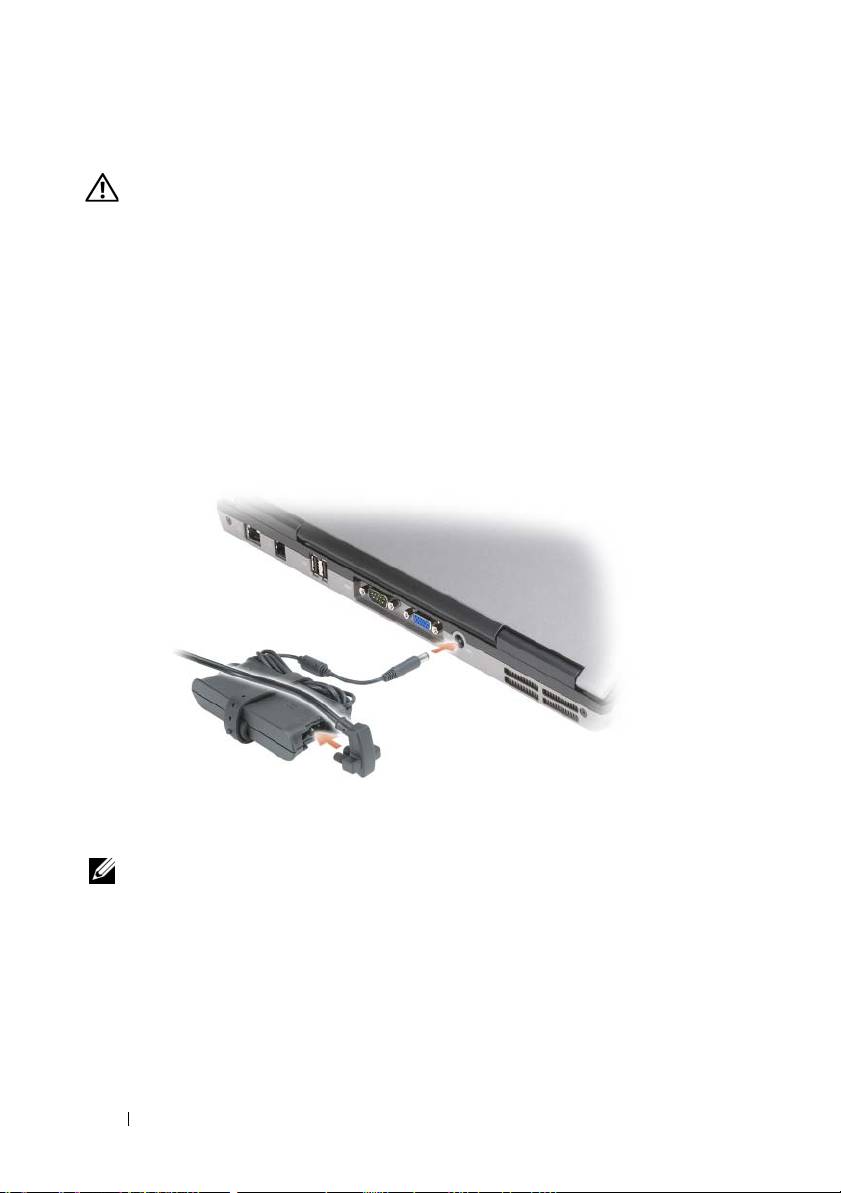
CAUTION: Before you begin any of the procedures in this section, follow the
safety instructions in the Product Information Guide.
1
Unpack the accessories box.
2
Set aside the contents of the accessories box, which you will need to
complete the setup of your computer.
The accessories box also contains user documentation and any software or
additional hardware (such as PC Cards, drives, or batteries) that you have
ordered.
3
Connect the AC adapter to the AC adapter connector on the computer
and to the electrical outlet.
4
Open the computer display and press the power button to turn on the
computer (see "Front View" on page 11).
NOTE: It is recommended that you turn on and shut down your computer at least
once before you install any cards or connect the computer to a docking device or
other external device, such as a printer.
10 Quick Reference Guide
About Your Computer
NOTE: The appearance of your computer may vary slightly from the model shown
in this document.
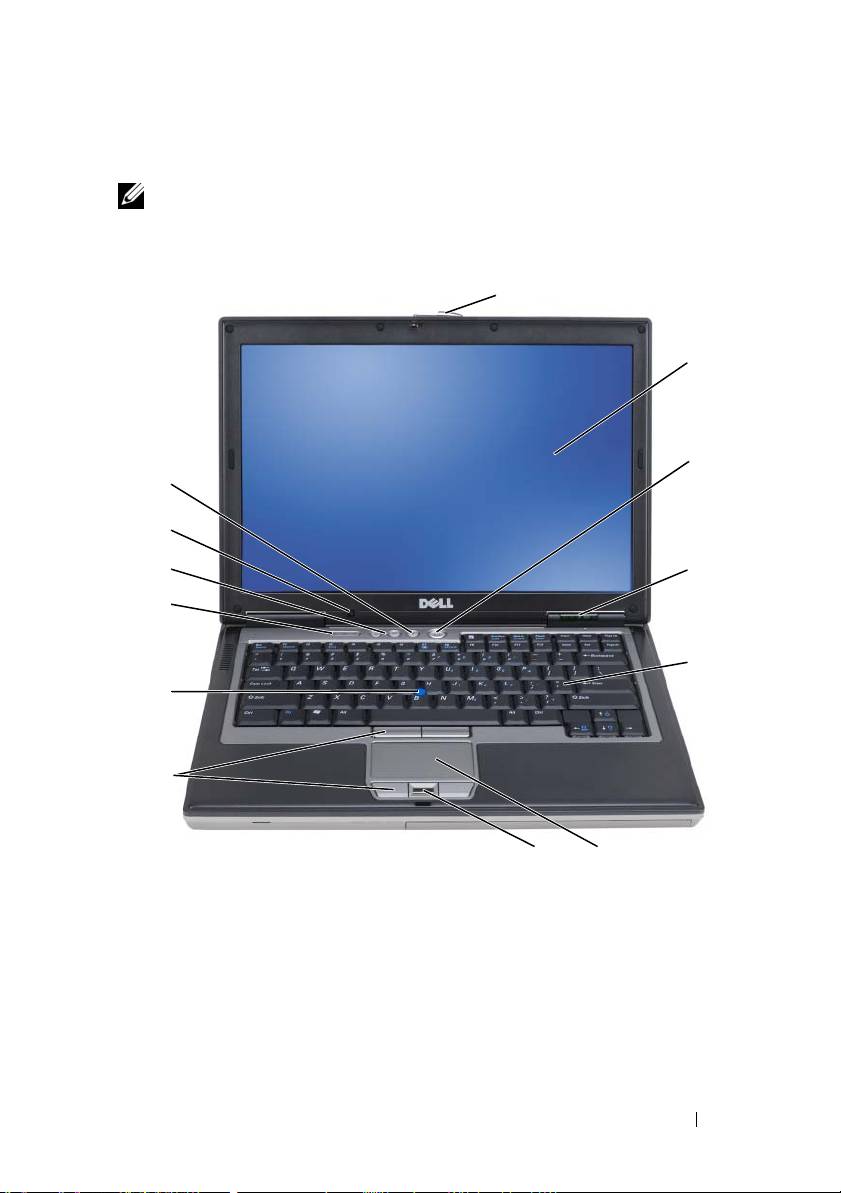
Front View
1
2
3
13
12
11
4
10
5
9
8
7
6
1 display latch 2 display 3 power button
4 device status lights 5 keyboard 6 touch pad
7 fingerprint reader
8 touch pad buttons/track
9 track stick
(optional)
stick buttons
10 keyboard status lights 11 volume control buttons 12 ambient light sensor
13 mute button
Quick Reference Guide 11
Left Side View
1 2 3 65 7 84 9
1 security cable slot 2 air vents 3 audio connectors (2)
4 smart card slot 5 1394 connector 6 wireless switch
7 Wi-Fi Catcher™ light 8 PC Card slot (with blank) 9 hard drive
Right Side View
1
2 3
1 optical drive in media bay 2 media-bay device latch
3 USB connectors (2)
release
12 Quick Reference Guide
Back View
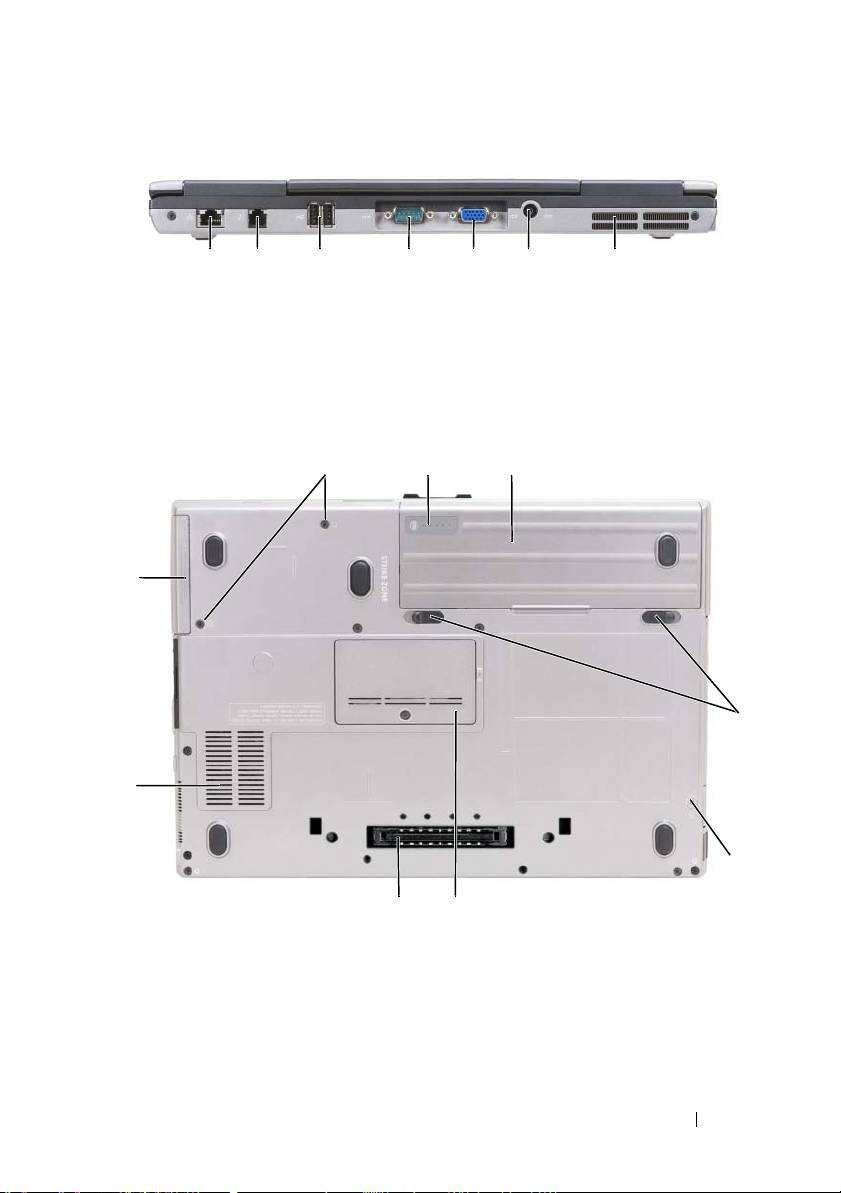
1 2 63 4 75
1 network
2 modem connector
3USB
4 serial
connector (RJ-45)
(RJ-11)
connectors (2)
connector
5 video connector 6 AC adapter
7 air vents
connector
Bottom View
9
1
2
8
3
7
4
6
5
1 battery charge
2 battery 3 battery-bay latch
gauge/health gauge
releases (2)
4 device locking screw
5 memory module cover 6 docking-device
(if present)
connector
7 air vents 8 hard drive 9 hard drive screws (2)
Quick Reference Guide 13

Using a Battery
Battery Performance
NOTE: For information about the Dell warranty for your computer, see the Product
Information Guide or separate paper warranty document that shipped with your
computer.
For optimal computer performance and to help preserve BIOS settings,
operate your Dell portable computer with the main battery installed at all
times. One battery is supplied as standard equipment in the battery bay.
NOTE: Because the battery may not be fully charged, use the AC adapter to
connect your new computer to an electrical outlet the first time you use the
computer. For best results, operate the computer with the AC adapter until the
battery is fully charged. To view battery charge status, click Start
→
Control
Panel
→
Power Options
→
Power Meter.
Battery operating time varies depending on operating conditions. You can
install an optional second battery in the media bay to significantly increase
operating time.
Operating time is significantly reduced when you perform operations
including, but not limited to, the following:
• Using optical drives
• Using wireless communications devices, PC Cards, ExpressCards, media
memory cards, or USB devices
• Using high-brightness display settings, 3D screen savers, or other power-
intensive programs such as complex 3D graphics applications
Running the computer in maximum performance mode (see "Configuring
Power Management Settings" in your
User’s Guide
).
NOTE: Battery operating time (the time the battery can hold a charge) decreases
over time. Depending on how often the battery is used and the conditions under
which it is used, you may need to purchase a new battery during the life of your
computer.
NOTE: It is recommended that you connect your computer to an electrical outlet
when writing to a CD or DVD.
14 Quick Reference Guide

Operating time is significantly reduced when you perform operations
including, but not limited to, the following:
• Using optical drives.
• Using wireless communications devices, PC Cards, Express Cards, media
memory cards, or USB devices.
• Using high-brightness display settings, 3D screen savers, or other power-
intensive programs such as complex 3D graphics applications.
• Running the computer in maximum performance mode. See "Configuring
Power Management Settings" in your
Hardware Owner’s Manual
for
information about accessing Windows Power Options Properties or Dell
QuickSet, which you can use to configure power management settings.
You can check the battery charge before you insert the battery into the
computer. You can also set power management options to alert you when the
battery charge is low.
CAUTION: Using an incompatible battery may increase the risk of fire or
explosion. Replace the battery only with a compatible battery purchased from
Dell. The battery is designed to work with your Dell computer. Do not use a battery
from other computers with your computer.
CAUTION: Do not dispose of batteries with household waste. When your battery
no longer holds a charge, call your local waste disposal or environmental agency
for advice on disposing of a lithium-ion battery. See "Battery Disposal" in the
Product Information Guide.
CAUTION: Misuse of the battery may increase the risk of fire or chemical burn.
Do not puncture, incinerate, disassemble, or expose the battery to temperatures
above 65°C (149°F). Keep the battery away from children. Handle damaged or
leaking batteries with extreme care. Damaged batteries may leak and cause
personal injury or equipment damage.
Checking the Battery Charge
The Dell QuickSet Battery Meter, the Microsoft Windows Power Meter
window and icon, the battery charge gauge and health gauge, and the low-
battery warning provide information on the battery charge.
Quick Reference Guide 15

Dell™ QuickSet Battery Meter
If Dell QuickSet is installed, press <Fn><F3> to display the QuickSet
Battery Meter. The Battery Meter displays status, battery health, charge level,
and charge completion time for the battery in your computer.
For more information about QuickSet, right-click the QuickSet icon in the
taskbar, and click Help.
®
®
Microsoft
Windows
XP Power Meter
The Windows Power Meter indicates the remaining battery charge. To check
the Power Meter, double-click the icon on the taskbar.
If the computer is connected to an electrical outlet, a icon appears.
Charge Gauge
By either pressing once or pressing and holding the status button on the
charge gauge on the battery, you can check:
• Battery charge (check by pressing and
releasing
the status button)
• Battery health (check by pressing and
holding
the status button)
The battery operating time is largely determined by the number of times it is
charged. After hundreds of charge and discharge cycles, batteries lose some
charge capacity—or battery health. That is, a battery can show a status of
"charged" but maintain a reduced charge capacity (health).
Check the Battery Charge
To check the battery charge, press and release the status button on the battery
charge gauge to illuminate the charge-level lights. Each light represents
approximately 20 percent of the total battery charge. For example, if the
battery has 80 percent of its charge remaining, four of the lights are on. If no
lights appear, the battery has no charge.
Check the Battery Health
NOTE: You can check battery health in one of two ways: by using the charge gauge
on the battery as described below and by using the Battery Meter in Dell QuickSet.
For information about QuickSet, right-click the QuickSet icon in the taskbar, and
click Help.
16 Quick Reference Guide

To check the battery health using the charge gauge, press and hold the status
button on the battery charge gauge for at least 3 seconds. If no lights appear,
the battery is in good condition, and more than 80 percent of its original
charge capacity remains. Each light represents incremental degradation. If
five lights appear, less than 60 percent of the charge capacity remains, and you
should consider replacing the battery. See "Specifications" in your User’s
Guide for more information about the battery operating time.
Low-Battery Warning
NOTICE: To avoid losing or corrupting data, save your work immediately after a
low-battery warning. Then connect the computer to an electrical outlet. If the
battery runs completely out of power, hibernate mode begins automatically.
By default, a pop-up window warns you when the battery charge is
approximately 90 percent depleted. You can change the settings for the
battery alarms in QuickSet or the Power Options Properties window. See
"Configuring Power Management Settings" in your
User’s Guide
for
information about accessing QuickSet or the Power Options Properties
window.
Charging the Battery
When you connect the computer to an electrical outlet or install a battery
while the computer is connected to an electrical outlet, the computer checks
the battery charge and temperature. If necessary, the AC adapter then charges
the battery and maintains the battery charge.
NOTE: With Dell ExpressCharge, when the computer is turned off, the AC adapter
charges a completely discharged battery to 80 percent in about 1 hour and to
100 percent in approximately 2 hours. Charge time is longer with the computer
turned on. You can leave the battery in the computer for as long as you like. The
battery’s internal circuitry prevents the battery from overcharging.
If the battery is hot from being used in your computer or being in a hot
environment, the battery may not charge when you connect the computer to
an electrical outlet.
The battery is too hot to start charging if the light flashes alternately
green and orange. Disconnect the computer from the electrical outlet and
allow the computer and the battery to cool to room temperature. Then
connect the computer to an electrical outlet to continue charging the battery.
Quick Reference Guide 17
Removing the Battery
CAUTION: Using an incompatible battery may increase the risk of fire or
explosion. Replace the battery only with a compatible battery purchased from
Dell. The battery is designed to work with your Dell™ computer. Do not use a
battery from other computers with your computer.
CAUTION: Before performing these procedures, turn off the computer, disconnect
the AC adapter from the electrical outlet and the computer, disconnect the modem
from the wall connector and computer, and remove any other external cables from
the computer.
NOTICE: You must remove all external cables from the computer to avoid possible
connector damage.
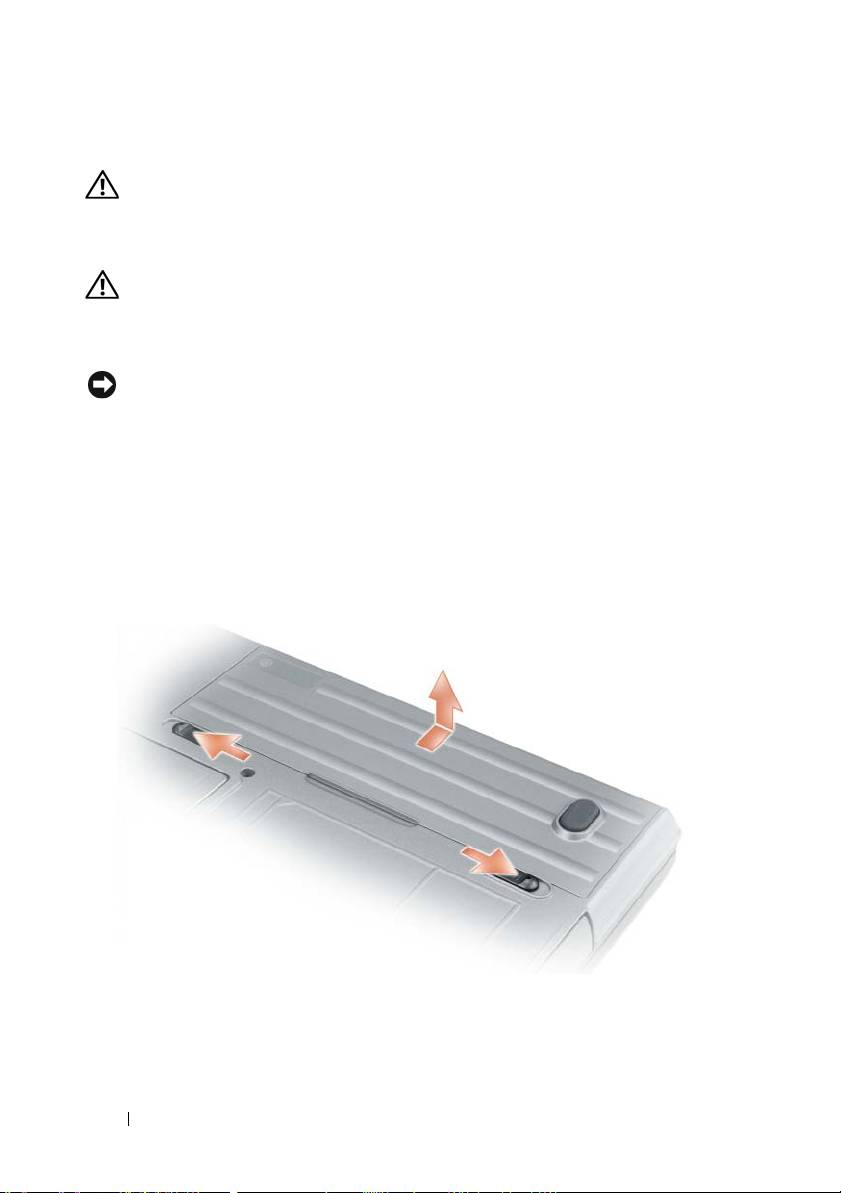
To remove the battery:
1
If the computer is connected to a docking device (docked), undock it. See
the documentation that came with your docking device for instructions.
2
Ensure that the computer is turned off.
3
Slide the two latch releases on the bottom of the computer, and then
remove the battery from the bay.
To replace the battery, follow the removal procedure in reverse order.
18 Quick Reference Guide

Storing a Battery
Remove the battery when you store your computer for an extended period of
time. A battery discharges during prolonged storage. After a long storage
period, recharge the battery fully (see "Charging the Battery" on page 17)
before use.
Troubleshooting
Lockups and Software Problems
CAUTION: Before you begin any of the procedures in this section, follow the
safety instructions in the Product Information Guide.
The computer does not start up
ENSURE THAT THE AC ADAPTER IS FIRMLY CONNECTED TO THE COMPUTER AND TO
THE ELECTRICAL OUTLET.
The computer stops responding
NOTICE: You might lose data if you are unable to perform an operating system
shutdown.
T
URN THE COMPUTER OFF — If you are unable to get a response by pressing a
key on your keyboard or moving your mouse, press and hold the power button
for at least 8 to 10 seconds until the computer turns off. Then restart your
computer.
A program stops responding or crashes repeatedly
NOTE: Software usually includes installation instructions in its documentation or
on a floppy disk or CD.
E
ND THE PROGRAM —
1
Press <Ctrl><Shift><Esc> simultaneously.
2
Click
Task Manager
.
3
Click the program that is no longer responding.
4
Click
End Task
.
CHECK THE SOFTWARE DOCUMENTATION — If necessary, uninstall and then
reinstall the program.
Quick Reference Guide 19

®
®
A program is designed for an earlier Microsoft
Windows
operating system
RUN THE PROGRAM COMPATIBILITY WIZARD — The Program Compatibility
Wizard configures a program so that it runs in an environment similar to non-
Windows operating system environments.
Windows XP
1
Click
Start
→
All Programs
→
Accessories
→
Program Compatibility
Wizard
→
Next
.
2
Follow the instructions on the screen.
Windows Vista
1
Click
Start
→
Control Panel
→
Control Panel Home
→
Programs
and click
Use an older program with this version of windows
.
2
Follow the instructions on the screen.
A solid blue screen appears
TURN THE COMPUTER OFF — If you are unable to get a response by pressing a
key on your keyboard or moving your mouse, press and hold the power button
for at least 8 to 10 seconds until the computer turns off. Then restart your
computer.
Other software problems
CHECK THE SOFTWARE DOCUMENTATION OR CONTACT THE SOFTWARE
MANUFACTURER FOR TROUBLESHOOTING INFORMATION —
• Ensure that the program is compatible with the operating system installed
on your computer.
• Ensure that your computer meets the minimum hardware requirements
needed to run the software. See the software documentation for
information.
• Ensure that the program is installed and configured properly.
• Verify that the device drivers do not conflict with the program.
• If necessary, uninstall and then reinstall the program.
BACK UP YOUR FILES IMMEDIATELY.
U
SE A VIRUS-SCANNING PROGRAM TO CHECK THE HARD DRIVE, FLOPPY DISKS, OR
CD
S .
20 Quick Reference Guide
