Pioneer DEH-P65BT: Installation
Installation: Pioneer DEH-P65BT
Installation
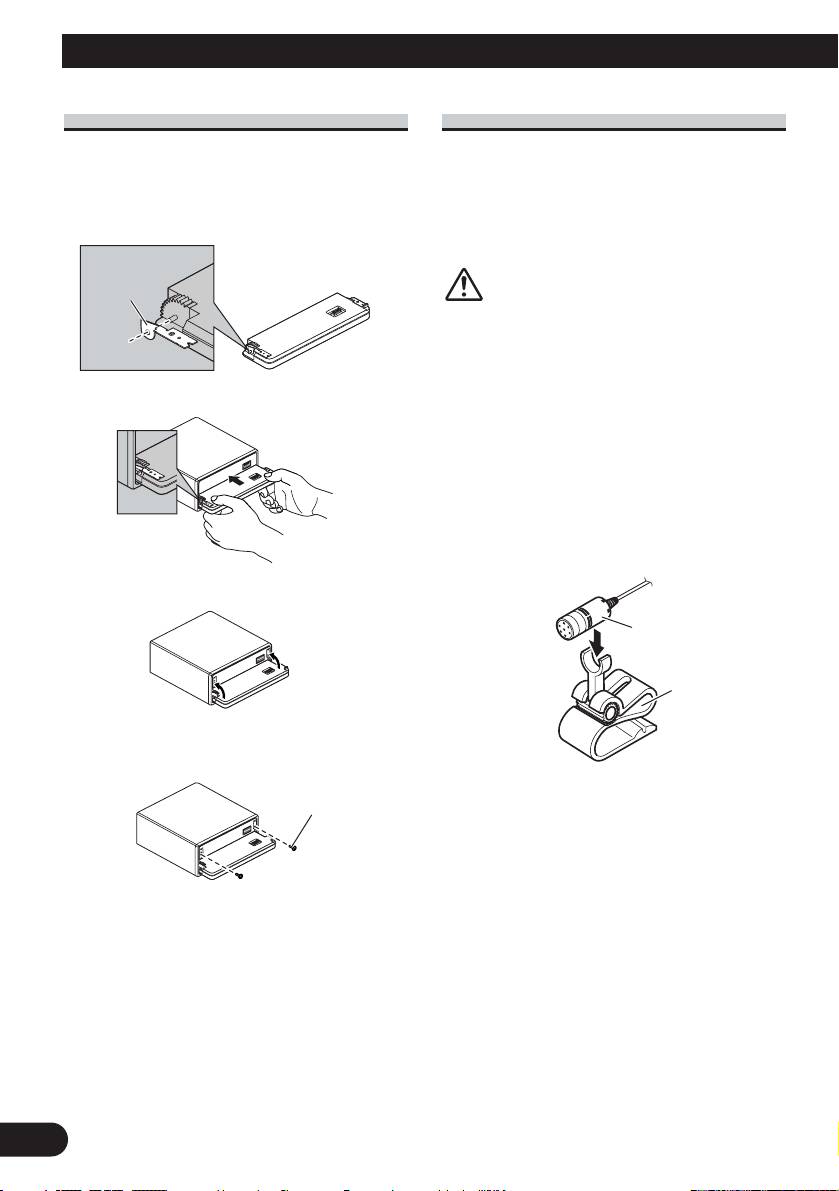
Fastening the front panel
Installing the microphone
If you do not plan to detach the front panel, the
front panel can be fastened with supplied screws
Installation notes
and holders.
Install the microphone in a position and ori-
entation that will enable it to pick up the
1. Attach the holders to both sides of the front panel.
voice of the person operating the system.
Holder
CAUTION
It is extremely dangerous to allow the
microphone lead to become wound
around the steering column or gearstick.
Be sure to install the unit in such a way
2. Replace the front panel to the unit.
that it will not obstruct driving.
When installing the microphone on
the sun visor
1. Install the microphone on the micro-
phone clip.
3. Flip the holders into upright positions.
Microphone
Microphone
clip
4. Fix the front panel to the unit using screws.
Screw
9
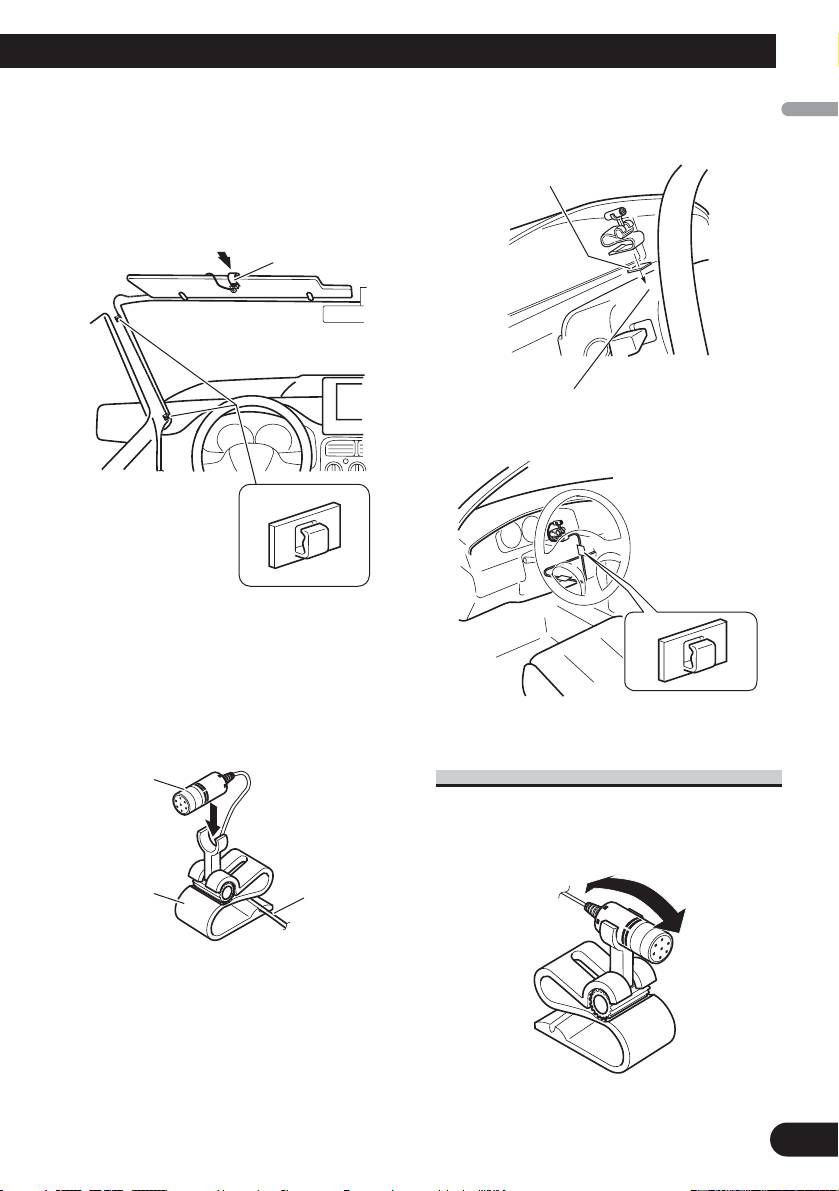
2. Install the microphone clip on the
2. Install the microphone clip on the
English
sun visor.
steering column.
With the sun visor up, install the micro-
Double-sided tape
phone clip. (Lowering the sun visor
reduces the recognition rate for voice
operations.)
Microphone clip
Español
Install the microphone clip on the rear side
Deutsch
of the steering column.
Clamps
Use clamps to secure
Clamps
the lead where neces-
Use clamps to
sary inside the vehi-
secure the lead
Français
cle.
where necessary
inside the vehicle.
When installing the microphone on
the steering column
Italiano
1. Install the microphone on the
microphone clip.
Microphone
Adjusting the microphone angle
The microphone angle can be adjusted by
moving forward or backward the micro-
phone clip angle.
Nederlands
Microphone
Fit the micro-
clip
phone lead into
the groove.
10
Table of contents
- Connecting the Units
- Connecting the Units
- Connecting the Units
- Installation
- Installation
- Conexión de las unidades
- Conexión de las unidades
- Conexión de las unidades
- Instalación
- Instalación
- Anschließen der Geräte
- Anschließen der Geräte
- Anschließen der Geräte
- Einbau
- Einbau
- Connexion des appareils
- Connexion des appareils
- Connexion des appareils
- Installation
- Installation
- Collegamento delle unità
- Collegamento delle unità
- Collegamento delle unità
- Installazione
- Installazione
- Aansluiten van de toestellen
- Aansluiten van de toestellen
- Aansluiten van de toestellen
- Installatie
- Installatie
- èÓ‰Íβ˜ÂÌË ÛÒÚÓÈÒÚ‚
- èÓ‰Íβ˜ÂÌË ÛÒÚÓÈÒÚ‚
- èÓ‰Íβ˜ÂÌË ÛÒÚÓÈÒÚ‚
- ìÒÚ‡Ìӂ͇
- ìÒÚ‡Ìӂ͇


