Kenwood KDC-W427: General features
General features: Kenwood KDC-W427
General features
Loudness
4 Adjust the Audio item
Press the [4] or [¢] button.
Compensating for low and high tones during low
volume.
Adjustment Item Display Range
Bass level "BAS" –8 — +8
Press the [LOUD] button for at least 1 second.
Middle level "MID" –8 — +8
Each time the button is pressed for at least 1
Treble level "TRE" –8 — +8
second the Loudness turns ON or OFF.
Balance "BAL" Left 15 — Right 15
When it’s ON, "LOUD" indicator is ON.
Fader "FAD" Rear 15 — Front 15
5 Exit Audio Control mode
System Q
Press the [AUD] button.
You can recall the best sound setting preset for
different types of music.
1 Select the source to set
Speaker Setting
Press the [SRC] button.
Fine-tuning so that the System Q value is optimal
2 Select the Sound type
when setting the speaker type.
Press the [Q] button.
1 Enter Standby
Each time the button is pressed the sound
Press the [SRC] button.
setting switches.
Select the "STANDBY" display.
Sound setting Display
2 Enter Speaker Setting mode
Flat "FLAT"
Press the [Q] button.
Rock "ROCK"
Top 40 "TOP40"
3 Select the Speaker type
Pops "POPS"
Press the [4] or [¢] button.
Jazz "JAZZ"
Each time the button is pressed the setting
Easy "EASY"
switches as shown below.
Speaker type Display
OFF "SP OFF"
• Each setting value is changed with the 'Speaker
For the OEM speaker "SP OEM"
Setting' (page 10).
For 6 & 6x9 in. speaker "SP 6/6x9"
First, select the speaker type with the Speaker setting.
•
For 5 & 4 in. speaker "SP 5/4"
When the System Q setting is changed, the Bass
and Treble set in audio control replace the System Q
values.
4 Exit Speaker Setting mode
Press the [Q] button.
Audio Control
1 Select the source for adjustment
Press the [SRC] button.
2 Enter Audio Control mode
Press the [AUD] button for at least 1 second.
3 Select the Audio item for adjustment
Press the [FM] or [AM] button.
Each time the button is pressed the items that
can be adjusted switch as shown below.
10
|
English
B64-2807-00U.S.Inddtcsp10 03.12.11,6:27:07PM
Switching Display
Theft Deterrent Faceplate
Switching the information displayed.
The faceplate of the unit can be detached and
taken with you, helping to deter theft.
Press the [DISP] button.
Each time the button is pressed the display
Removing the Faceplate
switches as shown below.
Press the Release button.
In Tuner source
The faceplate is unlocked, allowing you to detach
it.
Information
Frequency
Clock
• The faceplate is a precision piece of equipment and
can be damaged by shocks or jolts. For that reason,
In CD source
keep the faceplate in its special storage case while
detached.
Information Display
• Do not expose the faceplate or its storage case to
Disc title & Artist name "D-TITLE"
direct sunlight or excessive heat or humidity. Also
Tr ack title "T-TITLE"
avoid places with too much dust or the possibility of
Play time & Track number "P-TIME"
water splashing.
Clock
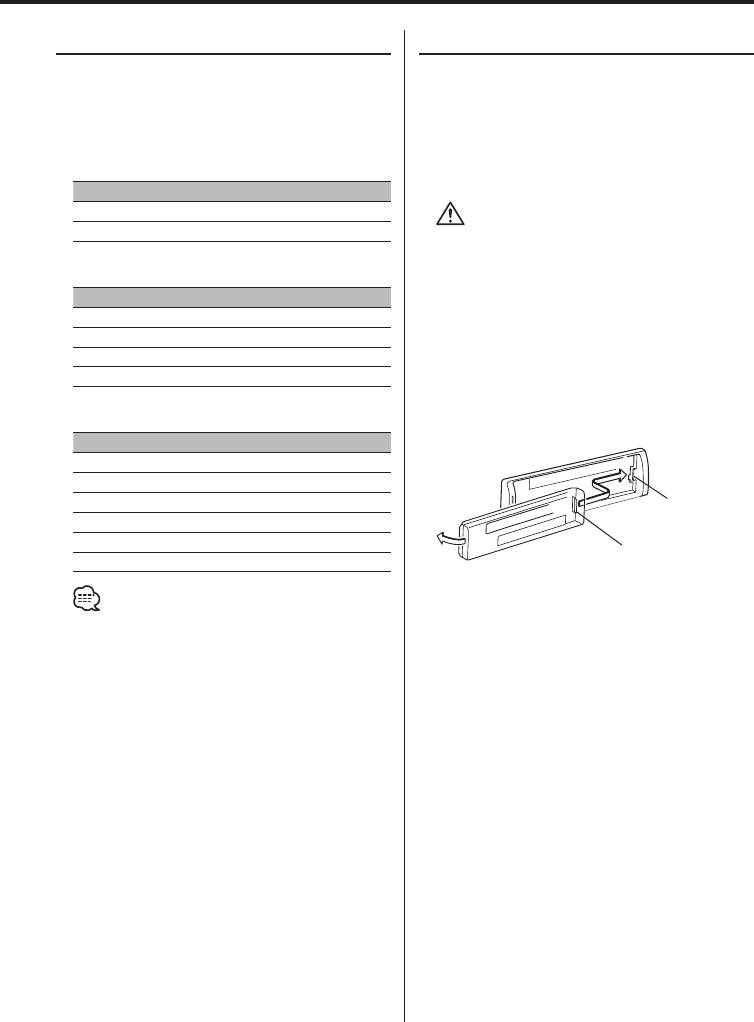
Reattaching the Faceplate
In MP3/WMA source
1 Align the projections on the unit with the
grooves on the faceplate.
Information Display
Song title & Artist name "TITLE"
Album name & Artist name "ALBUM"
Folder name "FLDR-NAME"
Projections
File name "FILE-NAME"
Play time & Track number "P-TIME"
Grooves
Clock
2 Push the faceplate in until it clicks.
The faceplate is locked in place, allowing you to
• If the Disc title, Track title, Song title & Artist name, or
use the unit.
Album name & Artist name is selected when the disc
which does not have Disc title, Track title, Song title,
Album name, or Artist name is played, track number
and play time are displayed.
• The Album name cannot be displayed during WMA
play.
English
|
11
B64-2807-00U.S.Inddtcsp11 03.12.11,6:27:09PM
Оглавление
- Contents
- Safety precautions
- Safety precautions
- Notes
- Notes on playing MP3/WMA
- About CDs
- General features
- General features
- General features
- Tuner features
- Tuner features
- CD/MP3/WMA control features
- CD/MP3/WMA control features
- Menu system
- Menu system
- Accessories/ Installation Procedure
- Connecting Wires to Terminals
- Connecting Wires to Terminals
- Installation
- Removing the Unit
- Troubleshooting Guide
- Troubleshooting Guide
- Specifications
- Cодержание
- Меры предосторожности
- Меры предосторожности
- Примечания
- Примечания к проигрыванию MP3/WMA
- О CD
- Общие характеристики
- Общие характеристики
- Общие характеристики
- Функции тюнера
- Функции тюнера
- Функции управления CD/MP3/WMA
- Функции управления CD/MP3/WMA
- Система меню
- Система меню
- Принадлежности/ Процесс установки
- Подсоединение кабелей к гнездам для подключения
- Установка
- Cнятие аппарата
- Поиск и устранение неисправностей
- Поиск и устранение неисправностей
- Технические характеристики
- Treść
- Środki ostrożności
- Środki ostrożności
- Uwagi
- Uwagi o odtwarzaniu MP3/WMA
- Uwagi dotyczące płyt kompaktowych
- Ogólne możliwości
- Ogólne możliwości
- Ogólne możliwości
- Możliwości tunera
- Możliwości tunera
- Możliwości sterowania CD/MP3/WMA
- Możliwości sterowania CD/MP3/WMA
- Menu systemu
- Menu systemu
- Akcesoria/ Procedura instalowania
- Podłączanie przewodów do końcówek
- Instalacja
- Wyjmowanie aparatu
- Przewodnik wykrywania i usuwania usterek
- Przewodnik wykrywania i usuwania usterek
- Dane techniczne
