Pioneer DDJ-SX: Playing tracks and outputting the sound
Playing tracks and outputting the sound: Pioneer DDJ-SX
Table of contents
- Operating Environment IMPORTANT
- POWER-CORD CAUTION WARNING
- Contents
- Before start What’s in the box Installing the software Installation Procedure (Windows)
- Installation procedure (Mac OS X)
- 11 If the following screen appears, drag and drop the [Serato DJ] icon on the [Applications] folder icon.
- Operation Connections
- 6 Connect the AC adapter. 7 Press the [STANDBY/ON] switch on this unit’s rear panel to turn this unit’s power on. 8 Turn on the power of the devices connected to the output terminals (powered speakers, power amplifier, components, etc.).
- Starting the system Launching Serato DJ
- Importing tracks Loading tracks and playing them
- Playing tracks and outputting the sound
- Monitoring sound with headphones Quitting the system Names of Parts
- Deck section Mixer section
- Acquiring the manual Downloading this unit’s operating Downloading the Serato DJ software manual
- About the AC adapter
- Mounting the power plug Removing the power plug Power plug
- Additional information
12
En
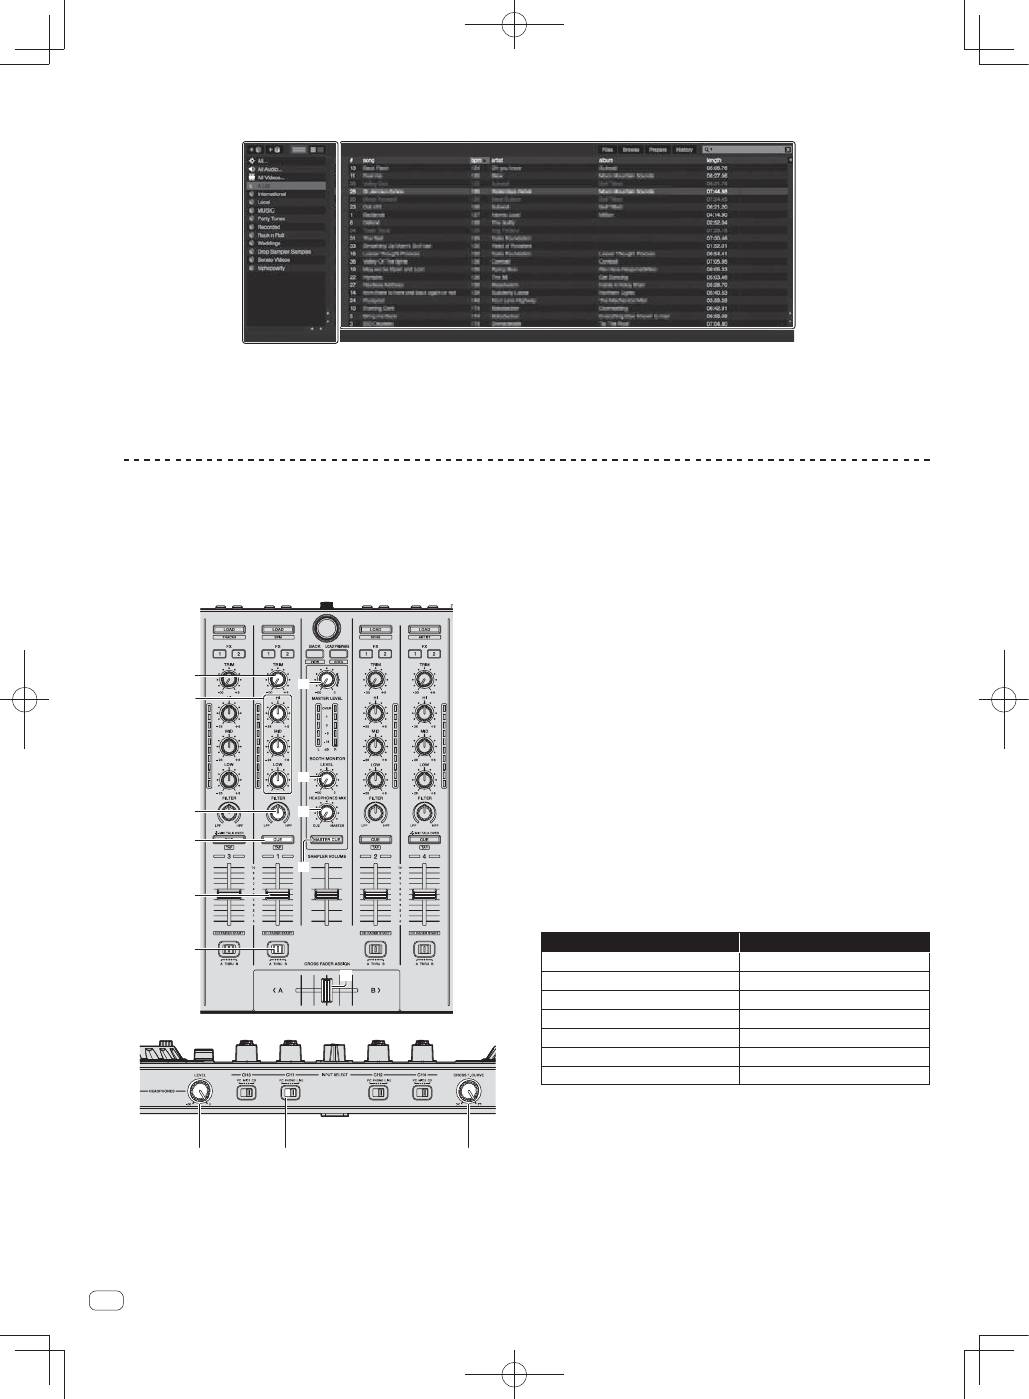
2 Press the rotary selector, move the cursor to the library on the computer’s screen, then turn the rotary selector and
select the track.
a
b
a
Library
b
Crates panel
3 Press the [LOAD] button to load the selected track onto the deck.
Playing tracks and outputting the sound
The following describes the procedure for outputting the channel 1
sound as an example.
Set the volume of the devices (power amplifier, powered speakers,
etc.) connected to the [
MASTER OUT 1
] and [
MASTER OUT 2
]
terminals to an appropriate level. Note that loud sound will be output
if the volume is set too high.
a
b
d
c
e
4
8
7
5
6
9
f
h
g
4
TRIM control
5
EQ (HI, MID, LOW) controls
6
FILTER control
7
Headphones CUE button
8
Channel fader
9
Crossfader Assign Switch
a
MASTER LEVEL control
b
BOOTH MONITOR LEVEL control
c
HEADPHONES MIXING control
d
MASTER CUE button
e
Crossfader
f
HEADPHONES LEVEL control
g
INPUT SELECT switch
h
Crossfader curve selector control
1 Set the positions of the controls, etc., as shown
below.
Names of controls, etc.
Position
MASTER LEVEL
control
Turned fully counterclockwise
TRIM
control
Turned fully counterclockwise
EQ
(
HI
,
MID
,
LOW
) controls
Center
FILTER
control
Center
Channel fader
Moved forward
Crossfader Assign Switch
[
THRU
] position
INPUT SELECT
switch
[
PC
] position
