Pioneer DDJ-SX: Deck section Mixer section
Deck section Mixer section: Pioneer DDJ-SX
Table of contents
- Operating Environment IMPORTANT
- POWER-CORD CAUTION WARNING
- Contents
- Before start What’s in the box Installing the software Installation Procedure (Windows)
- Installation procedure (Mac OS X)
- 11 If the following screen appears, drag and drop the [Serato DJ] icon on the [Applications] folder icon.
- Operation Connections
- 6 Connect the AC adapter. 7 Press the [STANDBY/ON] switch on this unit’s rear panel to turn this unit’s power on. 8 Turn on the power of the devices connected to the output terminals (powered speakers, power amplifier, components, etc.).
- Starting the system Launching Serato DJ
- Importing tracks Loading tracks and playing them
- Playing tracks and outputting the sound
- Monitoring sound with headphones Quitting the system Names of Parts
- Deck section Mixer section
- Acquiring the manual Downloading this unit’s operating Downloading the Serato DJ software manual
- About the AC adapter
- Mounting the power plug Removing the power plug Power plug
- Additional information
14
En
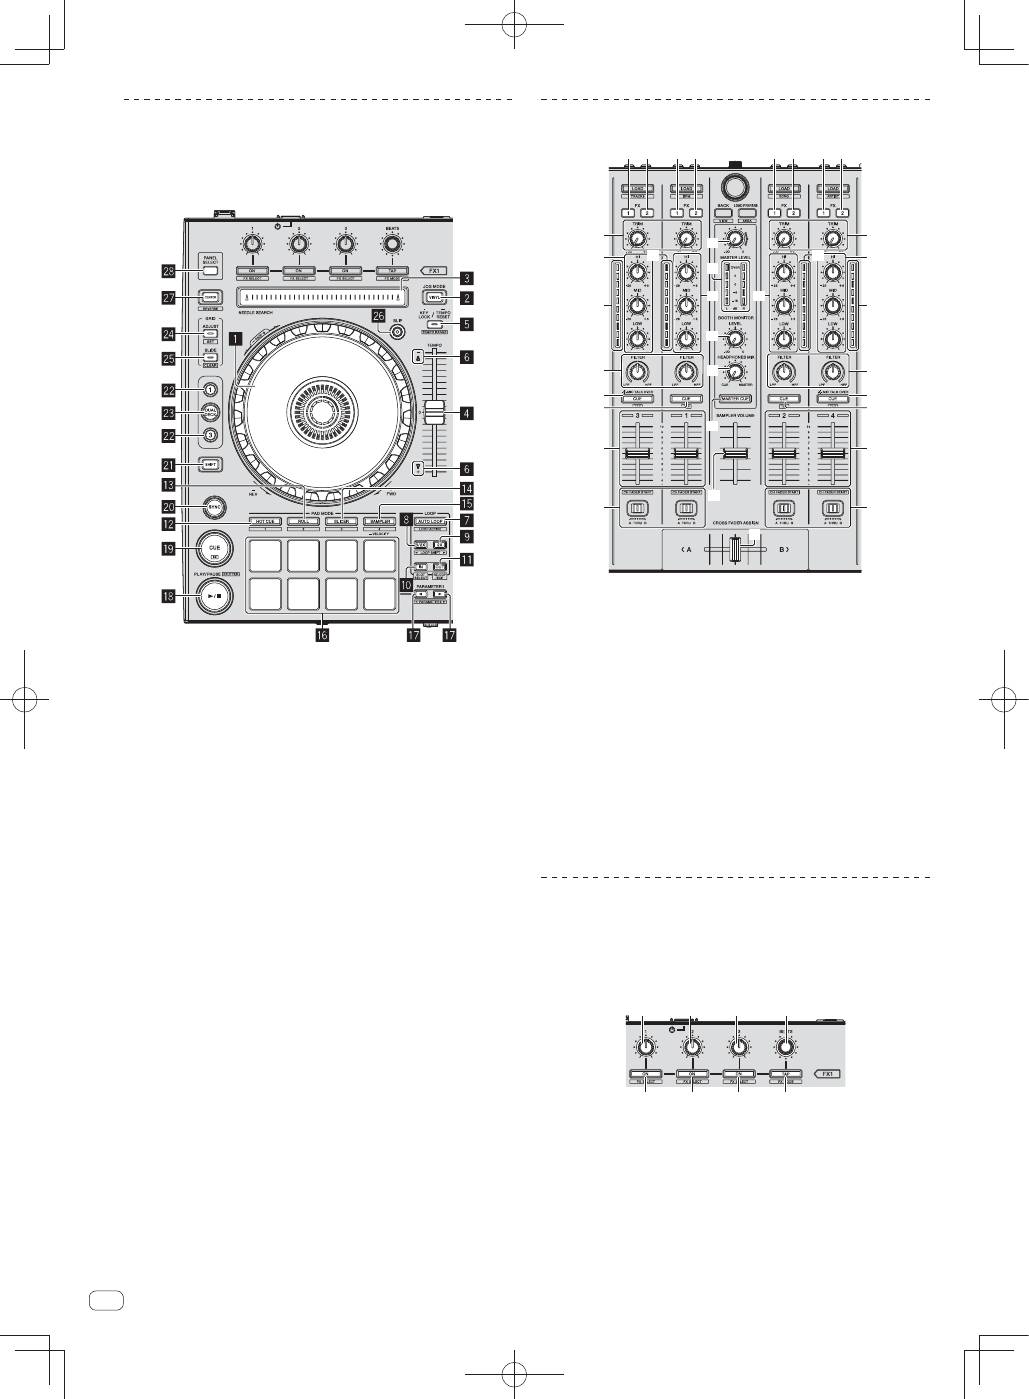
Deck section
This section is used to control the four decks. The buttons and controls
for operating decks 1 and 3 are located on the left side of the controller,
those for operating decks 2 and 4 are located on the right side of the
controller.
1
Jog dial
2
VINYL
button
3
NEEDLE SEARCH
pad
4
TEMPO
slider
5
KEY LOCK
button
6
TAKEOVER indicator
7
AUTO LOOP
button
8
LOOP 1/2X
button
9
LOOP 2X
button
a
LOOP IN
button
b
LOOP OUT
button
c
HOT CUE
mode button
d
ROLL
mode button
e
SLICER
mode button
f
SAMPLER
mode button
g
Performance pads
h
PARAMETER
button,
PARAMETER
button
i
PLAY/PAUSE
"
button
j
CUE
button
k
SYNC
button
l
SHIFT
button
m
DECK
button
n
DUAL DECK
button
o
GRID ADJUST
button
p
GRID SLIDE
button
q
SLIP
button
r
CENSOR
button
s
PANEL SELECT
button
Mixer section
c
d
4
4
e
g
f
h
b
1 2
1 2
1 2
1 2
5
3
9
7
4
6
a
5
5
5
3
9
4
6
a
8
7
8
1
FX 1
assign button
2
FX 2
assign button
3
TRIM
control
4
EQ
(
HI
,
MID
,
LOW
) controls
5
Channel Level Indicator
6
FILTER
control
7
Headphones
CUE
/
MIC TALK OVER
button
8
Headphones
CUE
button
9
Channel fader
a
Crossfader Assign Switch
b
Crossfader
c
MASTER LEVEL
control
d
Master level indicator
e
Booth monitor level control
f
HEADPHONES MIXING
control
g
MASTER CUE
button
h
SAMPLER VOLUME
fader
Effect section
This section is used to control the two effect units (FX1 and FX2).
Controls and buttons to operate the FX1 unit are located on the left side
of the controller, those to operate the FX2 unit are located on the right
side of the controller. The channels to which the effect is to be applied
are set using the effect assign buttons .
1
1
1
2
3
3
3
4
1
Effect parameter controls
2
FX BEATS
control
3
Effect parameter buttons
4
TAP
button
