Asus ITX-220: 7 Routing
7 Routing: Asus ITX-220

Chapter 7
iPBX30 User Manual
7 Routing
You can use the software application specific routes for your
Internet and network data communication.
This chapter describes basic routing concepts and provides
instructions for creating static routes. Note that most users do not
need to dene static routes.
7.1 Overview of IP Routes
The essential challenge of a router is: when it receives data
intended for a particular destination, which next device should it
send that data to? When you dene IP routes, you provide the rules
that the iPBX30 uses to make these decisions.
7.1.1 DoIneedtodenestaticroutes?
Most users do not need to dene static routes. On a typical small
home or ofce network, the existing routes that set up the default
gateways for your LAN computers and for the iPBX30 provide the
most appropriate path for all your Internet trafc.
• On your LAN computers, a default gateway directs all Internet
traffic to the LAN port on the iPBX30. Your LAN computers
know their default gateway either because you assigned it to
them when you modified their TCP/IP properties, or because
you congured them to receive the information dynamically from
a server whenever they access the Internet. (Each of these
processes is described in section 3.2.)
• On the iPBX30 itself, a default gateway is dened to direct all
outbound Internet traffic to a router at your ISP. This default
gateway is assigned automatically by your ISP whenever the
device negotiates an Internet connection. (The process for
adding a default route is described in section 7.3.2.)
You may need to dene static routes if your home setup includes
two or more networks or subnets, if you connect to two or more ISP
services, or if you connect to a remote corporate LAN.
52
iPBX30 User Manual
Chapter 7
7.2 Dynamic Routing using RIP (Routing
Information Protocol)
RIP enables routing information exchange between routers; thus,
routes are updated automatically without human intervention.
It is recommended that you enable RIP in the System Services
Conguration Page.
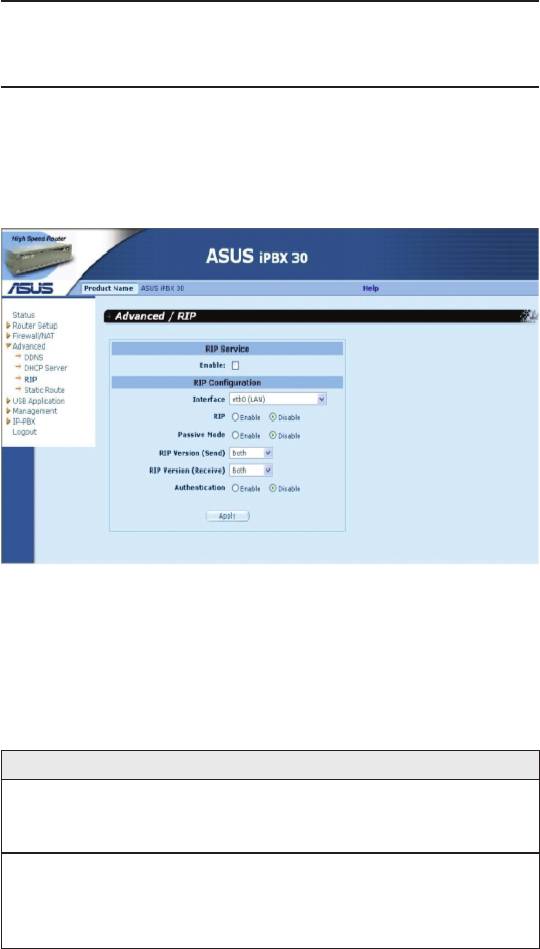
Figure 7.1. RIP Conguration Page
7.2.1 RIPCongurationParameters
The following table denes the available conguration parameters
for static routing conguration.
Table 7.1. Static Route Conguration Parameters
Field Description
Interface Select an interface through which the routing information
is exchanged. Available options are LAN, WAN1, WAN2,
PPPoE1, PPPoE2, PPPoE3 and PPPoE4.
RIP Click the “Enable” or “Disable” radio button to enable
or disable “RIP” for the interface selected. Note that
you must enable RIP service rst in the Management /
System Services conguration page rst.
53

Chapter 7
iPBX30 User Manual
Field Description
Passive Mode Enable this mode if RIP congured for this interface will
only receive routing information from other routers and
not send routing information to other routers. Disable
this mode if you want this interface to send and receive
routing information to/from other routers.
R I P V e r s i o n
Select the RIP version for sending the routing
(Send)
information. Three options are available: Version 1.
Version 2 and Both.
R I P V e r s i o n
Select the RIP version for receiving the routing
(Receive)
information. Three options are available: Version 1.
Version 2 and Both.
Authentication Click on “Enable” or “Disable” radio button to enable/
disable authentication for exchanging the routing
information. Note that all the routers exchanging routing
information must use the same authentication key.
A u t he n ti c a ti o n
Select RIP authentication mode from the drop down list.
Mode
Two modes are supported - Clear Text and MD5.
Authentication Key Enter the authentication key shared by all the routers
exchanging the routing information.
7.2.2 ConguringRIP
Follow these instructions to enable or disable RIP:
1. In the
System Services Conguration
page, click the
Enable
or
Disable
radio button depending on whether you want to
enable or disable RIP.
2. Select an interface from the drop-down list for routing information
exchange.
3. Click the
Enable
radio button to enable RIP for the particular
interface selected.
4. Decide whether the RIP is operated in passive mode or not by
clicking the
Enable
or
Disable
radio button.
5. Choose RIP version for sending and receiving the routing
information. Available options are Version 1, Version 2 and Both.
6. Choose whether authentication is required by clicking the
54
iPBX30 User Manual
Chapter 7
Enable
or
Disable
radio button.
7. (Optional) If authentication is enabled, you must also select
authentication mode and the desired authentication key.
8. Click
Apply
to save the settings.
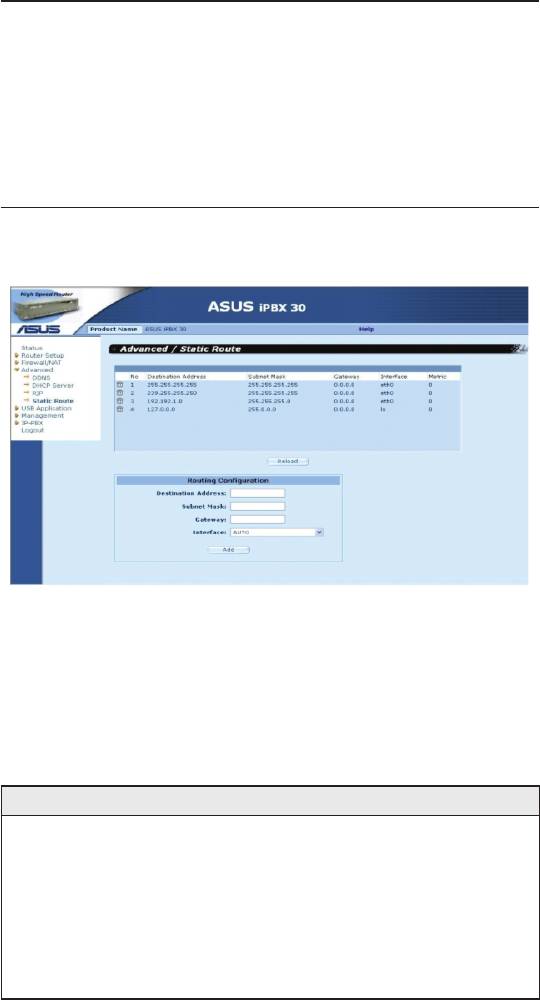
7.3 Static Route
Figure 7.2. Static Route Conguration Page
7.3.1 StaticRouteCongurationParameters
The following table denes the available conguration parameters
for static routing conguration.
Table 7.2. Static Route Conguration Parameters
Field Description
D e s t i n a t i o n
Specifies the IP address of the destination computer or
Address
an entire destination network. It can also be specified as
all zeros to indicate that this route should be used for all
destinations for which no other route is dened (this is the
route that creates the default gateway). Note that destination
IP must be a network ID. The default route uses a destination
IP of 0.0.0.0. Refer to Appendix 11 for an explanation of
network ID.
55
Chapter 7
iPBX30 User Manual
Field Description
Subnet Mask Indicates which parts of the destination address refer to the
network and which parts refer to a computer on the network.
Refer to Appendix 11 for an explanation of network masks.
The default route uses a 0.0.0.0 for subnet mask.
Gateway
Gateway IP address
Interface Available option include AUTO, Eth0 (LAN), Eth1 (WAN),
PPPoE:0 (unnumbered), PPPoE:1 (1st PPPoE session),
PPPoE:2 (2nd PPPoE session). These options are
selectable from the drop-down list. If AUTO is selected, the
router will automatically assign an interface to route the
packets based on the gateway IP address.
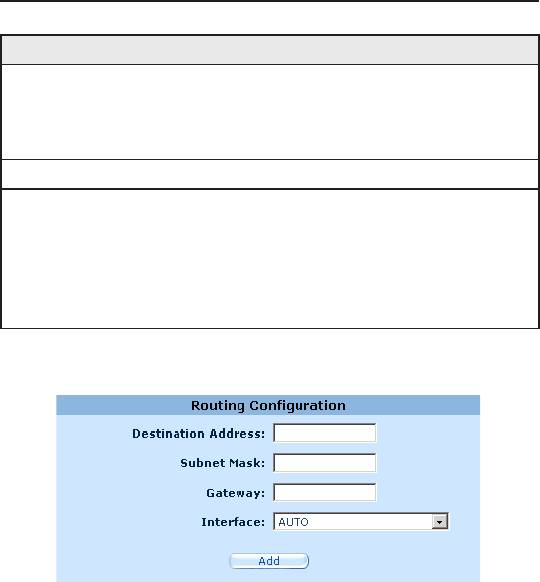
7.3.2 Adding Static Routes
Figure 7.3. Static Route Conguration
Follow these instructions to add a static route to the routing table.
1. Click the
Advanced ->Static Route
menu to open the
Static
Route
conguration page.
2. Enter static routes information such as destination IP address,
destination subnet mask, gateway IP address and the interface
in the corresponding elds.
To create a route that defines the default gateway for your
LAN, enter 0.0.0.0 in both the Destination IP Address and
Subnet Mask elds.
3. Click
Add
to add a new route.
56
iPBX30 User Manual
Chapter 7
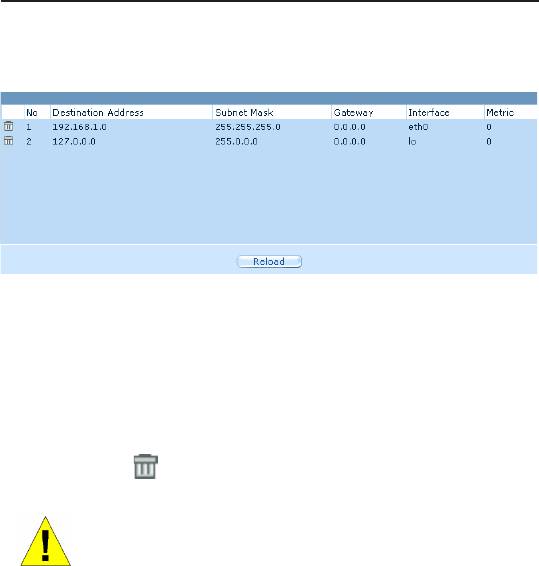
7.3.3 Deleting Static Routes
Figure 7.4. Sample Routing Table
Follow these instructions to delete a static route from the routing
table.
1. Click the
Advanced ->Static Route
menu to open the Static
Route conguration page.
2. Click on the icon of the route to be deleted in the Routing
Table.
WARNING Do not remove the route for default
gateway unless you know what you are doing.
Removing the default route will render the Internet
unreachable.
7.3.4 Viewing the Static Routing Table
All IP-enabled computers and routers maintain a table of IP
addresses that are commonly accessed by their users. For each of
these destination IP addresses, the table lists the IP address of the
rst hop the data should take. This table is known as the device’s
routing table.
To view the iPBX30’s routing table, click the
Advanced ->Static
Route
menu. The Routing Table displays at the upper half of the
Static Route Conguration page.
The Routing Table displays a row for each existing route containing
the IP address of the destination network, subnet mask of
destination network and the IP of the gateway that forwards the
trafc.
57
Оглавление
- List of Figures
- List of Tables
- Chapter 1 Introduction
- Chapter 2 Getting to Know your iPBX30
- 3 Quick Start Guide
- 4 Using the Web UI Management
- 5 Router Setup
- 6 DHCPServerConguration
- 7 Routing
- 8 ConguringDDNS
- 9 ConguringFirewallandNAT
- 10 USB Application
- 11 System Management
- 12 SIP IP-PBX
- 13 IP Addresses, Network Masks, and Subnets
- 14 Troubleshooting
- 15 Index
