Asus VW192: инструкция
Раздел: Компьютерная техника, комплектующие, аксессуары
Тип: Монитор


Инструкция к Монитору Asus VW192
Table of content
ASUS contact information ........................................................... ii
English...........................................................................................1
Français.........................................................................................5
Deutsch ....................................................................................... 9
Italiano........................................................................................13
Español........................................................................................17
Pyccкий
......................................................................................21
Nederlands..................................................................................25
.......................................................................................29
.......................................................................................33
..........................................................................................37
..........................................................................................41
Português....................................................................................45
Türkçe.........................................................................................49
...........................................................................................53
.............................................................................................57
Dansk...........................................................................................61
Suomi...........................................................................................65
Norsk............................................................................................69
Svenska........................................................................................73
Polski............................................................................................77
..........................................................................................81
Quick Start Guide
Quick Start Guide Quick Start Guide
Quick Start Guide Quick Start Guide
ii
i
ii

ASUS contact information
ASUSTeK COMPUTER INC.ASUSTeK COMPUTER INC.
ASUSTeK COMPUTER INC.ASUSTeK COMPUTER INC.
ASUSTeK COMPUTER INC.
Address 15 Li-Te Road, Peitou, Taipei, Taiwan 11259
Telephone +886-2-2894-3447
Fax +886-2-2894-7798
E-mail info@asus.com.tw
Web site www.asus.com.tw
ASUS COMPUTER INTERNATIONAL (America)ASUS COMPUTER INTERNATIONAL (America)
ASUS COMPUTER INTERNATIONAL (America)
ASUS COMPUTER INTERNATIONAL (America)ASUS COMPUTER INTERNATIONAL (America)
Address 44370 Nobel Drive, Fremont, CA 94538, USA
Fax +1-510-608-4555
E-mail tmd1@asus.com
Web site usa.asus.com
Technical Support
Telephone
(General) +1-502-995-0883
(Notebook) +1-510-739-3777
Support fax +1-502-933-8713
Online support http://vip.asus.com/eservice/techserv.aspx
ASUS COMPUTER GmbH (Germany and Austria)
ASUS COMPUTER GmbH (Germany and Austria)ASUS COMPUTER GmbH (Germany and Austria)
ASUS COMPUTER GmbH (Germany and Austria)ASUS COMPUTER GmbH (Germany and Austria)
Address Harkort Str. 25, D-40880 Ratingen, Germany
Telephone +49-2102-95990
Fax +49-2102-959911
Online contact www.asuscom.de/sales
Technical Support
Telephone +49-2102-95990
Fax +49-2102-959911
Online support www.asuscom.de/support
Web site www.asuscom.de/news
iiii
ii
iiii
Quick Start Guide
Quick Start Guide Quick Start Guide
Quick Start Guide Quick Start Guide
English
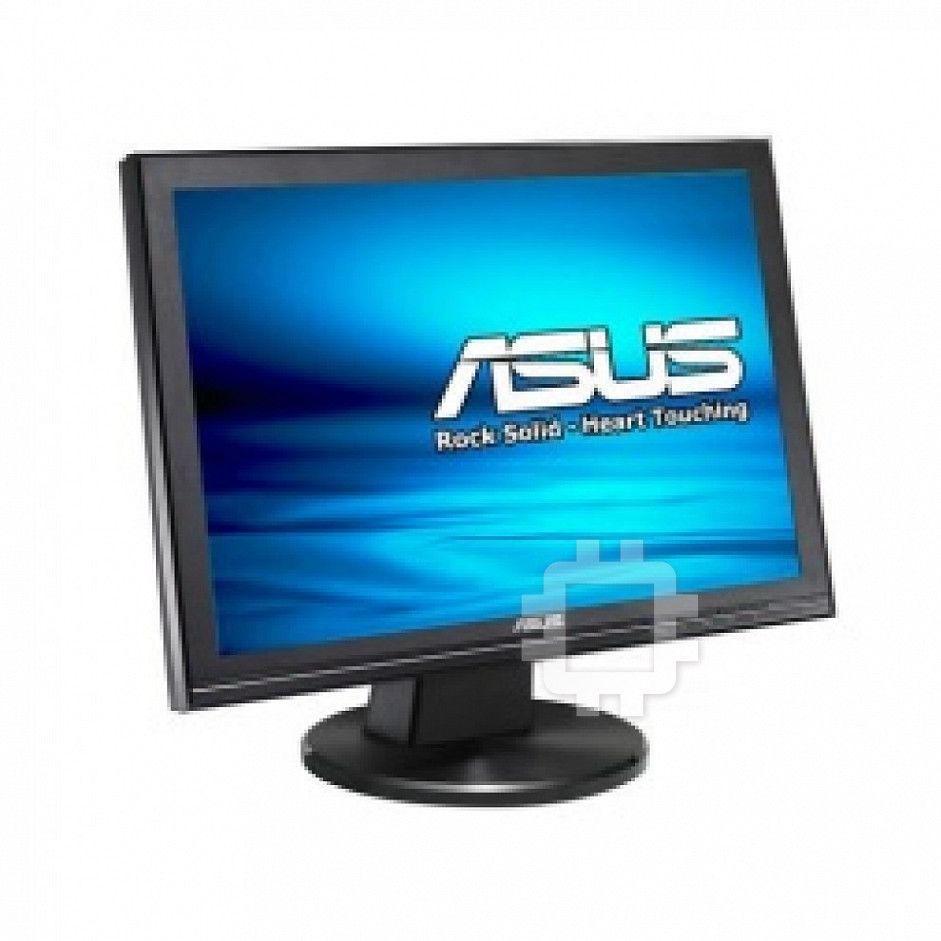
VW192 Series
LCD Monitor
Quick Start Guide
Safety information
• Before setting up the monitor, carefully read all the documentation that
English
came with the package.
• To prevent fire or shock hazard, never expose the monitor to rain or
moisture.
• The monitor should be operated only from the type of power source
indicated on the label. If you are not sure of the type of power supplied
to your home, consult your dealer or local power company.
• Use the appropriate power plug which complies with your local power
standard.
• To ensure satisfactory operation, use the monitor only with UL listed
computers which have appropriate configured receptacles marked
between 100-240V AC.
• If you encounter technical problems with the monitor, contact a qualified
service technician or your retailer.
Monitor introduction
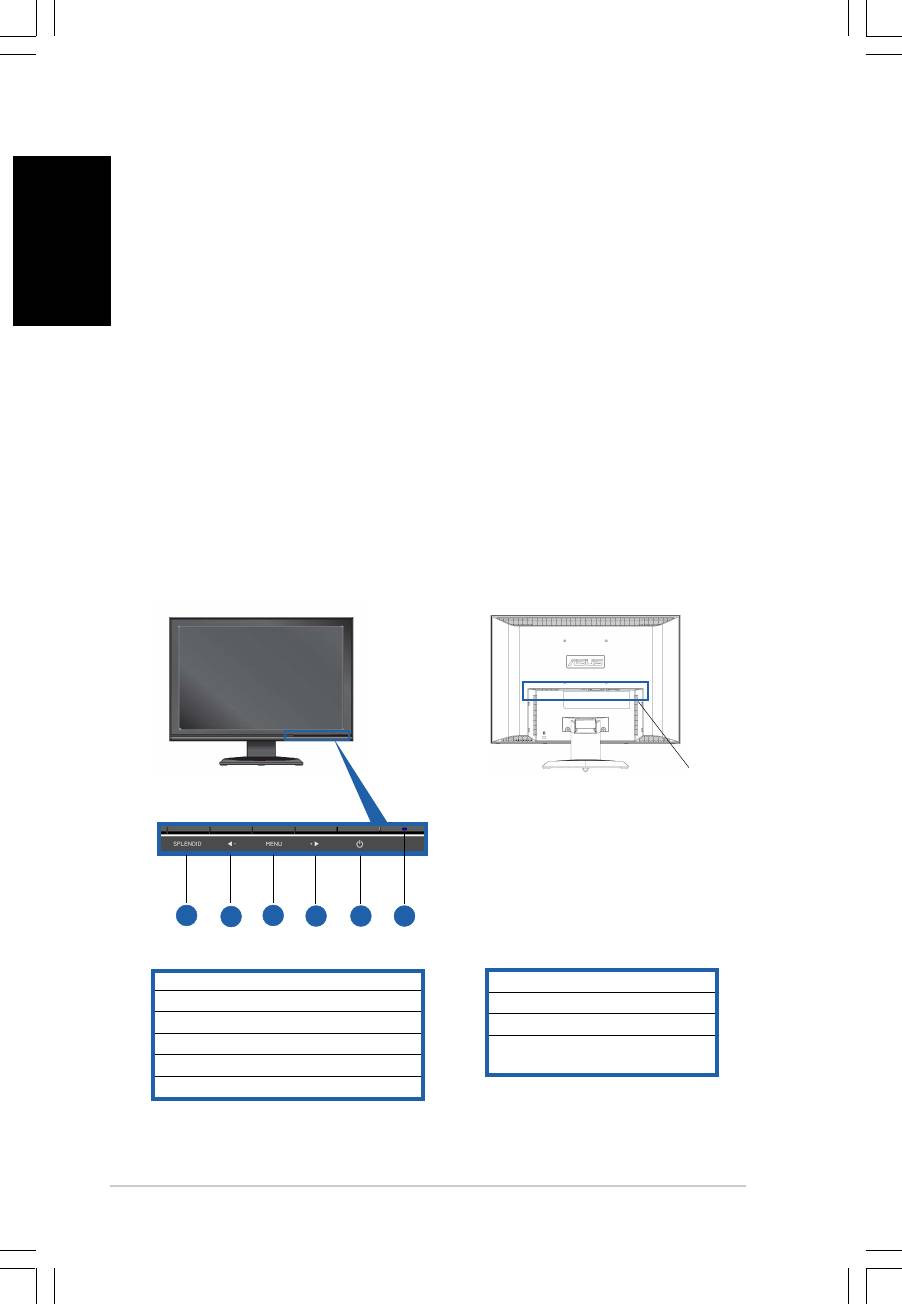
Front viewFront view
Front view
Front viewFront view
Rear view
Rear viewRear view
Rear viewRear view
Rear
RearRear
RearRear
connectorsconnectors
connectors
connectorsconnectors
11
11
1
1
11
11
11
11
1
22
2
22
3
33
33
4
44
44
44
4
4
44
44
44
55
55
5
66
66
6
(From left to right)
2
22
22
1. SPLENDID™ mode hotkey
1. AC-in port
2. Decrease button/Volume hotkey
2. DVI port (VW192T only)
3. MENU button
3. VGA port
4. Increase button/Brightness hotkey
4. Audio-in port (VW192T/
5. Power button
VW192S only)
6. Power indicator
22
2
22
Quick Start Guide
Quick Start Guide Quick Start Guide
Quick Start Guide Quick Start Guide
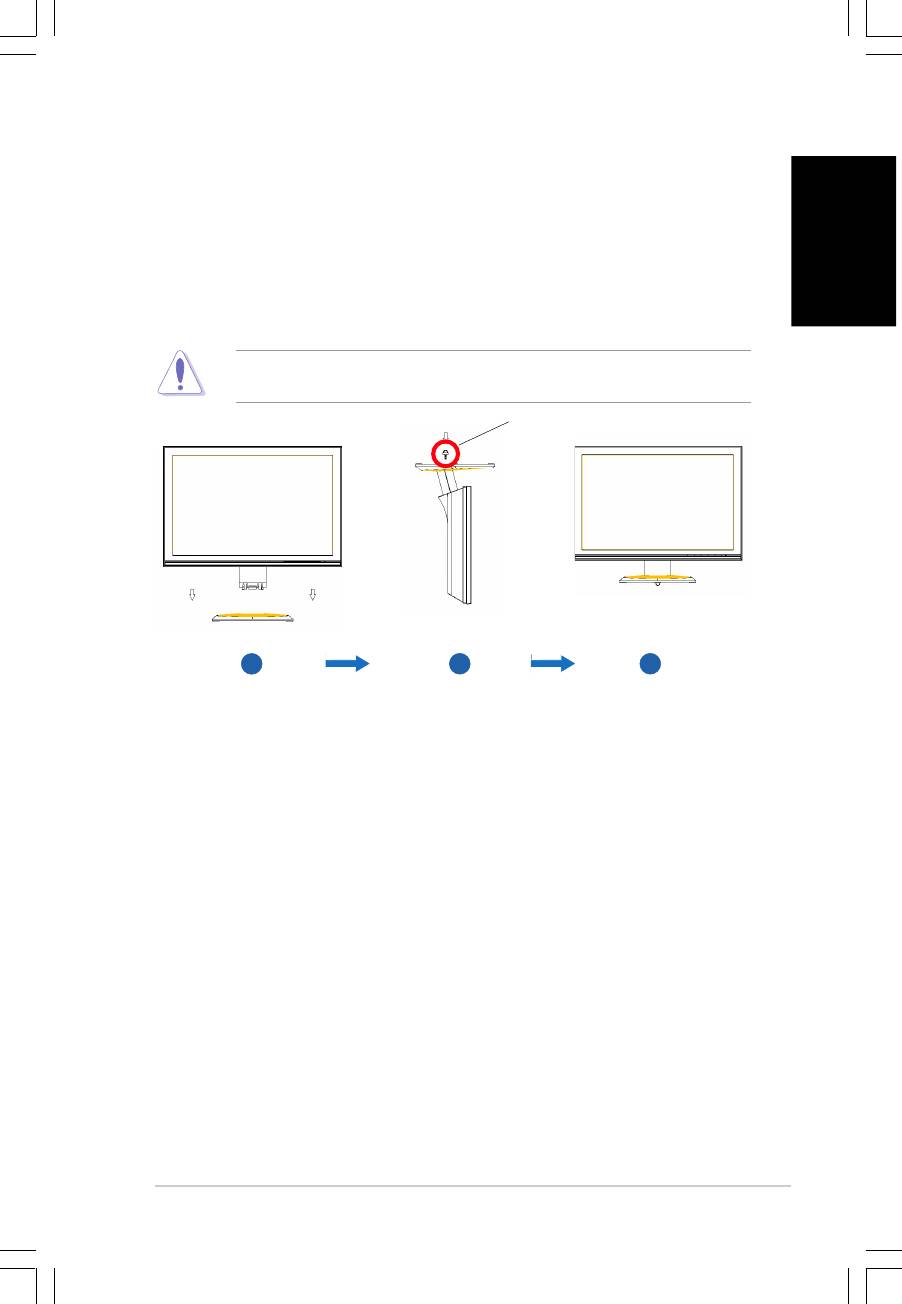
Assembling the monitor base
To assemble the monitor base:
1. Connect the base with the monitor. A click shows that the base has
been connected successfully.
2. Tighten the screw as the drawing shows to fix the base.
English
3. Adjust the monitor to the angle that is most comfortable for you.
• We recommend that you cover the table surface with soft cloth to
prevent damage to the monitor.
screw
screwscrew
screwscrew
11
11
1
22
22
2
33
3
33
Connecting the cables
1. Remove the rear cover.
2. Connect the cables as the following instructions:
•
To connect the audio cable: To connect the audio cable:
To connect the audio cable: connect one end of the audio cable to
To connect the audio cable: To connect the audio cable:
the monitor’s Audio-in port, and then connect the other end to the
computer multi-media (or audio) card’s audio output.
•
To connect the power cord: connect one end of the power cord
To connect the power cord: To connect the power cord:
To connect the power cord: To connect the power cord:
securely to the monitor’s AC input port, the other end to a power outlet.
•
To connect the VGA/DVI cable:
To connect the VGA/DVI cable:To connect the VGA/DVI cable:
To connect the VGA/DVI cable:To connect the VGA/DVI cable:
a. Plug the VGA/DVI connector to the LCD monitor’s VGA/DVI port.
b. Connect the other end of the VGA/DVI cable to your computer’s
VGA/DVI port.
c. Tighten the two screws to secure the VGA/DVI connector.
3. Close the rear cover. Align the cover to the six slots near the ports,
then close the cover carefully. A click indicates that the cover has
been closed successfully.
Quick Start Guide
Quick Start Guide Quick Start Guide
Quick Start Guide Quick Start Guide
33
3
33
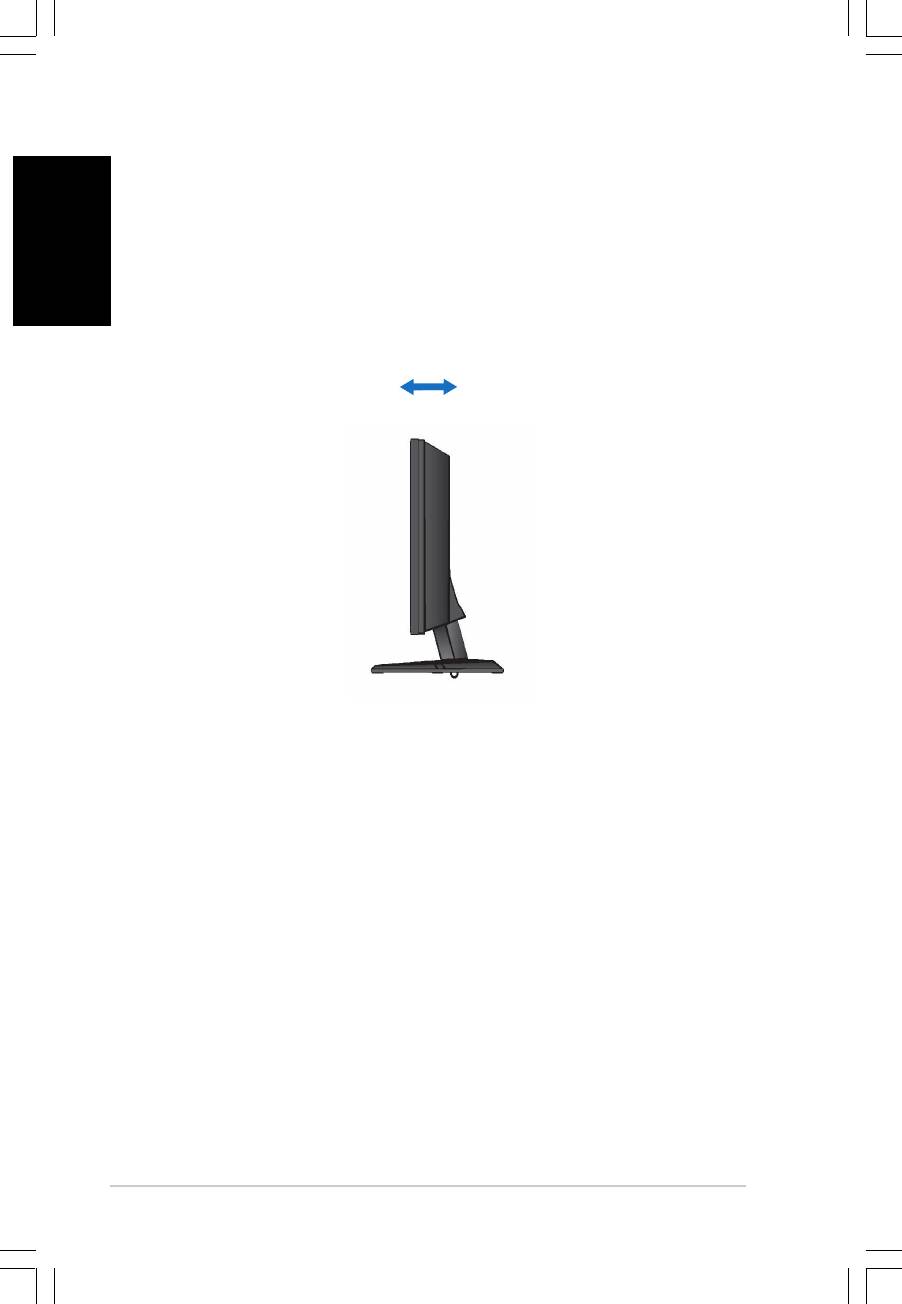
Adjusting the monitor
• For optimal viewing, we recommend that you look at the full face of the
English
monitor, then adjust the monitor to the angle that is most comfortable
for you.
• Hold the stand to prevent the monitor from falling when you change its
angle.
• You can adjust the monitor’s angle from -5º to 20º.
-5º~20º
44
44
4
Quick Start Guide Quick Start Guide
Quick Start Guide Quick Start Guide
Quick Start Guide
Оглавление
- VW192 Series LCD Monitor
- Séries VW192 Moniteur LCD
- VW192-Serie LCD-Monitor
- Monitor LCD Serie VW192
- VW192 Series
- LCD монитор серий VW192
- VW192 Serie Serie LCD-scherm
- VW192
- VW192 シリーズ
- VW192 시리즈
- Série VW192
- VW192 Serisi
- VW192 Series
- VW192 ซีรีส
- VW192 Serie LCD-Monitor
- VW192-sarja LCD-monitori
- VW192 Serie LCD-monitor
- VW192 Serie
- Seria VW192
- Řada VW192


