Asus Xonar DS: инструкция
Раздел: Профоборудование
Тип: Аппарат
Инструкция к Аппарату Asus Xonar DS
E8464
First Edition V1
June 2013
English
Xonar DS
7.1 PCI Audio card
Quick Start Guide
ASUS Xonar DS Quick Start Guide
1

Table of content
English
English ................................................................................................1
Français ................................................................................................6
Deutsch ..............................................................................................10
Italiano ..............................................................................................14
Español ..............................................................................................18
Português ...........................................................................................22
Pyccкий
..............................................................................................26
Hrvatski ..............................................................................................30
2
ASUS Xonar DS Quick Start Guide
1. Package contents
Check your ASUS Xonar DS audio card package for the following items:
• ASUS Xonar DS PCI audio card
• S/PDIF TOSLINK optical adapter x1
• LowProleBracketx1
English
• Support CD
• Quick Start Guide
2. System requirements
To ensure a successful installation of the Xonar DS card, your computer must meet
the following requirements:
• One PCI 2.2 (or higher) compatible slot for the audio card
®
®
• Microsoft
Windows
Vista (32/64bit) / XP (32/64bit) / MCE2005
®
®
®
• Intel
Pentium
4 1.4 GHz or AMD
Athlon 1400 CPU or faster CPU
• 256MB(orabove)DRAMsystemmemory
• 60MBavailableHDDspacefordriverinstallationpackage
• CD-ROMdrive(orDVD-ROMdrive)forsoftwareinstallation
• High-quality headphones, powered analog speakers, or a Dolby Digital or DTS
decoder,toenjoytheultra-highdelitysoundofthecard
3. Hardware introduction
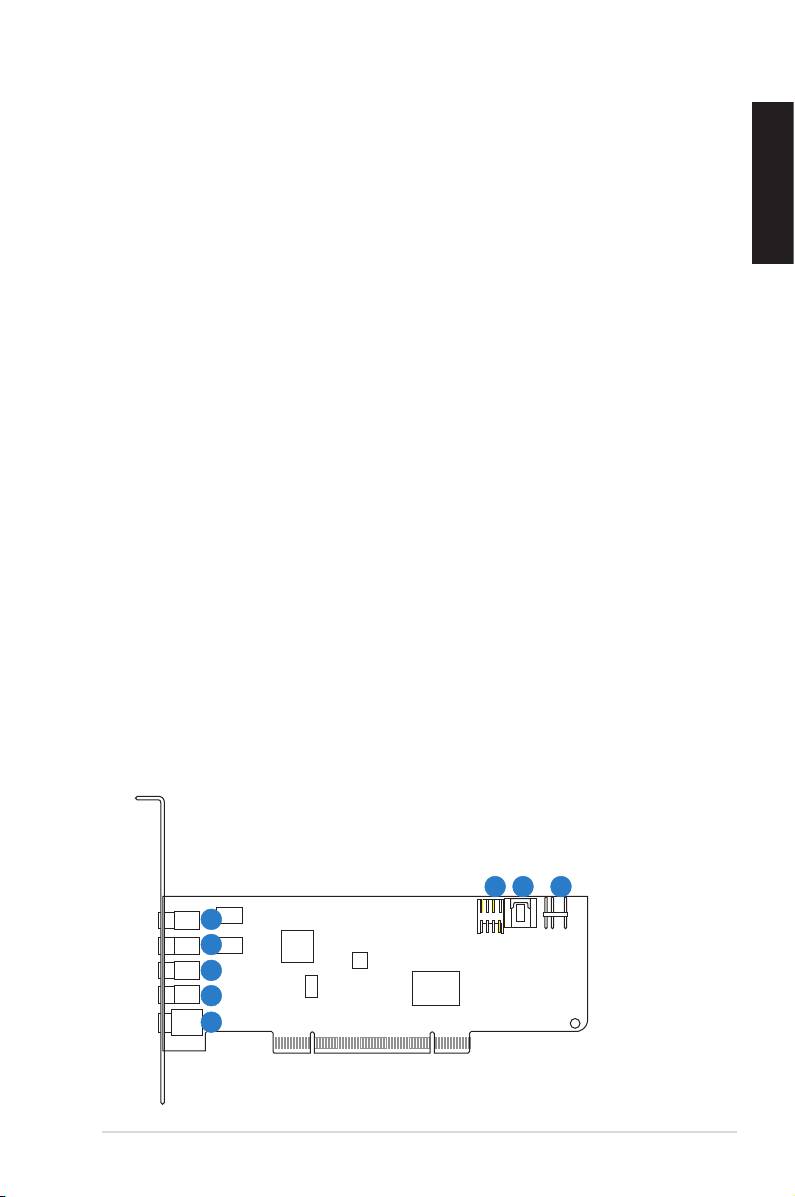
3.1 Xonar DS card layout
6
7 8
1
2
3
4
5
ASUS Xonar DS Quick Start Guide
3
English
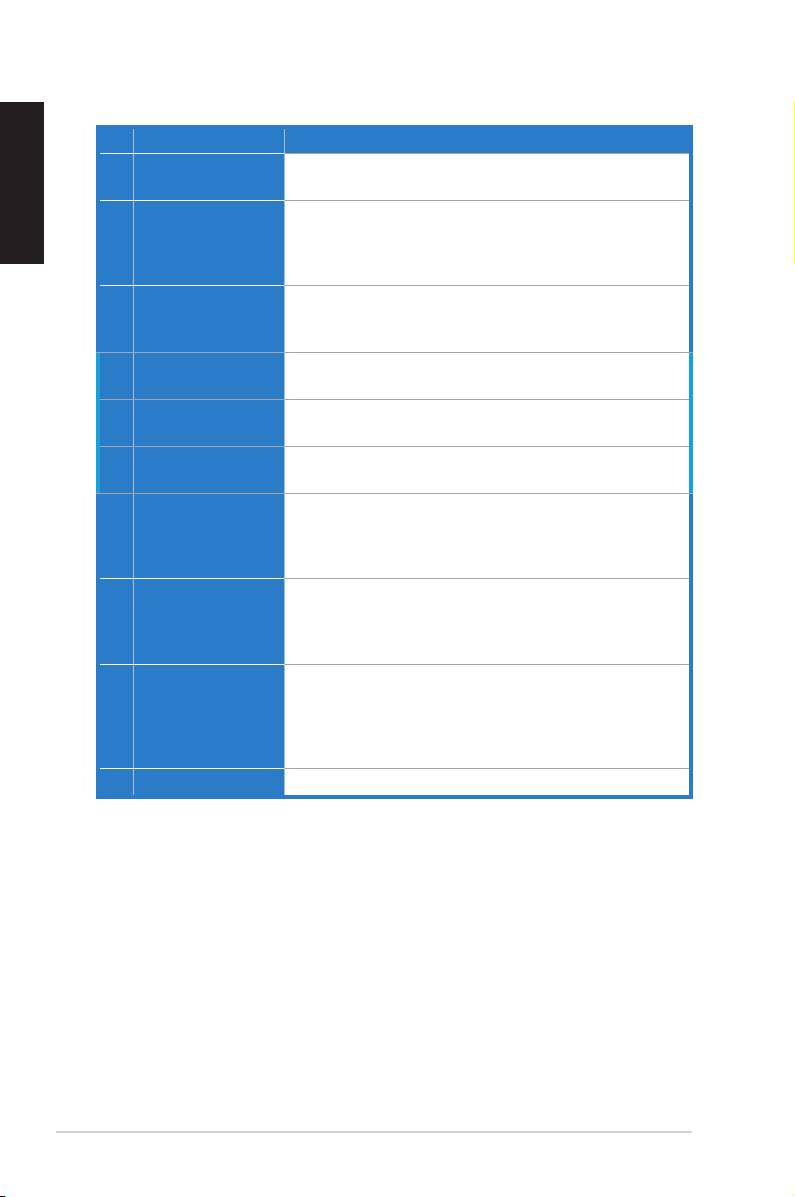
No Item Description
1 Microphone In port
Connect your external PC microphone to this 3.5mm port for
voiceinput.Built-inhigh-qualityMicrophonepre-amplier.
1 Line In port
ConnectanalogdeviceslikeMP3players,CDplayers,
musicsynthesizersandotherline-levelsoundsourcesto
this 3.5mm port for audio recording or processing. (Through
Ultra-highdelity102dBSNRA-Dconverter)
2 Headphone/Front
Connect your headphones or 2/2.1 channel speakers to this
Out port
3.5mm port. For multi-channel speaker systems, connects to
the front left/right input on the powered speakers.
3 Side Surround Out
Connects to the surround channel input on 4/4.1/5.1/6.1/7.1
port
powered analog speakers.
4 Center/Subwoofer
Connects to the center/subwoofer input on 5.1/6.1/7.1
Out port
powered analog speakers.
5 Rear/back Surround
ConnectstotheBackSurroundinputon6.1/7.1powered
Out port
analog speakers.
5 S/PDIF Out port
Optical TOSLINK digital output port. Connects to external
digital decoder or digital speaker systems, Home Theater
systems,AVreceiversforoutputtingdigitalaudioincluding
PCM, DTS Digital, DTS, WMA-Pro, etc.
6 Front panel audio
Intel HDA front-panel compatible and supports HP jack-
header
detection and automatically switch audio output from the
back panel to the front panel.
Supports both front-panel and sound card mic input mixing
7 Aux Input Header
Usually connects to the Analog Audio output of TV tuner card
or other sound source inside your PC system. (To monitor
yourTVtunercard’saudiofromthisAux-In,youmustenable
the “monitor” function for Aux-In in the Xonar DS Audio
Center‘srecordingmixer.)
8 S/PDIF Out header
Connects to the graphics card with HDMI support.
4
ASUS Xonar DS Quick Start Guide
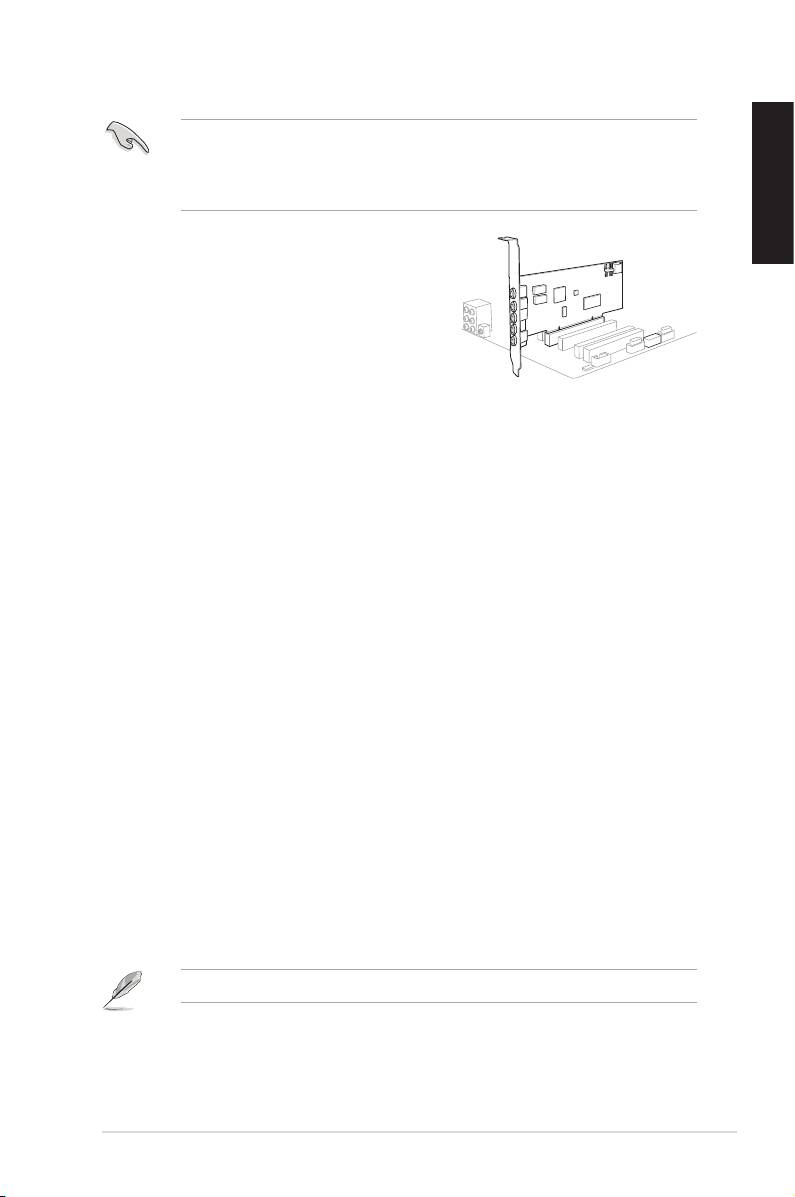
3.2 Card installation
Beforeyouproceedwiththefollowinginstallationsteps,it’srecommendedthat
youdisableyouronboardaudiodeviceinyourBIOSsettings,oruninstallany
otheraudiocardsonyourPC.(ForBIOSsettingoruninstallationofothersound
cards, refer to the user manuals of your motherboard and audio card.)
English
Installing the Xonar DS card
1. Power OFF the computer, the monitor, and
allotherperipheraldevicesconnectedto
your computer.
2. Unplug the computer power cord from your
computer and power outlet.
3. Touch the metal back or side panel of the
computertoavoidstaticelectricity.
4. Removethechassiscover.
5. RemovethemetalbracketfromanavailablePCIslotfortheXonarDSaudio
card.
6. Carefully insert the audio card into the PCI slot. Ensure the audio card sits
properly in place.
7. Secure the audio card with screws and the metal bracket.
8. Putbackthechassiscover.
9. Reconnectallcables.
10. Plug the power cord to the computer and to a power outlet.
11. Power ON the computer.
4. Driver installation
Installing the Xonar DS card driver
®
1. AfteryouhaveinstalledtheXonarDScard,turnonyourcomputer.Windows
automaticallydetectstheaudiocardandsearchesfordevicedrivers.When
promptedforthedrivers,clickCancel.
2. InsertthesupportCDintotheopticaldrive.IfAutorunisenabledinyour
system, the setup starts automatically. If not, run setup.exe from your
support CD.
3. Followtheonscreeninstructionstonishtheinstallation.
TheversionandcontentofthesupportCDaresubjecttochangewithoutnotice.
ASUS Xonar DS Quick Start Guide
5
1
2
- 1
- 2
