Asus ITX-220: 11 System Management
11 System Management: Asus ITX-220
Chapter 11
iPBX30
User Manual
11 System Management
This chapter describes the following administrative tasks that you
can perform using the web-based conguration software:
• Congure available system services
• Modify password and congure system settings
• View system information
• Modify system date and time
• Congure SNMP
• Reset system conguration to factory default settings
• Backup and restore system conguration
• Restart system
• Update rmware
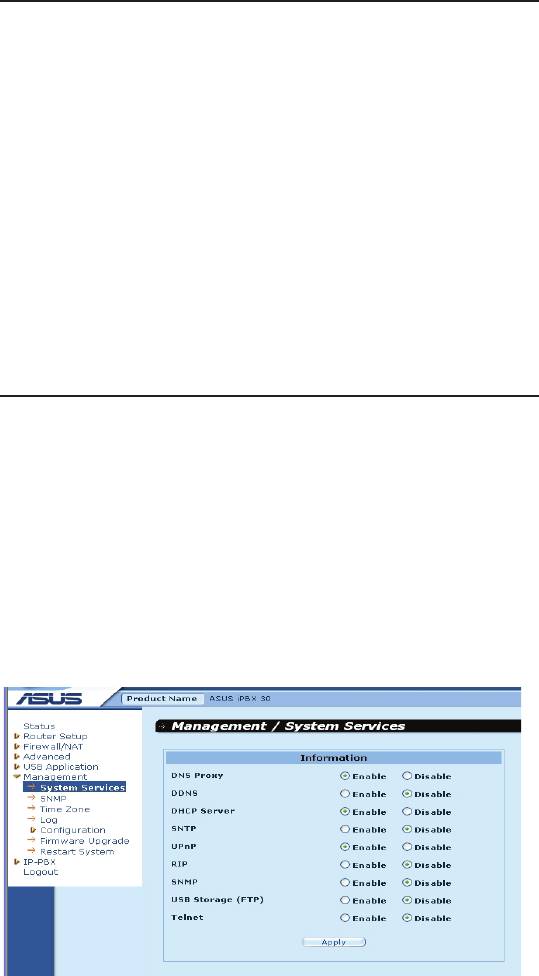
11.1 CongureSystemServices
You can use the System Services configuration page to enable
or disable services supported by the iPBX30. All services, except
DDNS, SNTP, UPnP and RIP, are all enabled in the predefined
configuration. To disable or enable individual service, follow the
steps below:
1. Click
Management ->System
Services menu to open the
System Services conguration page.
2. Click on the corresponding
Enable
or
Disable
radio button to
enable or disable the desired service.
3. Click on
Apply
button to save the changes.
Figure 11.1. System Services Conguration Page
94

iPBX30
User Manual
Chapter 11
11.2 Login Password and System Settings
11.2.1 Changing Password
The first time you log into the configuration software, the default
username and password (admin and admin) are used. For security
reasons, it is advised that you change this password to avoid router
conguration from unauthorized changes.
Note: This username and password is only used for
logging into the configuration software; it is not the
same login password that you use to connect to your
ISP.
Figure 11.2. System Administration Conguration Page
Follow the steps below to change password:
1. Click the
Router Setup ->Administration
menu to open the
System Administration conguration page.
2. Changing login password
a) Type the new password in the New Password text field and
again in the Conrm Password text eld. The password can be
up to 16 characters long. The system distinguishes between
upper and lower case characters.
95

Chapter 11
iPBX30
User Manual
3. Click on
Apply
button to save the new password.
11.2.2 CongureSystemSettings
Follow the steps below to modify the system settings:
1. Click the
Router Setup ->Administration
menu to open the
System Administration conguration page.
2. Clone the MAC address for WAN
a) If you had previously registered a specific MAC address with
your ISP for Internet access, check the
Clone WAN MAC
check
box and enter the registered MAC address here.
3. Allow Administration from WAN: check or uncheck the check box
to enable or disable remote management via WAN port.
4. Allow Ping Interface: This option allows user to control access
to the router using ping via the LAN or WAN ports. Check the
respective check box to enable ping from the respective interface.
5. Click on
Apply
button to save the settings.
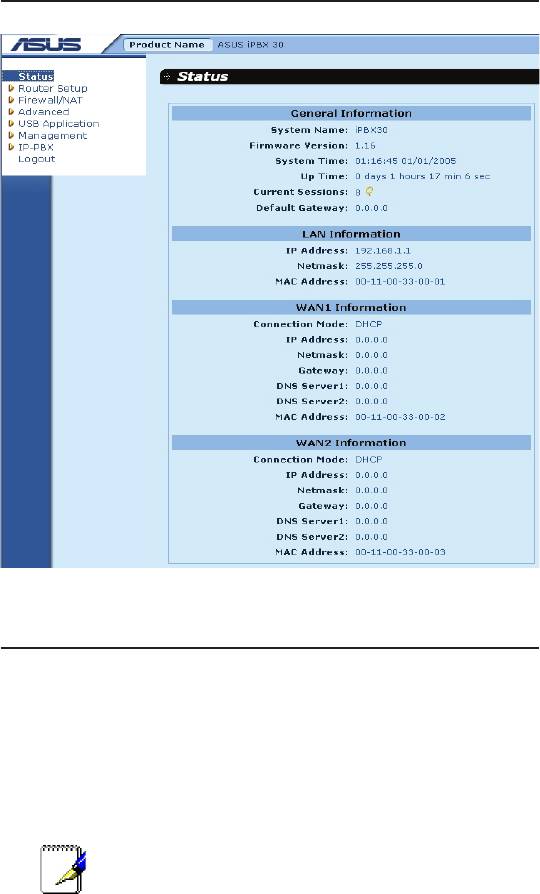
11.3 Viewing System Information
System Information page displays whenever you log into iPBX30.
You may also click on the Status menu to see the system
information. This page shows information of the overall system
settings.
96
iPBX30
User Manual
Chapter 11
Figure 11.3. System Information Page
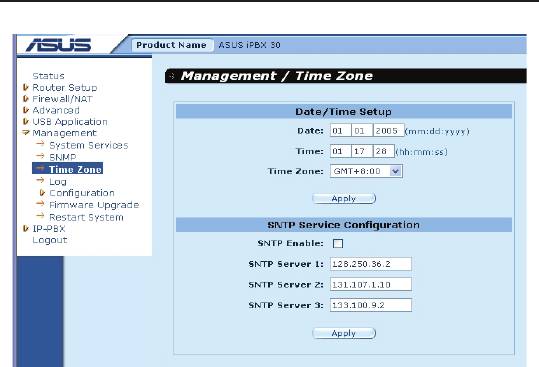
11.4 Setup Date and Time
iPBX30 keeps a record of the current date and time, which it uses
to calculate and report various data. Although there is a real time
clock inside iPBX30; you may also rely on external time servers
to maintain correct time. iPBX30 allows you to configure up to
three external time servers. Make sure that the
Enable
check box
is checked to activate the SNTP (Simple Network Time Protocol)
service for time keeping.
Note: Changing the date and time on iPBX30 does
not affect the date and time on your PCs.
97
Chapter 11
iPBX30
User Manual
Figure 11.4. Time Zone Conguration Page
To manually change the time for the router:
1. Click the
Management ->Time Zone
menu to open the Time
Zone conguration page.
2. Enter the current date and time in the proper elds.
3. Select your time zone from the drop-down list.
4. Click on
Apply
button to save the settings.
The synchronize the time between the real time clock and the
external time servers:
1. Click the
Management ->Time Zone
menu to open the Time
Zone conguration page.
2. Select your time zone from the drop-down list.
3. Check the
Enable
check box to activate the SNTP service.
4. Enter IP addresses for the SNTP servers that will be used to
update the system time.
5. Click on
Apply
button to save the settings.
11.4.1 View the System Date and Time
To view the updated system date and time, log into the conguration
software, click the
Management ->Time Zone
menu.
98

iPBX30
User Manual
Chapter 11
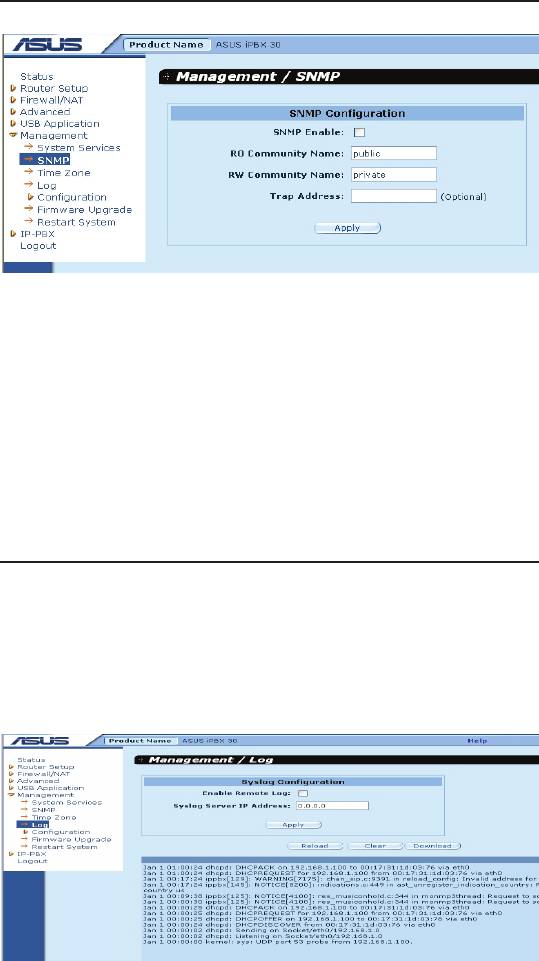
11.5 SNMP Setup
SNMP (Simple Network Management Protocol) as its name
suggests is used for network management. You may use the SNMP
conguration page to enable or disable the SNMP support.
11.5.1 SNMPCongurationParameters
The table below describes the conguration parameters available
for SNMP setup.
Table 11.1. SNMP Conguration Parameters
Field Description
SNMP Enable Check this box to enable the SNMP support; otherwise,
uncheck this box.
R O C o m m u n i t y
Community string is a clear text string that is used as
Name
password between the SNMP management station
and the Internet Security Router. This “Read Only”
community name is used by the SNMP management
station to read the settings in the Internet Security
Router.
R W C o m m u n i t y
Community string is a clear text string that is used
Name
as password between the SNMP management
station and the Internet Security Router. This “Read
and Write” community name is used by the SNMP
management station to read and configure the
settings in the Internet Security Router.
Trap Address Trap message is sent by the Internet Security Router
to tell the SNMP management station that something
has happened on the Internet Security Router. This
field is used to enter the IP address of the SNMP
management station that is supposed to receive trap
messages from the Internet Security Router.
11.5.2 ConguringSNMP
1. Click the
Management ->SNMP
menu to open the SNMP
conguration page.
99
Chapter 11
iPBX30
User Manual
Figure 11.5. SNMP Conguration Page
2. Check the
SNMP Enable
box to enable the SNMP support;
otherwise, uncheck the box.
3. Enter
RO
(read only) and
R/W
(read and write) community
names.
4. Enter the IP address of the SNMP management station that
receives trap messages from the iPBX30.
5. Click on
Apply
button to save the settings.
11.6 Log Setup
Log messages are stored in dynamic memory and will disappear
after system is rebooted. To keep a copy of the log messages,
you can setup a syslog server and have iPBX30 send out the log
messages to the server.
11.6.1 Setting Up Remote Logging Using a Syslog Server
Figure 11.6. Syslog Server Conguration
100
iPBX30
User Manual
Chapter 11
1. Cli ck t he
Ma nagement - >Lo g
menu to open the L og
conguration page.
2. Click
Enable Remote Log
check box to enable remote logging.
3. Enter the syslog server IP address in the
Syslog Server IP
Address
eld.
4. Click on
Apply
button to save the settings.
11.6.2 View the System Log
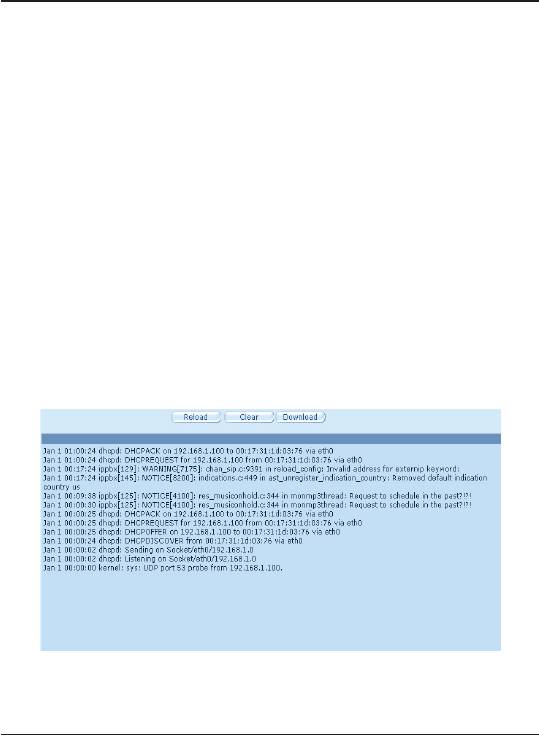
You may open the firewall log page by clicking
Firewall/NAT
->Log
menu to see any logged. You may click on the
Reload
button at the bottom of the Log configuration page to see the
updated log messages. To clear the log messages, just click on
the
Clear Log
button.
Figure 11.7 Sample Log
11.7 CongurationManagement
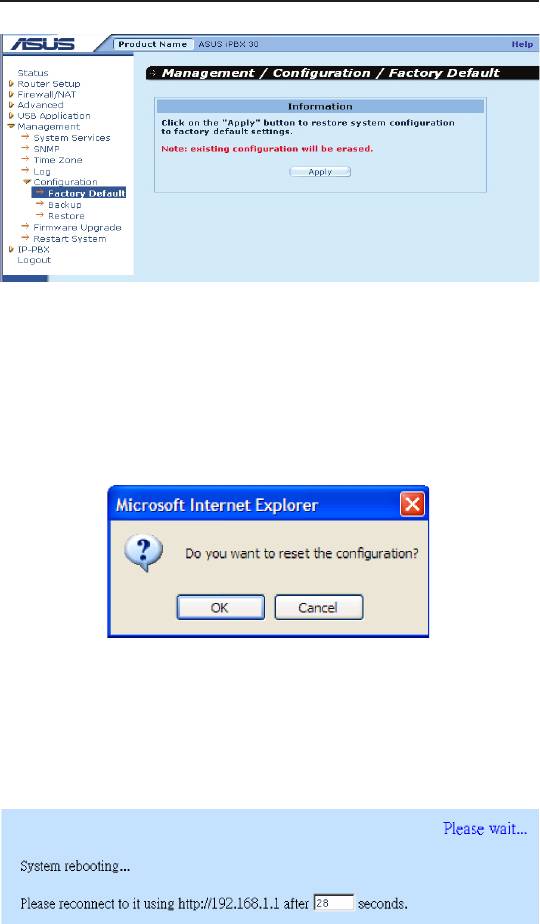
11.7.1 RestoreSystemCongurationtoFactory
Default Settings
At times, you may want to restore system configuration to the
factory default settings to eliminate problems resulted from incorrect
system conguration. Follow the steps below to reset the system
conguration:
1. To open the Factory Default conguration page, click the
Man-
agement ->Conguration ->Factory Default
menu.
101
Chapter 11
iPBX30
User Manual
Figure 11.8 Factory Reset Page
2. Click on
Apply
button to restore the system conguration to the
factory default settings.
3. A dialog window will pop up to ask for conrmation. Click on the
OK
button to proceed; otherwise, click on the
Cancel
button to
cancel the action.
Figure 11.9 Factory Reset Conrmation
4. iPBX30 will then reboot thereafter to make the factory default
conguration in effect. A count-down timer displays to indicate
when the reboot process will be completed.
Figure 11.10 Factory Reset Count Down Timer
102
iPBX30
User Manual
Chapter 11
Sometimes, you may find that you have no way to access the
iPBX30, e.g. you forget your password or the IP address of
iPBX30. The only way out in this scenario is to reset the system
conguration to the factory default by pressing the reset button for
at least 5 seconds. The system conguration will be reverted back
to the factory default settings after iPBX30 is rebooted.
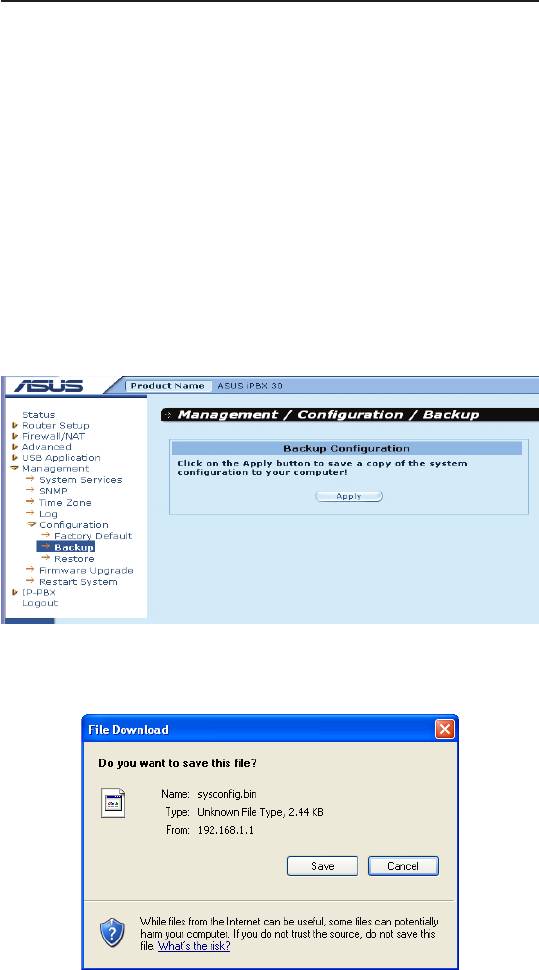
11.7.2 BackupSystemConguration
Follow the steps below to backup system conguration:
1. Click the
Management ->Configuration ->Backup
menu to
open the Conguration Backup page.
2. Click on
Apply
button to backup the system conguration.
Figure 11.11 Backup System Conguration Page
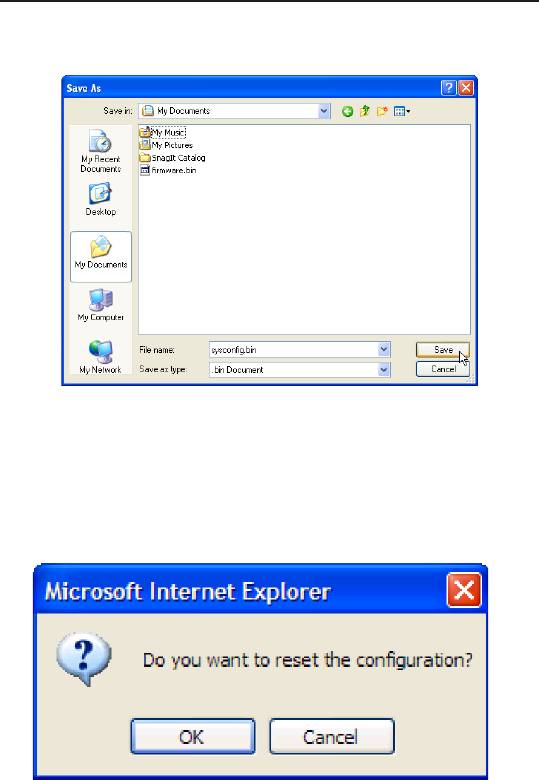
3. Click on
Save
button to backup the system conguration.
103
Chapter 11
iPBX30
User Manual
4. Click on button to backup the system conguration.
11.7.3 RestoreSystemConguration
Follow the steps below to backup system conguration:
1. Click the
Management ->Configuration ->Restore
menu to
open the System Conguration Restore page.
Figure 11.12 Restore System Conguration Page
2. Enter the path and name of the system conguration le that you
want to restore in the
Conguration File
text box. Alternatively,
you may click on the
Browse
button to search for the system
configuration file on your hard drive. A window will pop up for
you to select the conguration le to restore.
104

iPBX30
User Manual
Chapter 11
Figure 11.13 Selecting System Conguration from the File Manager
3. Click on
Apply
button to restore the system configuration. A
dialog window, such as the one below, will pop up to ask for
confirmation for restoring the system configuration. Click the
OK
button to proceed; otherwise, click the
Cance
l button to
cancel the action. The iPBX30 will reboot for the new system
conguration to take effect.
Figure 11.14 System Conguration Restoration Conrmation
4. A system reboot count down timer will display. You’ll be
reconnected back to iPBX30 when the counter returns to zero.
You may need to manually connect back to the iPBX30 if you
are not connected back to iPBX30 automatically.
105
Chapter 11
iPBX30
User Manual
Figure 11.15 System Reboot Counter Timer
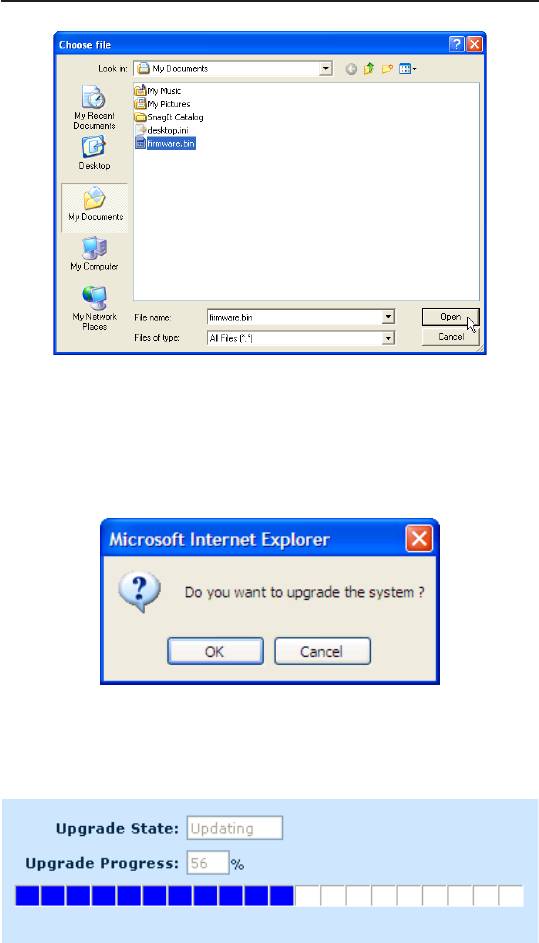
11.8 Firmware Upgrade
ASUSTeK may from time to time provide you with an update to the
rmware running on the iPBX30. All system software is contained
in a single le, called an image. Web UI Management provides an
easy way to upload the new rmware image. To upgrade the image,
follow this procedure:
1. Click the
System ->Firmware Upgrade
menu to open the
Firmware Upgrade page.
Figure 11.16 Firmware Upgrade Page
2. In the Select Firmware text box, enter the path and name of
the rmware image le. Alternatively, you may click on
Browse
button to open a le manager to search for the rmware image
on your computer.
106
iPBX30
User Manual
Chapter 11
Figure 11.17 Selecting Firmware from the File Manager
3. Click on
Apply
button to update the rmware. A dialog window,
such as the one below, will pop up to ask for conrmation of the
firmware upgrade. Click the OK button to proceed; otherwise,
click the Cancel button to cancel the action.
Figure 11.18 Firmware Upgrade Conrmation
4. Firmware upgrade status and progress will be shown.
Figure 11.19 Firmware Upgrade Progress
107
Chapter 11
iPBX30
User Manual
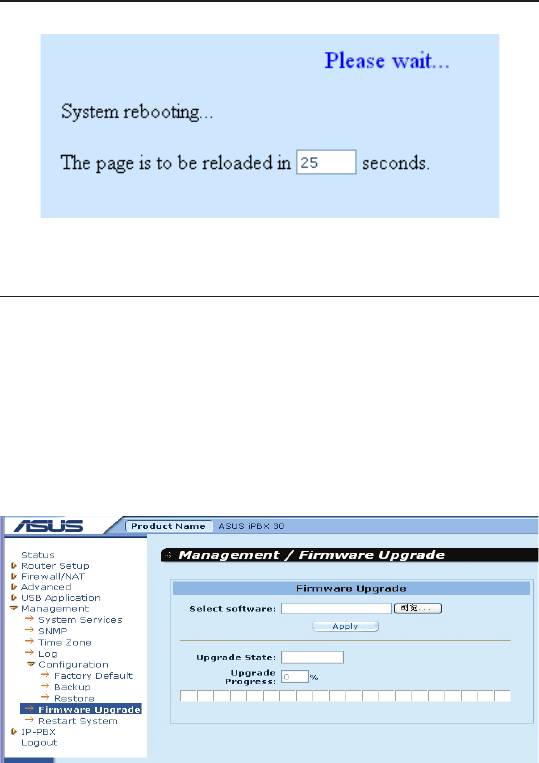
5. A count down timer will display after the firmware upgrade is
completed. You’ll be reconnected back to iPBX30 when the
counter returns to zero. You may need to manually connect
back to the iPBX30 if you are not connected back to iPBX30
automatically.
Figure 11.20 System Reboot Count Down Timer for Firmware
Upgrade
6. When you are reconnected to the iPBX30, click
Status
menu to
check if the new rmware is properly upgraded. You probably
need to clear the cache of your web browser to see the new
System Information page. Following is the procedure to clear
the browser cache for Microsoft Internet Explorer:
a) Click on
Tools
menu.
b) Click on
Internet Options
menu.
c) Click on
Delete Files
button to clear the browser cache.
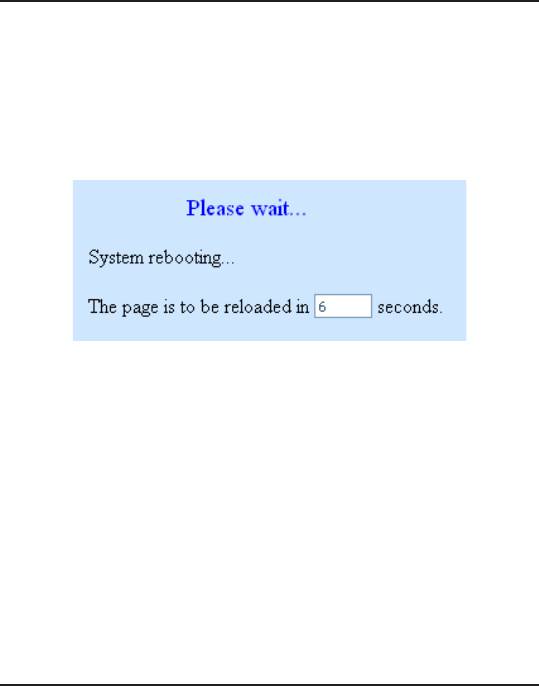
11.9 Restart System
1. Click the
Management ->Restart System
menu to open the
Restart System page.
2. Click on the
Apply
button to restart the system.
108
iPBX30
User Manual
Chapter 11
Figure 11.21 Restart System Page
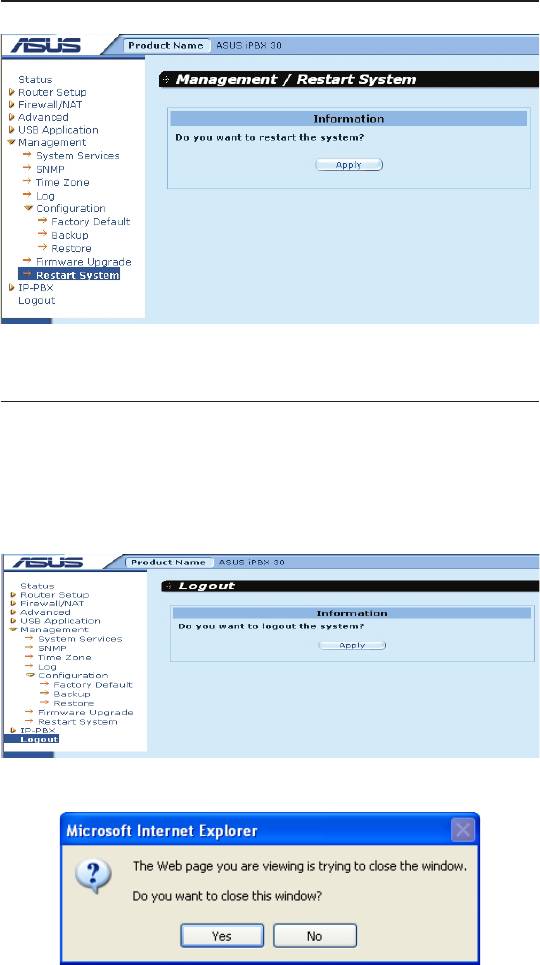
11.10 Logout from the Web UI Management
To logout of the conguration software, open the Logout page by
clicking the Logout menu and click on the
Apply
button. If you are
using IE as your browser, a window will prompt for confirmation
before closing your browser.
Figure 11.22 Logout Page
Figure 11.23 Conrmation for Closing Browser (IE)
109
Оглавление
- List of Figures
- List of Tables
- Chapter 1 Introduction
- Chapter 2 Getting to Know your iPBX30
- 3 Quick Start Guide
- 4 Using the Web UI Management
- 5 Router Setup
- 6 DHCPServerConguration
- 7 Routing
- 8 ConguringDDNS
- 9 ConguringFirewallandNAT
- 10 USB Application
- 11 System Management
- 12 SIP IP-PBX
- 13 IP Addresses, Network Masks, and Subnets
- 14 Troubleshooting
- 15 Index
