Asus ITX-220: 4 Using the Web UI Management
4 Using the Web UI Management: Asus ITX-220

iPBX30 User Manual
chapter 4
4 Using the Web UI Management
The iPBX30 includes the
Web UI Management
, a preinstalled
Web-based conguration software. It enables you to congure the
device settings to meet the needs of your network. You can access
it through your web browser from any PC connected to the iPBX30
via the LAN or the WAN ports.
This chapter describes the general guides in using the Web UI
Management.
4.1 Log into the Web UI Management
To access the software, you need the following:
• A computer connected to the LAN or WAN port on the iPBX30
as described in the chapter 3.
• A web browser installed on the computer. The program is
designed to work best with Microsoft Internet Explorer® 6.0 or
later.
You may access the software from any computer connected to
the iPBX30 via the LAN or WAN ports. However, the instructions
provided here are for computers connected via the LAN ports.
1. From a LAN computer, open your web browser, type the
following in the web address (or location) box, and press
<
Enter
>:
http://192.168.1.1
This is the predened IP address for the LAN port on the iPBX30.
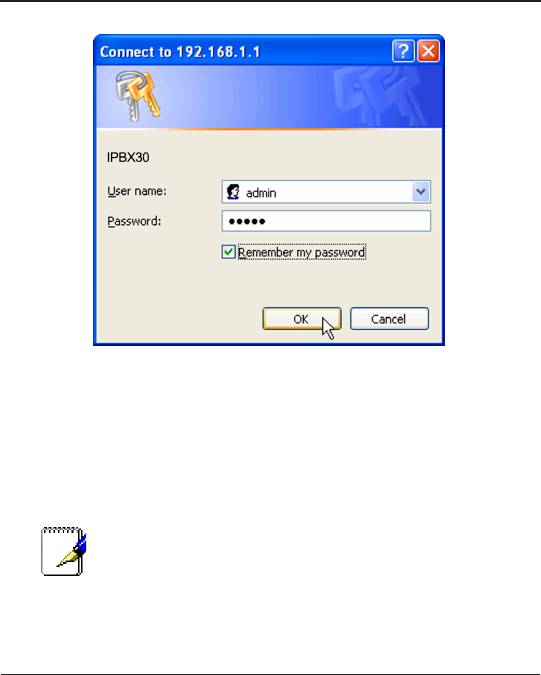
A login screen is shown.
23
chapter 4
iPBX30 User Manual
Figure 4.1 Login Screen
2. Enter your username and password, and then click
OK
.
The rst time you log into the program, use these defaults:
Default Username: admin
Default Password: admin
Note: You can change the password at any time (see
section 11.2).
The System Information page appears every time you log into the
software (shown in Figure 3.3).
4.2 Functional Layout
A typical page in the software consists of several elements –
banner, menu, menu navigation tips, configuration, and on-line
help. You can click on any menu item to expand/contract any menu
groups or to access a specic conguration page. The conguration
pane is where you interact with the software to configure the
settings for iPBX30. Menu navigation tips show how the current
conguration can be accessed via the menus.
24
iPBX30 User Manual
chapter 4
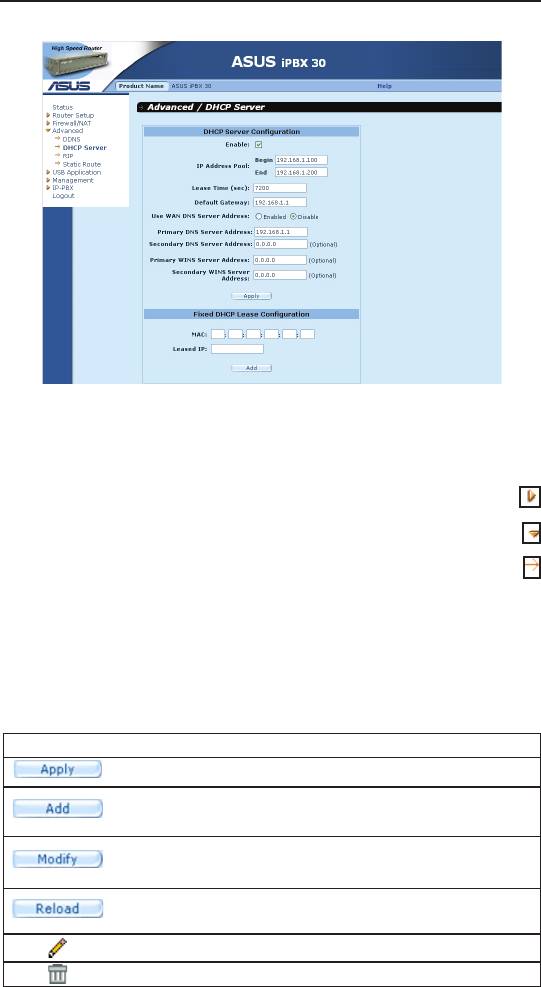
Figure 4.2 Typical Web UI Management Page
4.2.1 Menu Navigation
• To expand a group of related menus, double click the menu or the icon:
• To contract a group of related menus, double click the menu or the icon:
• To open a specic conguration page, double click the menu or the icon:
4.2.2 Commonly Used Buttons and Icons
The following buttons or icons are used throughout the application.
The following table describes the function for each button or icon.
Table 4.1 Description of Commonly Used Bottons and Icons
Button Function
Stores any changes you have made on the current page.
Adds the existing conguration to the system, e.g. a
static route or a rewall ACL rule and etc.
Modies the existing conguration in the system, e.g.
a static route or a rewall ACL rule and etc.
Redisplays the current page with updated statistics
or settings.
Selects the item for editing.
Deletes the selected item.
25
chapter 4
iPBX30 User Manual
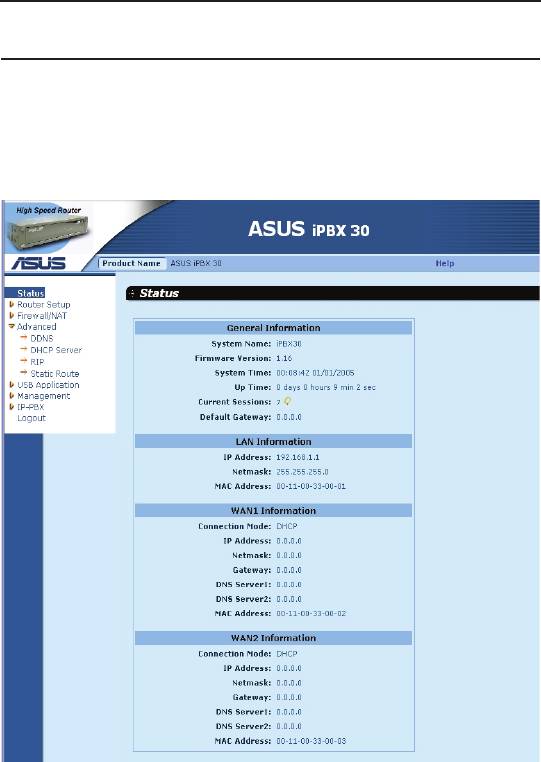
4.3 SystemCongurationOverview
To view the overall system conguration, log into the iPBX30 Web,
or click the Status menu if you have already logged on. The gure
below shows sample information available in the System Status
page.
Figure 4.3 System Status Page
26
Оглавление
- List of Figures
- List of Tables
- Chapter 1 Introduction
- Chapter 2 Getting to Know your iPBX30
- 3 Quick Start Guide
- 4 Using the Web UI Management
- 5 Router Setup
- 6 DHCPServerConguration
- 7 Routing
- 8 ConguringDDNS
- 9 ConguringFirewallandNAT
- 10 USB Application
- 11 System Management
- 12 SIP IP-PBX
- 13 IP Addresses, Network Masks, and Subnets
- 14 Troubleshooting
- 15 Index
