Pioneer AVD-W7900: Removing the display unit Resetting the microprocessor
Removing the display unit Resetting the microprocessor: Pioneer AVD-W7900
Table of contents
- IMPORTANT SAFEGUARDS
- Precautions
- Before You Start About this unit
- For viewing LCD comfortably Changing the wide screen size Installing the display unit Changing the picture adjustment Installing and removing the display unit
- Removing the display unit Resetting the microprocessor
- Basic Operations Power ON/OFF Turning the unit off Display unit Selecting a source Changing the wide screen mode Operating this unit
- Switching the dimmer setting Setup
- Selecting the video format
- Connection and installation Connections
- Connection Diagram
- Installation Mounting with flush mounting bracket
- Additional Information Using the display correctly Liquid crystal display (LCD) screen Handling the display Keeping the display in good condition
- Small fluorescent tube
- Specifications
Section
Before You Start
02
English
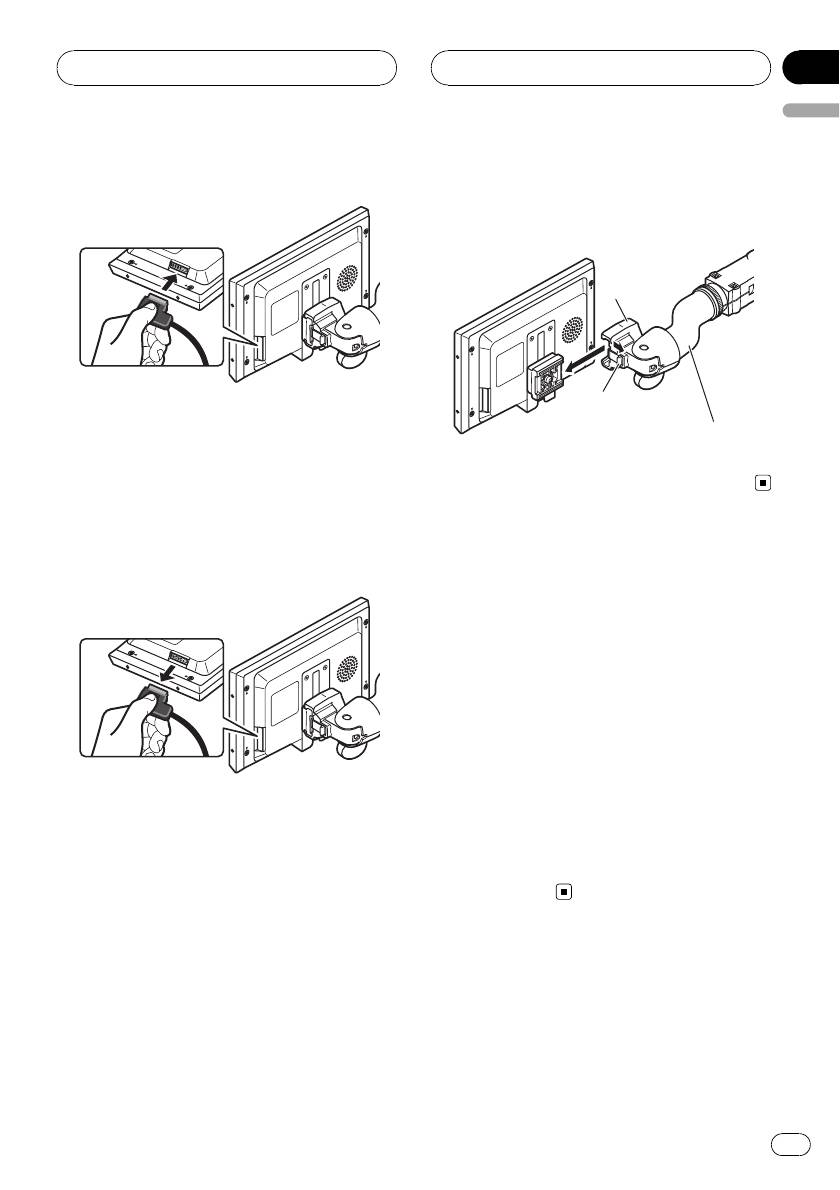
3 Connect the cable to the display unit.
2 Unlock the lock release lever, then slide
the display unit and detach it from the
base.
Base
Lock release lever
Mounting arm
(sold separately)
Removing the display unit
To deter theft of the display unit, remove the
display unit when leaving the vehicle.
1 Hold down the release section and un-
plug the connector.
Resetting the microprocessor
You can reset the microprocessor to its initial
settings.
The microprocessor must be reset under the
following conditions:
! Prior to using this unit for the first time
after installation
! If the unit fails to operate properly
! When strange or incorrect messages ap-
pear on the display
1 Press SOURCE/POWER and hold until
the unit turns off.
2 Hold down SOURCE/POWER and d
simultaneously.
7
En


