Pioneer AVD-W7900: Connection Diagram
Connection Diagram: Pioneer AVD-W7900
Table of contents
- IMPORTANT SAFEGUARDS
- Precautions
- Before You Start About this unit
- For viewing LCD comfortably Changing the wide screen size Installing the display unit Changing the picture adjustment Installing and removing the display unit
- Removing the display unit Resetting the microprocessor
- Basic Operations Power ON/OFF Turning the unit off Display unit Selecting a source Changing the wide screen mode Operating this unit
- Switching the dimmer setting Setup
- Selecting the video format
- Connection and installation Connections
- Connection Diagram
- Installation Mounting with flush mounting bracket
- Additional Information Using the display correctly Liquid crystal display (LCD) screen Handling the display Keeping the display in good condition
- Small fluorescent tube
- Specifications
Section
04
Connection and
installation
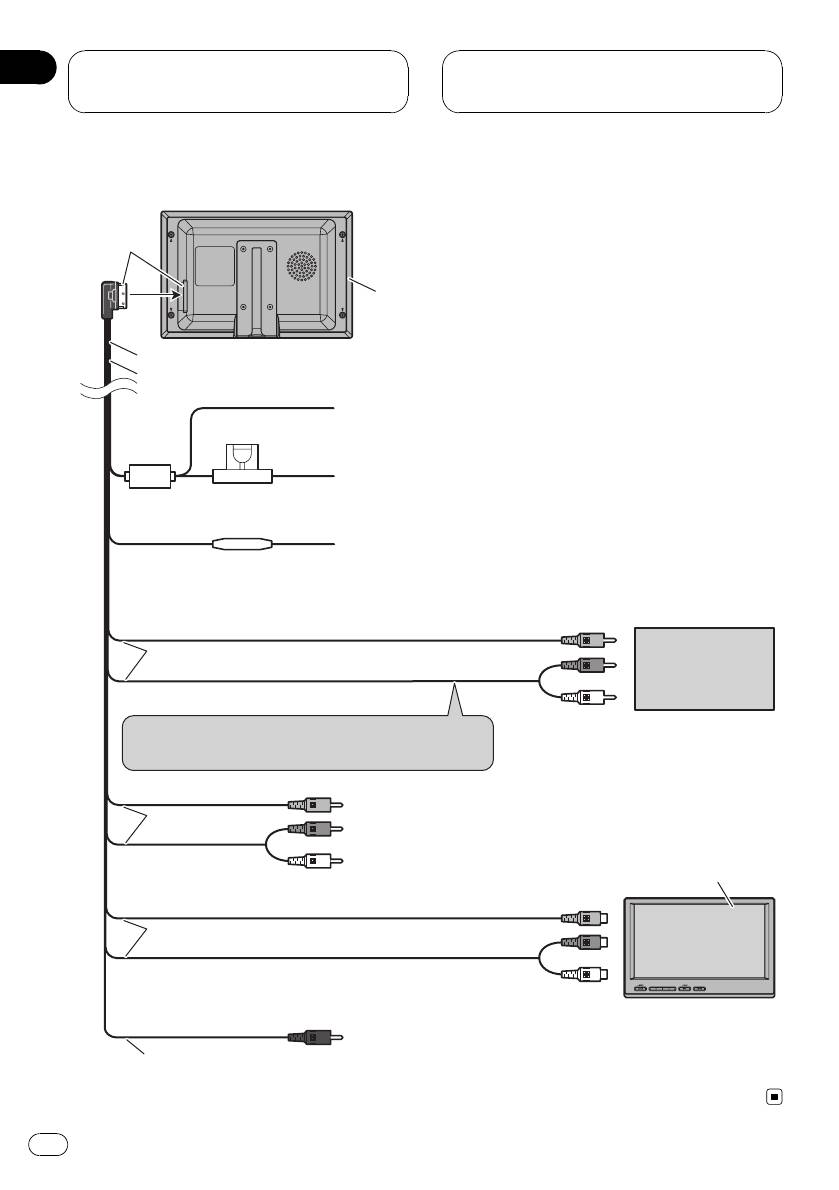
Connection Diagram
Black
Display unit
4 m
Power cable
Black (chassis ground)
Connect to a clean, paint-free metal location.
Fuse (4 A)
Yellow
Connect to the constant 12 V supply terminal.
Fuse resistor
Red
Connect to terminal controlled by ignition switch (12 V DC).
Connect to video output
Video 1 input (VIDEO 1 INPUT)
3 m
External video
component
(sold separately)
Audio 1 input (AUDIO 1 INPUT)
Connect to audio outputs
Connect to the terminal which is not interlocked to
the volume adjustment.
Video 2 input (VIDEO 2 INPUT)
3 m
Audio 2 input (AUDIO 2 INPUT)
AVD-W7900
(sold separately)
Connect to video 1 input
Video output (VIDEO OUTPUT)
3 m
Audio output (AUDIO OUTPUT)
Connect to audio 1 input
Remote control signal output (REMOTE CONTROLLER
3 m
SIGNAL OUTPUT): Not used.
12
En


