Pioneer PD-D6MK2-K: Connecting up 02 Plugging in
Connecting up 02 Plugging in: Pioneer PD-D6MK2-K
Table of contents
- IMPORTANT
- POWER-CORD CAUTION
- Contents
- Chapter 1 Before you start Features
- What’s in the box Inserting the battery
- Disc/content format playback compatibility About WMA Disc compatibility table Media Compatible formats About DualDisc playback
- Chapter 2 Connecting up Connecting to an amplifier Using the remote sensor of another Pioneer component
- Connecting up 02 Plugging in
- Chapter 3 Controls and displays Front panel Display
- Remote control
- Chapter 4 Getting started Switching on Playing discs Button What it does
- Other playback features Button What it does
- Chapter 5 Other settings and features Listening to Pure Audio Using Legato Link Pro Using the SACD/CD
- Chapter 6 Additional information Hints on installation Taking care of your player and discs
- Cleaning the pickup lens Cleaning discs Condensation Moving the player Cleaning the unit’s exterior Caution for when the unit is installed in a rack with a glass door
- Troubleshooting
- Glossary Specifications
- Accessories
Connecting up 02
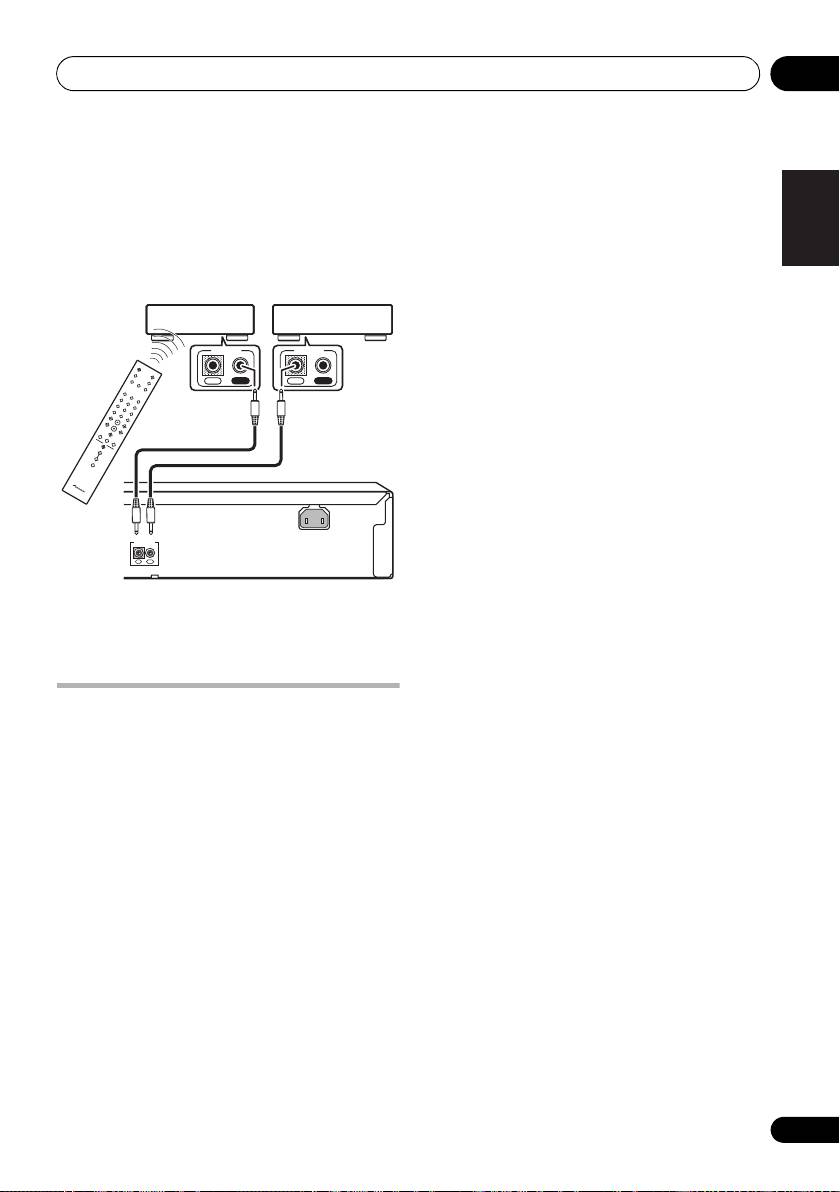
2 Connect the
CONTROL OUT
jack of that
English
component to the
CONTROL IN
jack of
another Pioneer component.
Use a cable with a mono mini-plug on each
end for the connection.
Deutsch Italiano EspañolFrançais
Nederlands
3 Continue the chain in the same way for as
many components as you have.
Plugging in
Make sure to complete all connections before
connecting to an AC outlet.
• Connect the AC power cord to the AC IN
inlet on the rear panel of the player, then
plug into a power outlet.
9
En
AC IN
CONTROL
IN
OUT
Pioneer componentPioneer component
CONTROL
CONTROL
IN OUT
IN
OUT
This player
PD-D6MK2_en_SYXJ5.book 9 ページ 2009年4月15日 水曜日 午後5時23分
Top 10 manuals
100.00
NZXT HALE90 1000W99.99
Samsung SM-R38099.97
AEG BSB 18C99.97
Dell 2700W99.97
Smeg KSEC70X99.96
Beurer HDE 4099.96
Pyramida KH 50 v.299.96
MSI CSM-H81M-P3299.96
AEG HR 562799.95
Melissa 640-048